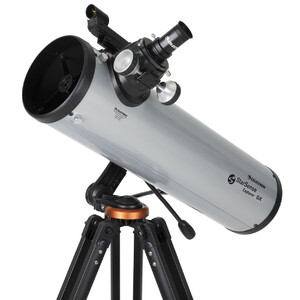
By Alexander Merz · Published on · Details checked on 14 September 2026
Celestron’s StarSense Explorer series solves the biggest beginner problem of all: “where do I point?” The smartphone docks onto the telescope, the app recognises the star field through the camera and guides you to every object with arrows — no motors, no power, no learning curve. We took a detailed look at the series: technology, models, strengths, weaknesses and which StarSense Explorer is worth it for whom.
Transparency: this review is based on manufacturer data, verified buyer experiences and tests from the specialist press, put into context with our advisory experience — not our own lab test.
Quick verdict
The StarSense Explorer DX 130 AZ ($449.95€ 599) is the best “Push-To” beginner package of 2026: 130 mm Newtonian optics plus brilliant smartphone navigation — finding objects with no prior knowledge, full optical performance, none of the battery hassle of GoTo. Review sites regularly crown it the best all-round package for beginners.
See the StarSense DX 130 at the retailerSee the StarSense DX 130 at the retailerHow does StarSense work?
Your smartphone clips into a mount with a mirror and photographs the sky. The app matches the star field against its database (plate solving — the same technique used in professional observatories and smart telescopes) and therefore knows exactly where the tube is pointing. You pick an object, follow the arrows, and when the circle turns green, Jupiter is in the eyepiece. The clever part: unlike a smart telescope, you look through the eyepiece yourself — a real photon experience, merely guided by the app.
Worth knowing: the app works completely offline — at a dark observing site you need no internet. Position finding takes only seconds and, because no motors are involved, there is no alignment ritual as on GoTo telescopes: set up, dock the phone, briefly calibrate on the sky, and off you go. Specialist testers consistently describe the setup as “clever and uncomplicated” — the plate solving working fast and accurately.
The series at a glance
| Model | Optics | Price approx. | For whom |
|---|---|---|---|
| LT 70/700 AZ | Refractor 70 mm | € 199 | a first taste, Moon and bright planets |
| LT 114/1000 AZ | Newtonian 114 mm | € 259 | more aperture, deep-sky capable |
| DX 130/650 AZDX 130/650 AZ ⭐ | Newtonian 130 mm | $449.95€ 599 | our pick: best optics in the series, stable mount |
| DX 102/660 AZ | Refractor 102 mm | € 529 | maintenance-free alternative to the DX 130 |
Prices are guide prices; the current price and availability are always shown on the Astroshop product page.
The rule of thumb within the series: the app is identical on every model — you pay for optics and mount. The LT 70 (€ 199) is the cheapest entry point but shows only the Moon, planets and the brightest deep-sky objects. The LT 114 (€ 259) already gathers considerably more light. The concept really comes together with the DX 130 ($449.95€ 599): a 130 mm Newtonian with decent optics and the most stable mount in the series. The DX 102 (€ 529) is the maintenance-free refractor alternative for anyone who never wants to collimate.
Assembly and first night: how the start goes
Assembly is done in 15 to 20 minutes: set up the tripod, fit the tube, adjust the smartphone dock — no tools needed. You then install the free StarSense app (iOS/Android) and unlock it with the activation code supplied with the telescope. A tip from many user reports: set up the mirror holder and phone centring once, calmly, in daylight, and the first night will be stress-free.
Once outside, you calibrate the app on any bright object — after that it guides you with arrows and a target circle. Users report that the navigation works reliably even under a brightened suburban sky, because the app only needs a few visible stars. After two or three evenings the routine sticks, and you jump from object to object in minutes — a pace that star-hopping beginners otherwise take months to master.
Optical performance: what users and the press report
A reminder: StarSense is only the navigation — you observe through perfectly ordinary optics. And they hold up well, according to the specialist press: testers credit the DX 130 with “crisp, clear images”; the 130 mm Newtonian shows Jupiter’s cloud bands along with its four Galilean moons, Saturn’s rings and, on the Moon, a wealth of craters and rilles. Under a dark sky the bright deep-sky classics join in: the Orion Nebula M42, the Hercules Cluster M13, the Andromeda Galaxy M31 as an elongated glow.
With the small LT 70 you have to adjust your expectations: the Moon and bright planets delight, deep-sky remains a hint. The Newtonian models (LT 114, DX 130) have a clear advantage here — more aperture means more light. Want some perspective? What each aperture generally shows is explained in our telescope buying guide.
The honest weak points
No review without criticism — and on the StarSense series, users and press agree on where it lies: the mount and eyepieces. The alt-azimuth mounts of the LT models wobble at high magnifications and when focusing; the DX mount is noticeably more stable, but no rock either. The supplied eyepieces (typically 25 mm and 10 mm) are solid starters, but deliver only low to medium magnifications — an additional planetary eyepiece is the most sensible first upgrade (tips in the eyepiece guide).
There is also no motorised tracking at all: at high magnification the object drifts out of the field after about a minute and you nudge it back by hand. For visual observing that is routine; for deep-sky imaging it is a deal-breaker. A few buyers also report problems with invalid app activation codes — more on that below.
Strengths and weaknesses
- ✅ Finding objects with no prior knowledge — the No. 1 frustration is solved
- ✅ No power, no motors — set up and go, nothing can run flat
- ✅ Full visual performance: the 130 mm Newtonian shows Saturn’s rings, Jupiter’s bands, bright deep-sky objects
- ✅ Learning effect: you move the telescope yourself and learn the sky along the way
- ❌ Premium for the technology: a classic 130 mm Dobsonian costs half as much — you pay for the navigation
- ❌ Smartphone-bound: no guidance without a phone (classic star-hopping still works, of course)
- ❌ Mount and eyepieces: wobble at high magnifications; an eyepiece upgrade is worthwhile
- ❌ No tracking: unsuitable for astrophotography — for that there are smart telescopes
StarSense vs Dobsonian vs GoTo vs smart telescope
Maximum optics for the money: Dobsonian (200 mm for $699.95€ 479). Guided visual observing: StarSense DX 130 ($449.95€ 599). Automatic astrophotos: Seestar S30 Pro / DWARF 3 ($549.00€ 529–$699.00€ 699). All three routes are mature in 2026 — it comes down solely to whether you want to look yourself, look with guidance, or take pictures. Overview: telescope for beginners.
And GoTo? Motorised mounts drive to objects automatically and track them — but you need power, a clean alignment, and for the same budget you pay with considerably less aperture. This is exactly where StarSense’s Push-To approach is so clever: it takes the finding off your hands but leaves the budget in the optics. Our decision matrix:
| You want to… | Best solution | Budget example |
|---|---|---|
| see as much as possible for the money | Dobsonian 200/1200Dobsonian 200/1200 | $699.95€ 479 |
| find objects with no prior knowledge, look yourself | StarSense Explorer DX 130StarSense Explorer DX 130 | $449.95€ 599 |
| comfort with tracking (e.g. sketching, groups) | GoTo telescope | from approx. €500, less aperture |
| colour deep-sky images on your phone | smart telescope (DWARF 3DWARF 3 / Seestar S30 ProSeestar S30 Pro) | $549.00€ 529–$699.00€ 699 |
App activation code and buying used: what you need to know
A detail almost no review mentions: the StarSense app is free but is activated with an unlock code supplied with every telescope. The code can be used on up to five devices belonging to the same user — a few users do report invalid or already-redeemed codes; in these cases Celestron support usually helps out without fuss.
This becomes really relevant when buying used: before buying, ask explicitly whether the original activation code is included and whether the seller is handing over the app activation too. A StarSense Explorer without a working code is just an ordinary telescope with a phone holder — in which case you might as well go for a cheaper Dobsonian. By the way: the smartphone holder and its code are not sold separately; the technology is tied to the telescope series.
Which StarSense model for whom?
- LT 70 (€ 199): a first taste and gift budget — Moon and planets, nothing more. For children often a better choice than a department-store telescope (see telescope for kids)
- LT 114 (€ 259): the value compromise — first deep-sky successes on a modest budget
- DX 102 (€ 529): for collimation-averse users — a refractor with no need for collimation, excellent on the Moon and planets
- DX 130 ($449.95€ 599): our recommendation — best optics and the most stable mount in the series
If you are unsure whether it should be a StarSense at all: the interactive telescope finder leads you to the right instrument type in two minutes.
Our recommendation
Best beginner package: Celestron StarSense Explorer DX 130 AZ
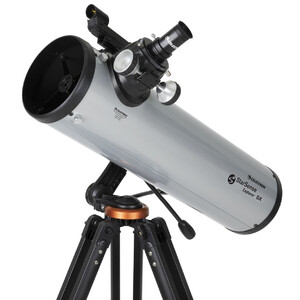
Your smartphone guides the scope to the target via the StarSense app. 130 mm optics: detailed planets and deep sky, without the frustration of star-hopping.
Price: € 599
First accessory: Omegon Premium Moon Filter 1.25″
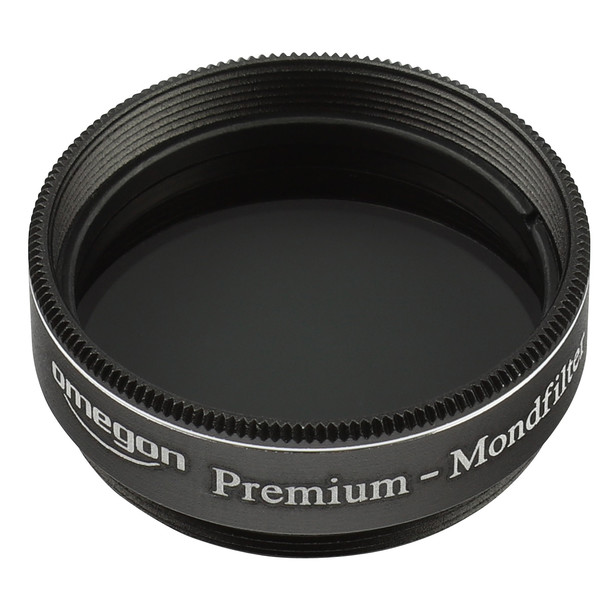
Dims the harsh moonlight, is easy on the eyes and brings out far more contrast and detail – our best-selling filter and the number-one pick to start with.
Price: € 19.90
* Affiliate link: if you buy through this link we may earn a small commission from Astroshop or High Point Scientific, at no extra cost to you.
Frequently asked questions
Does StarSense work in the city too?
Yes — the app only needs a few visible stars to orient itself, and that works surprisingly reliably even with light pollution. What you see depends on the sky, of course: the Moon and planets always, faint galaxies only outside the city.
Which smartphones are supported?
Practically all recent iPhones and Android devices with a decent camera. The app is free and is paired to the telescope with the supplied activation code — the code works on up to five of your own devices.
Can I take photos with the StarSense Explorer?
The Moon, yes — through the eyepiece with a smartphone you can get surprisingly good snapshots. Deep-sky photography is out due to the lack of tracking. Anyone wanting to photograph galaxies and nebulae is far better served by a smart telescope; the basics are in our astrophotography guide.
Does the telescope need power or batteries?
No — that is one of the biggest advantages over GoTo. There are no motors and no electronics on the telescope itself. Only your smartphone battery is used: in the cold, a small power bank in your jacket pocket is worthwhile.
Is a used StarSense Explorer worth it?
Only if the original app activation code is demonstrably included and still usable — otherwise the very feature you pay the premium for is missing. Ask before buying and ideally test the activation at handover.
StarSense Explorer or a GoTo telescope?
For purely visual beginners, usually StarSense: no power, no alignment frustration, more optics for the money — and you learn the sky along the way. GoTo is worth it if you want tracking, for example for relaxed group observing or high magnifications. More options: telescopes for advanced users.
Verdict: the cleverest beginner navigation of 2026
The StarSense Explorer series delivers on its promise: it removes astronomy’s biggest hurdle for beginners without buying into the drawbacks of motorised systems. Anyone who accepts the premium for the navigation and goes for the DX 130 ($449.95€ 599) gets the most complete Push-To package on the market — press and users have confirmed this remarkably unanimously for years. Just don’t set out to photograph with it.