By Alexander Merz · Published on · Details checked on 14 September 2026
The most tedious part of this hobby isn’t the observing, it’s the half hour before it: carry the telescope out, align the mount, wait for it to cool down. A garden observatory saves you exactly that half hour — and with it most of the evenings you’d otherwise never start at all.
Prices run from 158 € for a tent to well over 15,000 € for a masonry dome. Somewhere in between sits the solution that fits most people.
⭐ In short: For most people a roll-off roof observatory is the right choice: the roof slides to one side, the telescope stays set up and polar aligned, and you observe open sky instead of squinting through a slit. Domes cost more and mainly pay off where there is wind and stray light. If all you want is to skip the setup, an observatory tent from around 160 € gets you surprisingly far. The most expensive mistake is leaving out the pier — without a solid foundation even the nicest hut is pointless.
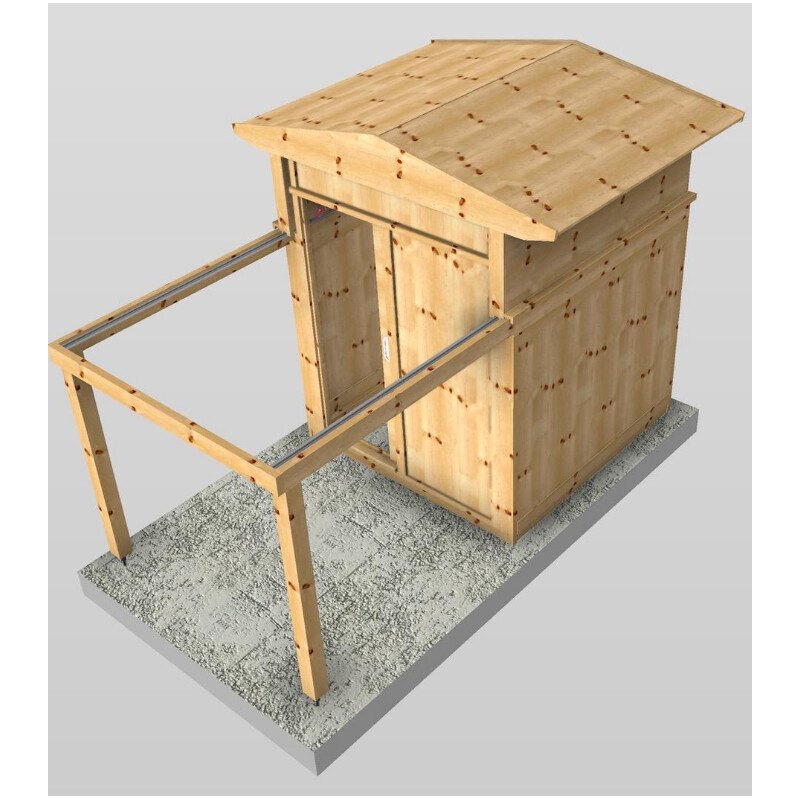
Dome or roll-off roof: the basic decision
Both designs solve the same problem in different ways. The dome protects you better, the roll-off roof shows you more sky.
Through a dome slit you only ever see a strip about 60 to 100 cm (2 to 3 ft) wide, and the dome has to be turned along with the telescope. In return you stand out of the wind and see none of the stray light from next door.
With a roll-off roof observatory, the whole sky is open once the roof is pushed back. That is far more relaxed, but it costs you the shelter from wind and light — and the hut needs space beside it for the roof to sit on.
| Design | Advantage | Drawback | From about |
|---|---|---|---|
| Observatory tent | Cheap, portable, no foundation needed | Not a permanent site, the telescope still has to come out | € 158 |
| Roll-off roof observatory | ⭐ Right for most peopleFull sky, telescope stays set up, simple construction | Room needed for the roof to slide onto, no wind shelter | € 2,975 |
| Dome | Shelter from wind and stray light, classic look | Expensive, slit-sized view, the dome has to be turned | € 5,290 |
The cheap way in: the observatory tent
An observatory tent isn’t really an observatory. It doesn’t replace the setup, it replaces the wind shelter and blocks the glare.
That sounds like very little, but it is exactly what rescues a lot of evenings. You stand inside it in the dark, without a street lamp in the corner of your eye, and your eyes stay dark adapted.
If you observe from a balcony, an allotment or changing sites, it’s the only sensible solution — and the only one that needs no permission from anybody.
The cheap way in: Omegon Zeltsternwarte
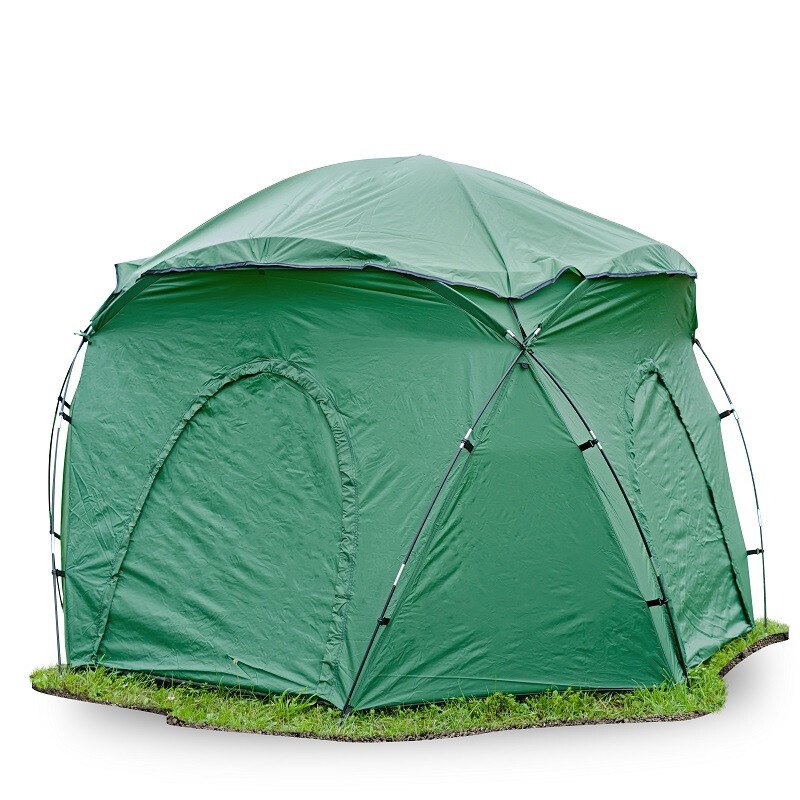
Aufblasbares Zelt statt Gebäude: schützt Teleskop und Beobachter vor Streulicht und Wind, in Minuten aufgebaut und wieder verstaut.
Price: € 158
A bit bigger: Explore Scientific Zeltsternwarte
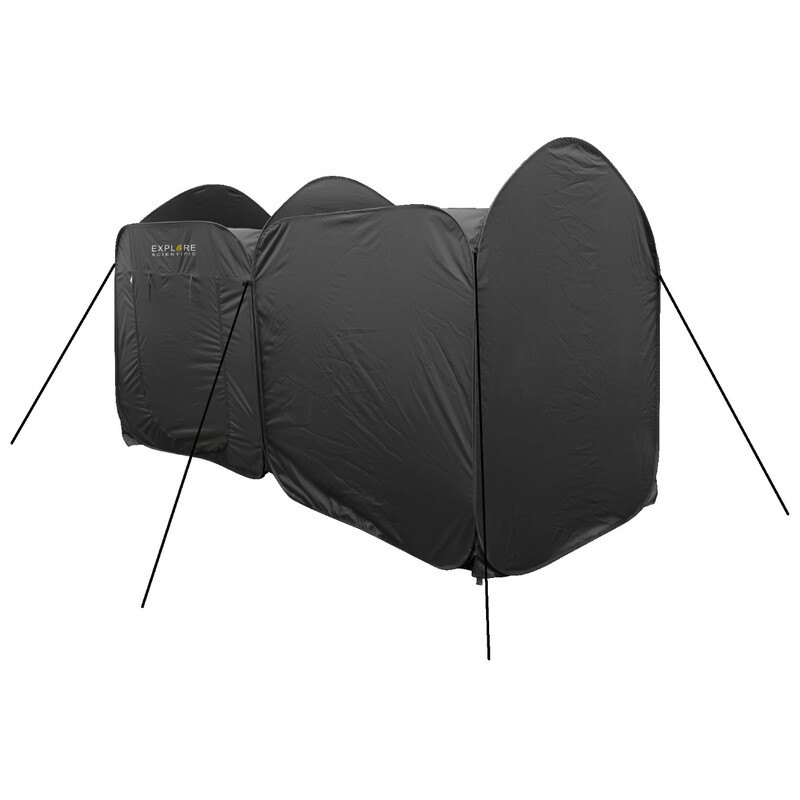
Die etwas größere Zeltsternwarte – genug Platz, um mit Montierung und Tisch darin zu stehen.
Price: € 215
The pier: the part people skimp on, and the part that decides everything
This is where most people make the most expensive mistake. A garden observatory is only as good as whatever the mount is standing on.
The entire point of the exercise is that the telescope stays polar aligned. If it sits on a tripod on the hut floor, it shifts with every step you take — and you’re aligning it again every single time.
The answer is a concrete foundation with a steel pier on top, completely separated from the hut floor. Leave a gap of one to two centimetres (half an inch or so) between foundation and floor and fill it with insulation strip. Skip that, and every footstep goes straight into your exposure.
The dimensions that have proven themselves: the foundation goes below the local frost line — in the UK that means at least 45 cm (18 in) and 75 cm (2 ft 6 in) or more in shrinkable clay, in the US anything from 30 cm (12 in) in the South to 1.5 m (5 ft) in Minnesota or Maine. Footprint around 60 × 60 cm (2 × 2 ft), with a steel tube of 20 cm (8 in) diameter on top. The height depends on whether you observe sitting or standing — most people end up between 100 and 130 cm (3 ft 4 in and 4 ft 4 in).
Common mistake: building the pier too tall. The higher it stands, the more it vibrates — and the more often the tube hits the wall near the zenith. Go lower and put a stool next to it.
A pier like that typically carries mounts in the EQ6-R or HEQ5 class. Every manufacturer has its own adapter plate for the top — and that plate gets cast into the concrete, not bolted on afterwards.
Location: where the hut has to go and where it must not
The best spot is rarely the most convenient one. What matters is a clear view south (north, if you’re reading this from the southern hemisphere), because that’s where planets and the interesting deep-sky objects culminate.
A tree to the south costs you more targets than a street lamp to the north. Check the whole horizon once before you break ground — ideally with a planetarium app that shows you how objects track across the year.
What to avoid: the south-facing house wall. It radiates heat well into the night, and that rising air ruins exactly the sharpness you’re building the observatory for. Two or three metres (six to ten feet) of distance make a visible difference.
The ground counts too. Grass and soil give off less heat at night than concrete or gravel — an observatory in the middle of a paved patio has worse seeing than the same hut on the lawn.
Planning permission: what actually applies
The good news first: most garden observatories need no planning permission at all. The bad news: what exactly counts as permission-free depends on where you live, and in the US it can change from one town to the next.
In England a garden observatory is normally an outbuilding under permitted development. The limits: maximum overall height 4 m with a dual-pitched roof, 3 m with any other roof, and only 2.5 m if the building stands within two metres of a boundary. It must sit behind the front wall of the house, and buildings and extensions together must not cover more than half the land around the original house. A typical roll-off roof hut of 2.5 × 2.5 m with a 2 m wall stays comfortably inside all of that. Building regulations approval is normally not needed either, as long as the floor area is under 15 m² (about 160 sq ft) and nobody sleeps in it. There are exceptions worth knowing before you order anything, though: inside the curtilage of a listed building every outbuilding needs permission. On designated land — National Parks, the Broads, Areas of Outstanding Natural Beauty, World Heritage Sites — anything more than 20 m from the house is capped at 10 m², and a building at the side of the house needs permission. Wales, Scotland and Northern Ireland run their own versions of these rules, so don’t assume the English numbers apply.
In the US there is no national answer, because permits are issued locally. The International Residential Code exempts detached accessory structures up to 200 sq ft (about 18.5 m²) from a building permit, but roughly half of all jurisdictions set the bar lower — 100, 120 or 144 sq ft are all common. A 2.5 × 2.5 m hut is around 67 sq ft and comes in under every one of those. But a building-permit exemption is not a zoning exemption: setbacks from the property line, height limits, lot coverage and rear-yard-only rules still apply, plenty of towns want a zoning permit even when the building permit is waived, and an HOA can be stricter than the city.
Tip: The rules vary by region, by county and in the US by town — so make the call. Ten minutes with your local planning department or building and zoning office beats any amount of web research. Ask specifically about a “detached outbuilding with no sleeping accommodation” and give the footprint, the height and the distance to the boundary — then you get a firm answer instead of a general one.
None of this touches an observatory tent. It isn’t a building: it’s temporary, it comes down again, and it needs neither permission nor a setback.
Condensation and cool-down: the two permanent problems
The forums rarely argue about the design and almost always about these two. A closed wooden hut in a garden is a moisture trap.
It heats up during the day, cools down at night, and the humidity settles on your optics and electronics. Do nothing about it and after a year you have a telescope with fogged lenses and tarnished mirrors.
What helps is unglamorous: cross ventilation with two openings on opposite walls, offset high and low, plus a dehumidifier or, at the simplest, tubs of desiccant. If you have power out there, put a small heating mat under the optics to hold the temperature a couple of degrees above the dew point.
The second issue is cool-down time. A hut that has sat in the sun all day radiates heat for hours in the evening — and then the seeing is ruined by your own building. A light-coloured roof and opening the roof half an hour before you start sort most of that out.
Power, network and remote control
If you’re digging a trench for the foundation anyway, the conduit goes in at the same time. A cable laid afterwards costs many times as much.
What makes sense is buried armoured cable on its own RCD (a GFCI breaker, in US terms) plus a second conduit for network. Wi-Fi through a wooden wall usually works, but not reliably enough for a night when you’re indoors and a sequence is running.
With power and network the hut becomes a remotely operated observatory: mount, camera and focuser all run off a small computer in the building, controlled from the sofa. What that looks like in practice is in the guide to astrophotography.
The thing nobody should leave out: a rain sensor, or at the very least a weather camera. An open roof and a sudden shower are the most expensive combination in this hobby.
What it realistically costs
The price of the building is only part of the sum. Foundation, pier and electrics come on top, and they get underestimated with great regularity.
| Item | Observatory tent | Roll-off roof | Dome |
|---|---|---|---|
| Building | from 158 € | from 2,975 € | from 5,290 € |
| Foundation and pier | not needed | 300–800 € | 300–800 € |
| Electrics and network | not needed | 200–600 € | 200–600 € |
| Dehumidifying and extras | — | 100–300 € | 100–300 € |
| Realistic total | from 160 € | 3,600–4,700 € | 5,900–7,000 € |
And there’s one item that appears in no table: time. Digging a foundation, pouring it and letting it cure costs two weekends plus waiting — even if the hut arrives ready made.
Build it yourself or buy it finished?
A roll-off roof observatory is, at heart, a garden shed with a roof on rails. If you’re confident with tools, you can build one for roughly half the price.
The usual recipe from the self-build crowd: a frame of 10 × 10 cm (4 × 4 in) solid spruce, walls of 24 mm (1 in) tongue-and-groove boards, roof on galvanised rollers. Material for a 2.5 × 2.5 m (8 × 8 ft) hut runs to around 1,500 to 2,000 €.
One thing argues against building it yourself more than anything else: keeping the roll-off roof watertight. Building a dome yourself, by contrast, is a project for people who enjoy building as such — the effort bears no relation to the money saved.
What that looks like in detail — foundation depth, pier dimensions, timber sizes, rails and what the material actually costs — is set out in the guide to building your own.
Tip: The middle road works well: pour the foundation and pier yourself, buy the building ready made. The foundation is the job that doesn’t demand millimetre precision — the roll-off roof does.
If you want more: the right dome
A dome pays off at windy sites and wherever a neighbour’s light comes in from the side. It’s also the only building that stays halfway bearable in winter, because you’re not standing in a draught.
The price you pay is the slit. At 70 cm (28 in) wide and a 2.7 m (9 ft) dome diameter you see a narrow strip of sky and have to turn the dome every few minutes — motorised or by hand.
For the more ambitious: Pulsar Sternwartenkuppel 2,2 m Generation II
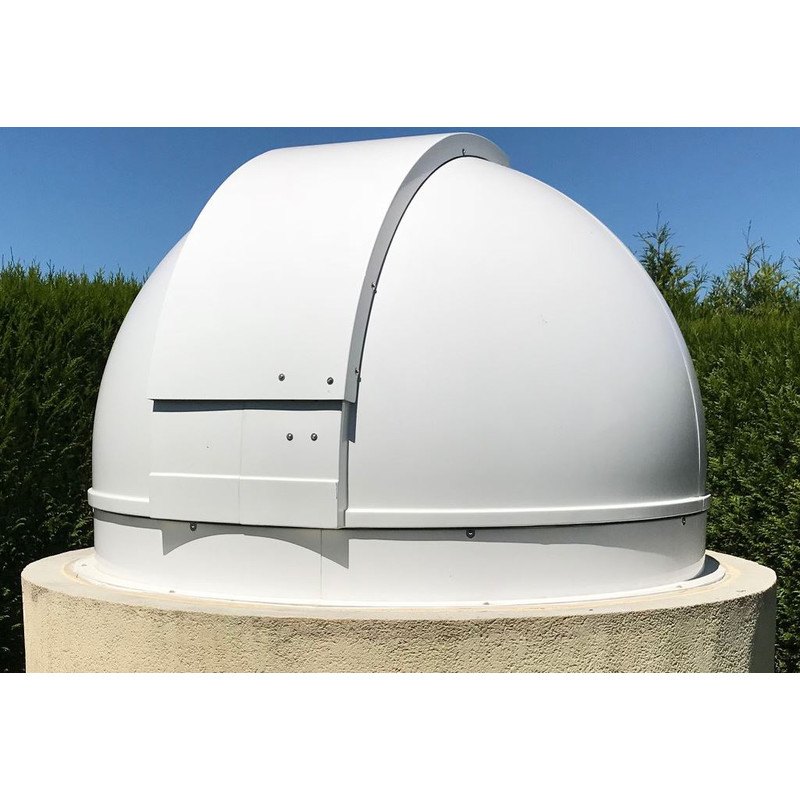
Glasfaserkuppel mit 2,2 m Durchmesser – die klassische Sternwarte für den Garten, wetterfest und drehbar.
Price: € 5,290
Our recommendation: Dome Parts Rolldach-Sternwarte GreenLine MS-20
Die kleinste echte Rolldachhütte: Dach zur Seite schieben, Teleskop bleibt aufgebaut und ausgerichtet stehen.
Price: € 2,975
Common questions about garden observatories
Does a garden observatory need planning permission?
Usually not. In England an outbuilding with no sleeping accommodation is normally permitted development as long as it stays under 4 m high (2.5 m within two metres of a boundary), sits behind the front of the house and doesn’t cover more than half the garden. In the US the building permit depends on your town: many exempt detached structures up to 120 or 200 sq ft, but zoning setbacks and HOA rules apply anyway. Listed buildings, designated land and allotment tenancy agreements are the usual exceptions. One call to the local office settles it in ten minutes.
How big does a roll-off roof observatory need to be?
2.5 × 2.5 m (8 × 8 ft) is the proven standard for one telescope plus observer. Below that it gets tight as soon as a laptop and a chair join in. More important than the footprint is the space next to it: the roof, once pushed off, needs almost the same length again.
Does the mount really have to stay bolted down?
That’s the whole idea. The time you save doesn’t come from the building, it comes from the polar alignment staying put. A mount that gets realigned every session turns the observatory into an expensive equipment shed.
How deep does the foundation have to be?
Below the frost line, and that number is local. UK practice starts at about 45 cm (18 in) in frost-susceptible ground and goes to 75 cm (30 in) or more on shrinkable clay or near trees. In the US the IRC wants footings at least 30 cm (12 in) down and below the frost depth your building department publishes: roughly 30 cm in the South, 45 to 75 cm (18–30 in) in the mid-Atlantic and Pacific Northwest, 105 to 120 cm (42–48 in) across the Midwest and New England, and 1.5 m (60 in) or more in Minnesota, Maine, North Dakota and Alaska. Look up your own figure rather than trusting a map — a foundation that’s too shallow lifts in winter and settles in spring, taking your polar alignment with it. A footprint of around 60 × 60 cm (2 × 2 ft) is enough for the usual mounts.
What do you do about damp inside the hut?
Cross ventilation with two offset openings is the basis, a dehumidifier or desiccant the supplement. The telescope itself is best left covered but not packed airtight — otherwise the moisture condenses right underneath the cover.
Is an observatory tent worth it at all?
For balconies, allotments and rented ground yes, because it’s the only solution that needs no foundation. As a replacement for a fixed hut no: the telescope still has to be set up and aligned every time, all you save is the wind and the stray light.
Dome or roll-off roof for astrophotography?
There’s more of a case for the dome than you’d first think: it keeps the wind off the mount, and wind is the commonest reason for eggy stars in long exposures. If you observe visually and want to take in the whole sky, you’ll be happier with the roll-off roof.
Can I move a garden observatory?
The building yes, the foundation no. Wooden roll-off roof huts come apart and go back together, and domes certainly do. But count on a new foundation at the new site — that’s the cost that stays.
Read on:
- Building a garden observatory yourself – foundation, pier, dimensions and material costs in detail
- Observatories in Germany – visit first, build later: the directory of public observatories
- Telescopes for advanced observers – which instrument belongs on a pier like that
- Light pollution and the Bortle scale – how dark your garden really is
- Astrophotography – the reason most observatories get built in the first place