By Alexander Merz · Published on · Details checked on 14 September 2026
A roll-off roof observatory is, at heart, a garden shed with its roof sitting on rollers. That’s exactly why so many amateur astronomers build their own: the material costs around half what a finished one does, and the design forgives more than you’d expect.
What it doesn’t forgive is a bad foundation. Which is why that comes first here, not last.
⭐ In short: The proven self-build is a roll-off roof hut of 2.5 × 2.5 m (8 × 8 ft) in 10 × 10 cm (4 × 4 in) structural timber and 24 mm (1 in) tongue-and-groove boards, with the roof running on galvanised rollers. Material: around 1,500 to 2,000 €, plus two or three weekends of work. The pier stands on its own foundation, dug below the local frost line — from about 45 cm (18 in) in most of Britain to 1.5 m (5 ft) in the northern US — and touches the hut floor nowhere. Building a dome yourself, on the other hand, almost never pays: the effort bears no relation to the saving.
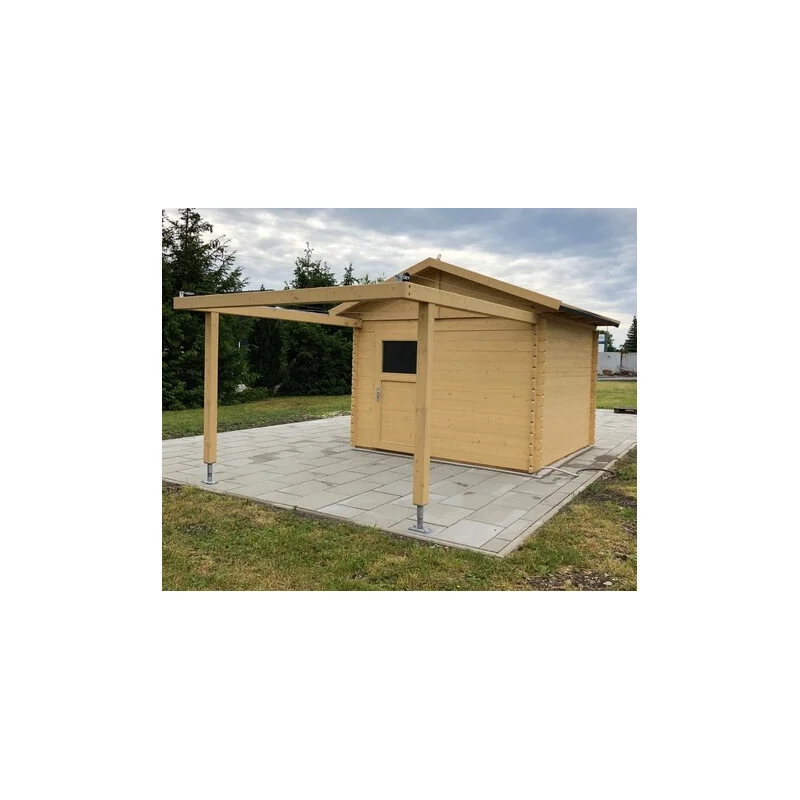
Build or buy: the honest sum
The saving is real, but smaller than the bare material bill suggests. About 1,500 € of material stands against roughly 3,000 € for a finished hut — that’s 1,500 € for two or three weekends.
On top of that comes everything you’re not buying: instructions, parts cut to fit, and somebody to ring when it goes wrong. In a self-build, the roll-off roof is the point where the experience is missing.
| Build it yourself | Buy it finished | |
|---|---|---|
| Cost | 1,500–2,000 € of material | from € 2,975 |
| Time | 2–3 weekends plus the foundation | 1 weekend of assembly |
| Dimensions | free, cut exactly to the space you have | fixed sizes |
| Risk | keeping the roll-off roof watertight | low |
| Tools | Circular saw, hammer drill, spirit level, a second person | Cordless screwdriver |
Tip: For a lot of people the middle road is the best one: pour the foundation and pier yourself, buy the building ready made. The foundation needs muscle but no millimetre precision — with the roll-off roof it’s the other way round.
The foundation: below the frost line, 45 cm to 1.5 m, no exceptions
Everything else in a self-build can be corrected later. This can’t. The pier foundation has to sit below the frost line, and that depth is a local number: from about 45 cm (18 in) in frost-susceptible ground across most of Britain — 75 cm (30 in) or more on shrinkable clay and near trees — to 105 or 120 cm (42–48 in) across the American Midwest and New England and 1.5 m (5 ft) and beyond in Minnesota, Maine or North Dakota. In the southern US, 30 cm (12 in) is often the whole story. Your building control or building department publishes the figure that counts for your postcode or ZIP; ask for that one rather than trusting an online map.
The reason is simple: water in the ground expands as it freezes and lifts everything sitting above it. In spring it settles again — and takes your polar alignment with it, the very thing you were trying to preserve for good.
Proven dimensions: a pit 60 × 60 cm (2 × 2 ft), taken down past your local frost depth, 10 cm (4 in) of compacted gravel at the bottom, then C25/30 concrete (ask for a 3,500 psi mix in the US) around a rebar cage. At a metre (3 ft 3 in) deep that’s roughly 0.35 m³, about half a cubic yard — two people manage it in a day if the concrete gets delivered.
The mistake nearly everybody makes once: pouring the foundation and the hut floor together because it’s quicker. After that, every step inside the building goes straight into the mount — at 1,000 mm focal length you see it immediately. The gap of one to two centimetres stays open and gets nothing but an insulation strip.
The pier: steel tube, height and adapter plate
On top of the foundation goes a steel tube, and 200 mm (8 in) diameter with a 6 to 8 mm wall is the usual choice. Thinner tube vibrates, thicker tube gains you nothing.
The base plate gets cast in, not bolted on afterwards. Four M16 threaded rods (5/8 in) set in wet concrete hold for good; heavy-duty anchors drilled into cured concrete work themselves loose over the years.
On height, most people err upwards. 100 to 130 cm (3 ft 4 in to 4 ft 4 in) is almost always enough — the taller the pier, the more it vibrates, and the sooner the tube hits the wall near the zenith. Build it lower and put a stool next to it.
On top sits the adapter plate for your mount. That part is manufacturer-specific: an EQ6-R or HEQ5 needs a different bolt circle than an iOptron. Buy it before you pour, and the alignment works first time.
Dimensions and material: what has proven itself
2.5 × 2.5 m (8 × 8 ft) is the standard, and for good reason: below that it gets cramped as soon as a laptop, a chair and a second observer join in.
More important than the footprint is the space beside it. The roof, once pushed off, needs almost the same length again — count on 5 m (16 ft) of overall length for a 2.5 m hut.
| Component | Proven version | Why |
|---|---|---|
| Frame | 10 × 10 cm spruce, pressure treated | Carries the roof without sagging |
| Walls | 24 mm tongue-and-groove boards | Windtight, and breathable without a vapour barrier |
| Roof | Profiled steel sheet or bitumen felt on OSB | Light, so it can actually be pushed |
| Rails | Galvanised U-channel, rollers with ball bearings | Don’t rust, still run years later |
| Wall height | 1.80–2.00 m (6–6 ft 7 in) | High enough to stand, low enough for a free horizon |
| Floor | Concrete slabs or timber decking, separate from the foundation | No vibration transferred |
One decision gets made too late far too often: wall height versus a free horizon. Every centimetre of wall costs you view downwards. With a 2 m wall and a 2.5 m room, anything below roughly 38 degrees altitude is gone — and for planets low in the south that can be too much.
The roll-off roof: the part that’s genuinely hard
This is where self-builds fail, not on the woodwork. A roof that slides still has to keep the rain out — and precisely where it comes to rest.
The proven answer is an overhang of at least 10 cm (4 in) all the way round, so that the roof caps the top of the wall like a lid. Rain then runs off outside instead of being drawn into the joint.
The rails run on two beams that project beyond the hut. Those beams need their own post at the free end — otherwise half the roof’s weight hangs off a lever, and the rail twists out of true in the first winter.
And one detail that rarely makes it into a build report: a latch against the wind. A closed roll-off roof with nothing holding it down is a sail in a gale. Two simple barrel bolts are enough.
Planning permission: usually none needed, but never rule-free
Most garden observatories need no planning permission. In England an outbuilding with no sleeping accommodation is normally permitted development, and in the US a hut this size sits under almost every local shed threshold.
The English numbers: maximum overall height 4 m with a dual-pitched roof, 3 m with any other roof, and only 2.5 m within two metres of a boundary; nothing forward of the front wall of the house; and buildings together covering no more than half the land around the original house. A 2.5 × 2.5 m hut with a 2 m wall is 6.25 m² and stays well inside that, and under 15 m² it normally needs no building regulations approval either. Wales, Scotland and Northern Ireland have their own versions of these rules, and inside the curtilage of a listed building or on designated land you need permission regardless.
In the US, permission is a local matter. The IRC exempts detached accessory structures up to 200 sq ft from a building permit and about half of all jurisdictions cut that to 100, 120 or 144 sq ft — a 2.5 × 2.5 m hut is about 67 sq ft and clears all of them. But exempt from a building permit is not exempt from zoning: setbacks from the property line, height limits, lot coverage and rear-yard-only rules still apply, many towns want a zoning permit anyway, and an HOA can be stricter than the town. In an allotment or on rented ground, the tenancy agreement decides.
Tip: Because the rules differ from region to region and, in the US, from town to town, ring the local planning or building and zoning office before you order material. Ask about a “detached outbuilding with no sleeping accommodation” and give the footprint, the height and the distance to the boundary. It takes ten minutes and it’s worth more than any amount of research.
Damp: the problem that comes after the build
The build is finished, and six months later the mirrors are tarnished and the electronics corroded. A closed wooden hut in a garden is a moisture trap, and it catches almost everyone out the first time.
It heats up during the day and cools below the dew point at night. What helps is cross ventilation with two openings on opposite walls, offset high and low, plus a dehumidifier or tubs of desiccant.
The telescope itself stays covered, but never packed airtight — under a plastic sheet the moisture condenses exactly where it does most damage. A breathable cover beats any tarpaulin.
Bury the power and network while you’re digging
While the digger is there anyway, the conduit belongs in the trench. Laid afterwards, the same cable costs many times as much, because the lawn gets opened up twice.
Two separate conduits make sense: one for the buried mains cable on its own RCD (a GFCI breaker, in US terms), one for network. Wi-Fi through timber often works, but not reliably enough for a night when an imaging run is going.
And if you’re thinking that far ahead, think one step further: a rain sensor costs little and saves the gear. An open roll-off roof and a sudden shower are the most expensive combination in this hobby.
Why a home-built dome rarely pays off
With a dome the ratio flips. The effort climbs steeply, the saving doesn’t.
A dome needs a circular track ring, a rotating shell and a weathertight slit with a moving shutter. That’s three precision parts instead of one — and every single one is harder than the entire roll-off roof.
People who try anyway usually work with plywood segments and a fibreglass coating. That’s a project of its own, running for months. If you want a dome, buy it — and build at most the base underneath it yourself.
If it has to be a dome after all: Pulsar Sternwartenkuppel 2,2 m Generation II
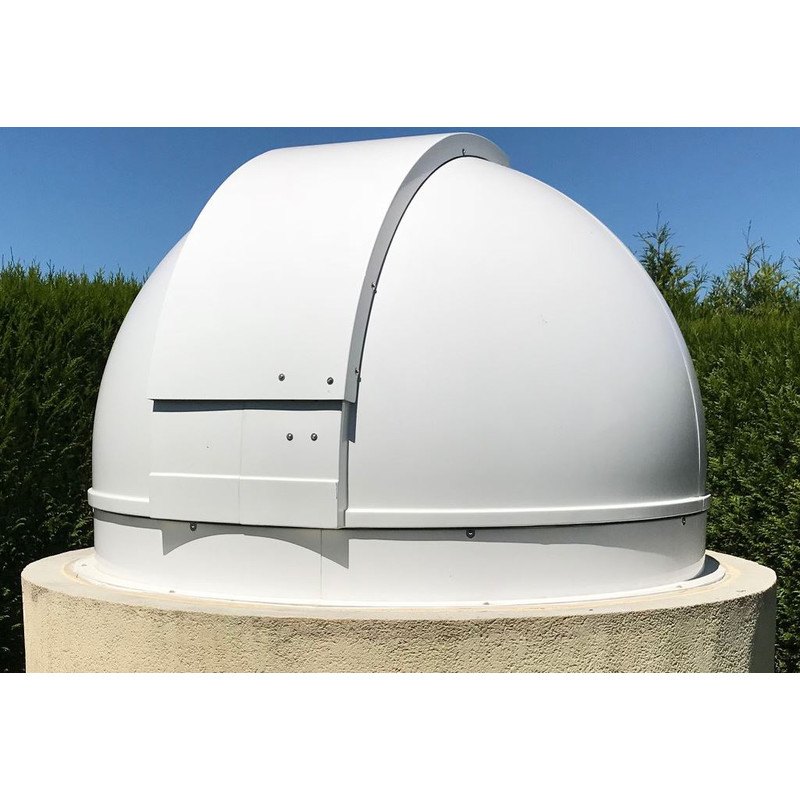
Glasfaserkuppel mit 2,2 m Durchmesser – die klassische Sternwarte für den Garten, wetterfest und drehbar.
Price: € 5,290
Common questions about building your own
How long does it take to build a roll-off roof observatory?
Two to three weekends for the building, plus a weekend for the foundation and at least a week of curing before you put any load on the pier. If it’s your first build, reckon realistically on a month of work spread out.
What does the material for a 2.5 × 2.5 metre hut cost?
Around 1,500 to 2,000 € for timber, roof, rails and fittings, plus 300 to 500 € for the foundation and pier. The price swings mainly with the timber market — pressure treatment and profiled steel sheet are the biggest single items.
Can the observatory stand on an existing patio?
The building yes, the pier no. That needs its own foundation below the frost line, which means opening up the paving at that spot. And bear in mind that concrete and paving give off heat for longer at night than grass does, which makes the seeing worse.
Is a shop-bought garden shed good enough as a basis?
As a basis yes, and it’s a common route. The conversion consists of replacing the roof structure with a sliding frame and fitting rails along the top of the walls. When buying, look for at least 19 mm (3/4 in) wall thickness — thinner kits distort as soon as the roof stops bracing them.
How do I stop the roof blowing open in a storm?
With two barrel bolts on the long sides that tie the closed roof to the frame. If you motorise the roof you also need a limit switch — otherwise the motor keeps pulling against a jammed rail until something gives.
Does the timber need treating?
The frame yes, pressure treated or with a blue-stain preservative. Inside, as little as possible — solvents outgas for years and settle on cold optics. Untreated timber on the inside is a better choice than a well-meant coat of varnish.
Read on:
- Buying a garden observatory – dome, roll-off roof and tent compared, with prices
- Telescopes for advanced observers – what belongs on a pier like that
- Light pollution and the Bortle scale – is building worth it at your site?
- Observatories in Germany – visit first, then build your own