By Alexander Merz · Published on · Details checked on 14 September 2026
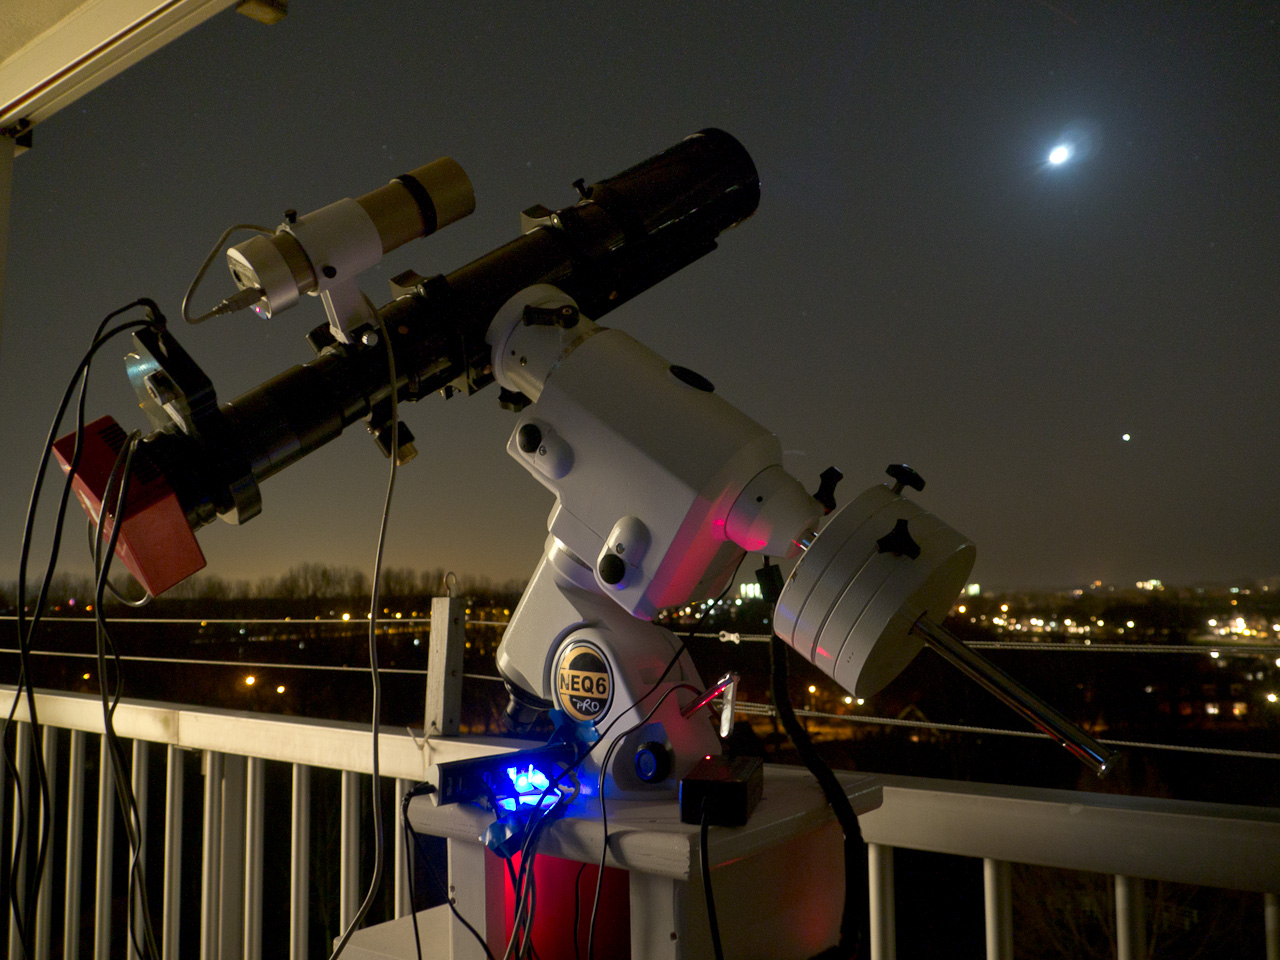
An equatorial mount has exactly one job: it turns your telescope at the same rate the sky turns. That is why an object stays put in the eyepiece instead of drifting out of view after half a minute.
Sounds like a detail. It is the difference between “I caught a glimpse of the Ring Nebula” and “I looked at it for twenty minutes” – and between a blurred snapshot and a real astrophoto.
⭐ In short: An equatorial mount tilts one of its two axes until it runs parallel to the Earth’s axis. After that, a single steady rotation is enough to follow the sky – by hand, by motor or by GoTo. For visual observing it is a comfort; for long-exposure astrophotography it is a requirement. The price you pay: it wants polar alignment before every session, it needs counterweights, and photographically it only carries about two thirds of what the spec sheet claims.
Why one axis sits at an angle
The sky does not stand still. At 150× magnification a star crosses the entire field of view in roughly twenty seconds – without mechanical help you are nudging the telescope constantly.
An altazimuth mount would have to move two axes at once and at uneven rates: up/down and left/right, in a ratio that keeps changing. You can motorise that, but it stays complicated.
The equatorial design solves it with a trick: it tilts one axis upwards until it is parallel to the Earth’s axis – in Central Europe that means 47 to 55 degrees, depending on latitude. This axis is called the polar or right ascension axis (RA).
From then on a single steady rotation around that one axis is enough, always at the same speed: once per sidereal day. The second axis – declination (DEC) – then stays still and is only used for aiming.
Astrophotography hangs on exactly this. Only accurately tracked sub-exposures can be stacked cleanly afterwards – and without stacking many frames you will not reach faint nebulae and galaxies.
Tracking in three stages: by hand, by motor and by GoTo
“Equatorial” says nothing yet about whether anything moves by itself. There are three levels, and they differ in price by a factor of ten.
| Stage | What it does | Good for | Limit |
|---|---|---|---|
| By hand | You turn a slow-motion control while you observe | Observing at any magnification | Any exposure over a second is blurred |
| Motor on the polar axis | Turns steadily with the Earth’s rotation | Relaxed observing, lunar and planetary video, short deep-sky exposures | Finds nothing by itself; depending on the optics it stops at 30 to 60 seconds |
| GoTo | Two motors plus a controller with an object database – slews to targets and tracks | Deep-sky imaging, finding objects under a bright city sky | Needs 12 volts, polar alignment and a star alignment every night |
The second stage is often underrated. A plain RA motor costs far less as a retrofit kit than a new mount and turns a manual mount into a usable observing instrument.
The other way round: a real GoTo controller cannot sensibly be retrofitted to most entry-level mounts. There, buying new is the more honest calculation.
Tip: Controllers with switchable tracking rates are worth the surcharge. Stars, Moon and Sun drift at different speeds – sidereal, lunar and solar. Anyone filming the Moon for half an hour notices immediately.
Payload done honestly: the two-thirds rule
This is where most bad purchases happen. The spec sheet gives you a number – and that number applies to steady visual observing, not to imaging.
Among experienced astrophotographers the two-thirds rule has become the standard: photographically usable is roughly 60 to 65 per cent of the stated visual payload. Anything above that keeps vibrating – and vibration shows up in every frame.
| Spec sheet figure | Usable visually | Usable photographically | What realistically fits |
|---|---|---|---|
| 5 kg | up to 5 kg | about 3 kg | Camera with a telephoto lens, or a small refractor |
| 10 kg | up to 10 kg | about 6 kg | 6-inch Newtonian, or an 80 mm apo with a camera |
| 18 kg | up to 18 kg | about 11 kg | 8-inch Newtonian with camera, guiding and cables |
And count everything that rides along: camera, filter drawer, guide scope, guide camera, dew shield, cables. A kilo of accessories adds up faster than you think – the counterweights do not count, they hang on the other side.
⚠️ The trap with complete sets: In budget telescope sets the mount is almost always the weak part – the telescope just about fits on paper, but not photographically. If you come across a set pairing a 150 mm Newtonian with a 5-kg mount, that is an observing instrument, not an imaging rig.
The second underrated factor is the tripod. A flimsy aluminium tripod undoes the best mount, because every gust of wind and every footstep on the lawn arrives as a wobble in the eyepiece. Steel-tube tripods or a fixed pier are the cheapest real improvement here.
Polar alignment: how precise it really has to be
Polar alignment means pointing the polar axis at the celestial pole. Only then does the assumption behind the whole design actually hold.
The good news: how precise this needs to be depends entirely on what you are doing. For most readers it is far less work than feared.
| What you want to do | Method | Time needed |
|---|---|---|
| Observing, any magnification | Tripod roughly north, set the latitude, done | 1 minute |
| Filming the Moon and planets | The same, plus Polaris centred in the polar scope | 3 minutes |
| Deep-sky up to about 500 mm focal length | Polar scope with the correct hour-angle setting | 5 minutes |
| Deep-sky from about 800 mm focal length | Polar scope plus a software routine or drift alignment | 15 to 40 minutes |
In practice the polar scope goes further than its reputation suggests. Experienced astrophotographers routinely align focal lengths around 400 mm in under five minutes using the polar scope alone – provided the polar scope itself is properly calibrated.
Only long focal lengths make it laborious. Then you either use a software routine that calculates the error from two exposures, or classic drift alignment on the declination drift.
Tip for a fixed site: If you always observe from the same spot, set the latitude once and mark the tripod feet on the patio. Polaris will then already be almost in the finder next time, and five minutes become one.
⚠️ A compass app alone is not enough: It shows magnetic north, not true north. Across Central Europe the difference is currently a few degrees – enough to skew any longer exposure. Use the app only for rough placement, then correct on Polaris.
Autoguiding: when you actually need it
Every mechanical drive has a small, repeating error – the periodic error of the worm gear. It makes the star wander slowly back and forth over a few minutes.
You will not notice it while observing. In a photograph it turns a point into a line. Autoguiding corrects this: a second small camera watches a guide star and sends continuous correction commands to the mount.
When it becomes mandatory can be put in numbers. Without guiding, 30 to 60 seconds are realistic depending on mount and focal length, and even then roughly one frame in ten ends up rejected. At long focal lengths the limit drops noticeably.
If you only photograph the Moon, planets or bright star clusters, you do not need guiding. If you want nebulae and galaxies at exposures of several minutes, there is no way around it – more on that in our guide to deep-sky astrophotography.
Technically you need three things: a guide scope or off-axis guider, a guide camera, and a mount with an ST-4 port or computer control. Many mid-range mounts already have that port.
Getting into guiding: Omegon Microspeed Guidescope 60 mm
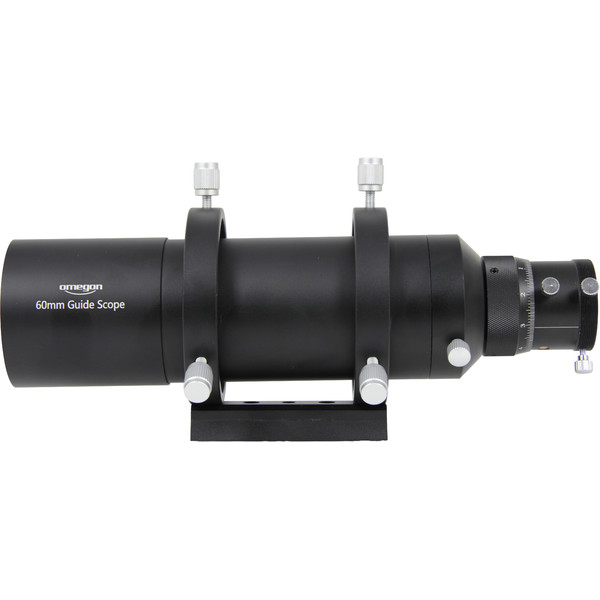
A compact 60 mm guide scope – the usual first addition once exposures need to run beyond a minute. It comes without a camera: it only makes sense once the mount and telescope are in place and stars are visibly turning into lines on your frames.
Price: € 159
Which mount fits what you want to do?
The honest answer does not depend on budget but on the question of what ends up on top. A camera with a lens weighs a kilo and a half; an 8-inch Newtonian with accessories weighs ten times that.
| What you want to do | Mount | Why | Price |
|---|---|---|---|
| Visual only | No purchase needed – a Dobsonian gives you more aperture for the same money | No polar alignment, no counterweights, all the money goes into the optics. | — |
| Milky Way and constellations with a camera | Omegon MiniTrack LX3 Essentials | Purely mechanical, wound up like a kitchen timer – needs no power and fits in a camera bag. | € 143 |
| Camera with a telephoto lens, first deep-sky attempts | Omegon MiniTrack LX3 | The same idea with a polar scope and higher accuracy. Still no power needed, still very light. | € 199 |
| The serious entry point with GoTo | Skywatcher Star Adventurer GTi SetSkywatcher Star Adventurer GTi Set | ⭐ Our pickCarries 5 kg, slews to targets via GoTo, is controlled over Wi-Fi and comes complete with tripod and wedge. Photographically that means about 3 kg – enough for a camera with a telephoto lens or a small refractor. | $830.00€ 665 |
| Small telescope plus camera and guiding | Skywatcher EQM-35 Pro SynScan GoTo | The next step up: more headroom for a 6-inch Newtonian or an 80 mm apo with a full imaging train. | € 945 |
| Travel and air luggage | iOptron GEM28 GoTo | A strikingly light head with around 13 kg capacity – built for people who really move their gear. | € 1,585 |
| Deep-sky as your main subject | Skywatcher HEQ5-R Pro SynScan GoTo | The classic this class is measured against. Belt drive, ST-4 port, very well documented and always easy to resell second-hand. | € 1,679 |
| Long focal lengths, permanent setup | Sky-Watcher EQ6-R Pro EQ MountSkywatcher EQ6-R Pro SynScan GoTo | Around 20 kg capacity and the steadiness an 8-inch Newtonian with a camera needs. In return the head alone weighs 17 kg. | $2,250.00€ 1,799 |
Links marked with an asterisk are affiliate links.
If you want more: the HEQ5 class skips a round. If you already know deep-sky will be your subject, going straight to the HEQ5 saves money overall.
It carries a good three times what a travel mount does, uses a belt drive instead of gears, and still runs cleanly with guiding where smaller mounts give up.
The surcharge pays off for anyone who wants to image through a telescope rather than a lens – for lens-only astrophotography it is wasted.
Still looking for your first telescope? Then do not start with the mount: our guide to beginner telescopes puts optics and mount in the right order. If you are further along, you will find suitable complete instruments among the telescopes for advanced users.
Only the Moon and planets? Then a motorised mount is plenty, because that work uses short video sequences rather than long exposures – how it goes in practice is covered in planetary photography.
Power in the field: the forgotten item
Almost every mount calculation online stops at the purchase price. In practice there is one more item, and it can ruin your first few nights.
GoTo mounts need 12 volts DC. A normal USB power bank delivers 5 volts and will not do – one of the most common beginner mistakes. What you need is a 12-V battery pack or a LiFePO4 battery with the right plug.
Budget another 70 to 120 euros for that if you want to observe away from home. At a fixed site a mains adapter does the job for a fraction of it.
The difference is an argument for the small solution: simple RA motors often run on 6 volts from batteries or a power bank. If you travel a lot and can live without GoTo, that saves weight, money and one source of failure.
And the classic among underrated costs: adapters. Between camera, telescope, guiding and filters, several small parts pile up that together approach the price of an eyepiece.
Buying a mount second-hand: what to check
Mounts are mechanics. They age far more slowly than cameras, which makes the second-hand market much more attractive here than it is for electronics.
Classics such as the EQ5, the NEQ3 or older Celestron CG-series models turn up regularly at a fraction of their new price. A used mid-range mount is often the better choice than a new entry-level mount at the same price.
What to look out for:
- ✅ Is the polar scope included and adjustable? If it is missing, retrofitting quickly gets expensive or impossible.
- ✅ Are the motors and hand controller included? On GoTo models the hand controller is the part that is nearly impossible to source separately.
- ✅ Does the worm run smoothly? Noticeable play and jerky motion point to hardened grease – fixable, but work.
- ⚠️ How old is the grease? After a few years it goes stiff. Cleaning and re-greasing is standard maintenance, not a defect – but it is a bargaining point.
- ⚠️ Are firmware updates still available? With older GoTo controllers it pays to check the manufacturer’s site before you buy.
- 🛑 Is the tripod included? Buying a matching tripod separately can easily cost a third of the mount’s price.
A special case are models the manufacturer no longer lists – such as the Celestron CG-5, replaced years ago by the Advanced VX. Mechanically such mounts are still perfectly usable, and spare parts are available through specialist workshops.
But be honest with yourself: with a discontinued model you are also buying a project. If you enjoy mechanics, you get a lot of mount for the money. If you simply want to take pictures, a current model with a warranty serves you better.
Frequently asked questions about equatorial mounts
Do I need an equatorial mount just to observe?
No. For visual observing a sturdy altazimuth mount or a Dobsonian will do, and both are quicker to set up. The equatorial design pays off as soon as you want to stay on an object at high magnification or take photographs.
What does getting into a tracking mount cost?
A travel mount for a camera and lens starts at around 150 euros. For a GoTo mount that will also carry a small telescope, budget 600 to 700 euros plus power. If you want to image through a telescope, you realistically land in the HEQ5 class – which starts at just under 1,700 euros.
How long can I expose without autoguiding?
Depending on mount and focal length, 30 to 60 seconds is realistic, and some frames will still be rejected. Short focal lengths allow more, long ones considerably less. Once you regularly want to expose beyond a minute, autoguiding is the next sensible step.
Will a GoTo mount run off a normal power bank?
Usually not. GoTo controllers expect 12 volts; a USB power bank delivers 5. You need a 12-V battery pack or a power bank with a 12-V output and the right barrel plug. Simple 6-volt RA motors, by contrast, will often run on batteries or a power bank.
Can I motorise an existing mount later?
On many entry-level mounts, yes – a motor kit for the polar axis is the cheapest improvement there is. A true GoTo controller, however, usually cannot be retrofitted sensibly; there, buying new is the more honest calculation.
How many counterweights do I need?
Enough that the telescope stays put in any position without you having to tighten the clamp. Manufacturers usually supply one or two weights to match the mount size. If the telescope gets heavier later, you buy an extra weight – check the diameter of the counterweight shaft.
* Affiliate link: if you buy through this link we may earn a small commission from Astroshop or High Point Scientific, at no extra cost to you.