By Alexander Merz · Updated on · Details checked on 14 September 2026
Northern lights over Central Europe – what used to be a sensation is now possible again and again around the current solar maximum. But anyone who simply starts snapping away with their phone often ends up with nothing but a black frame and a few points of light. Yet aurora photography is no black magic: with the right settings you can capture impressive shots even with a smartphone – the camera actually sees more colours than your eye does. Here you’ll find the concrete settings for phones, iPhone, Samsung and DSLR or mirrorless cameras.
The short answer:
You photograph the northern lights with a tripod, ISO 1600–3200, a wide aperture (f/1.8–f/2.8) and a 2–5 second exposure time, with focus set manually to infinity. With a smartphone, the night mode is often enough (iPhone from model 11, Samsung from the S10) – rest the phone flat or on a tripod and let it expose for 3–10 seconds. Important: the camera shows more vivid colours than you see with the naked eye.
Why photograph right now? The solar maximum
The Sun goes through an activity cycle of roughly eleven years – and we are currently in a very active phase. Powerful solar storms hurl charged particles towards Earth, which make oxygen and nitrogen atoms glow high in the atmosphere. The result: northern lights that, during strong events (from a Kp index of 7), become visible as far south as southern Central Europe. When and where to see them and how the Kp index works, we explain in detail in our guide Northern lights.
Good to know: Your camera is more sensitive to light than your eye. Even if you can only make out a faint grey veil in the sky, the photo may already show vivid green and violet. So a test shot towards the north is always worthwhile when the aurora forecast is good!
The gear you really need
The good news: you don’t need expensive gear to get started. The most important thing is stability, because with an exposure time of several seconds any handheld shot comes out blurred.
- Tripod – by far the most important accessory. In a pinch, a wall, a car roof or a phone leaned against your jacket will also do.
- Camera or smartphone – any camera with a manual mode (M) works; for smartphones, any model with a night mode or Pro mode.
- Remote or self-timer (2 s) – prevents camera shake when releasing the shutter.
- Spare batteries – cold drains batteries twice as fast. Keep the spare warm in an inside pocket.
- Headlamp with red light – red light preserves your dark adaptation and doesn’t dazzle other observers. Switchable between red and white, so it also works for digging through the camera bag: the Omegon LED Headlamp (red/white) for € 14.90. The twenty minutes of dark adaptation you just built up are gone after one white glance into the lens.
- Fast wide-angle lens (optional) – ideal is 14–24 mm at f/2.8 or better, since auroras often fill half the sky.
What you explicitly do NOT need for the northern lights
No telescope. Auroras often fill half the sky – a telescope shows you a piece of it the size of a thumbnail. For this subject it is simply the wrong tool.
No tracking mount. A photo mount compensates for the Earth’s rotation so that stars stay points during long exposures. But the aurora moves considerably faster than the starry sky, and at 2 to 5 seconds of exposure the Earth’s rotation plays no role anyway.
No expensive specialist lens to begin with. The kit lens that came with your camera delivers usable images wide open. Only once you are out there regularly does the jump to f/2.8 or faster pay off.
On this page we deliberately link to no telescope and no mount: for the northern lights you need a tripod, a camera, warm clothes and at most a red-light headlamp – the one item for which there is a concrete recommendation above. None of the rest is specialist gear we would have to advise you on here. What really helps is in the list above.
Which camera is generally suited to shooting the night sky is shown in our big guide Astrophotography camera.
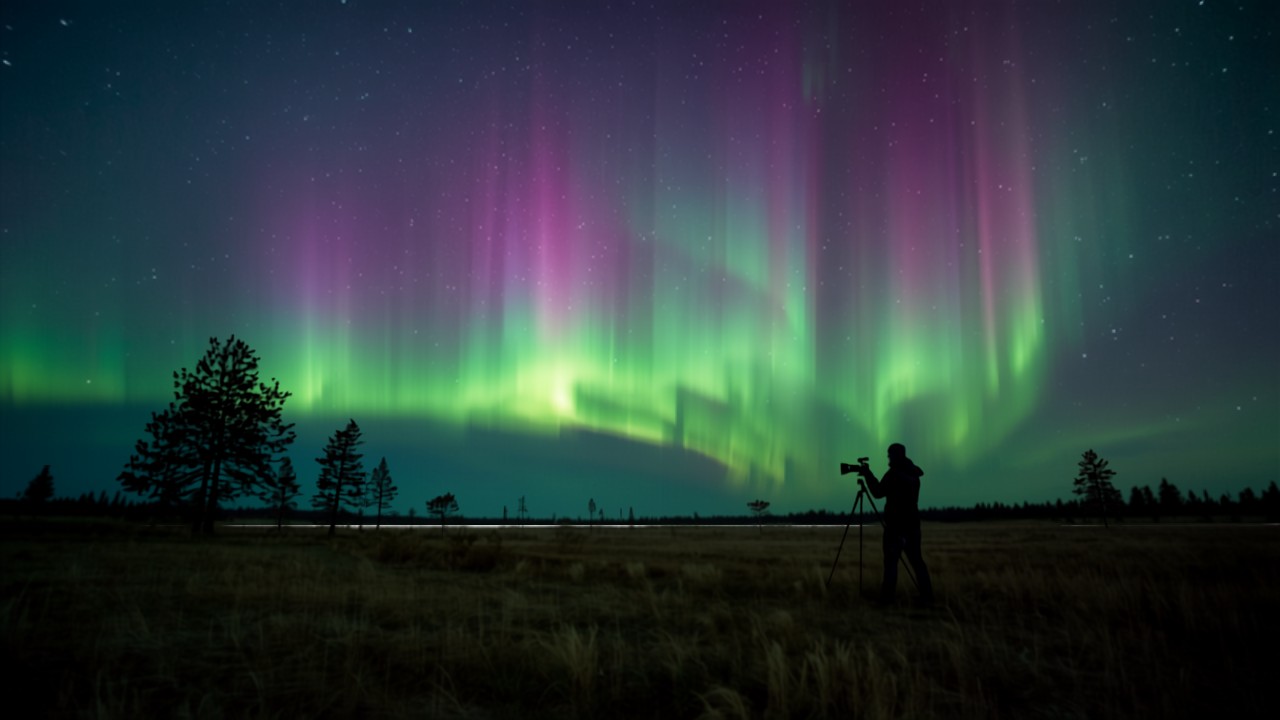
Photographing the northern lights with your phone
Modern smartphones are astonishingly good at night photography – often better than older compact cameras. The key is the night mode: the phone captures many individual frames over several seconds and combines them into a bright, low-noise photo.
iPhone: using night mode properly
From the iPhone 11 onwards, night mode (moon icon top left) activates automatically in the dark. Here’s how to get the most out of it: tap the moon icon and drag the slider to the maximum exposure time – handheld usually 3 seconds, with a tripod or a rested iPhone up to 30 seconds (the iPhone detects on its own that it’s steady and unlocks the longer times). Turn off the flash, choose the 0.5× ultra-wide for plenty of sky, and ideally shoot in ProRAW format (from iPhone 12 Pro) if you want to edit later.
Samsung & Android: night mode or Pro mode
On Samsung Galaxy models (from the S10), the feature is simply called “night mode” – when rested steadily it too exposes automatically for longer. The Pro mode offers even more control (on top models the “Expert RAW” app as well): there you set ISO, exposure time and focus manually. Similar Pro modes are also found on Google Pixel (“astrophotography mode” – it activates automatically in night sight on a tripod), Xiaomi and other manufacturers.
| Setting (Pro mode) | Recommended value |
|---|---|
| ISO | 800–3200 |
| Exposure time | 2–10 seconds |
| Focus | Manual, at infinity (∞) |
| White balance | 3500–4500 kelvin |
| Format | RAW (if available) |
| Flash & HDR | Off |
More basics and tricks for night shots with your phone can be found in our guide Smartphone astrophotography.
Camera settings for DSLR & mirrorless
With a “proper” camera you have full control – and considerably more headroom for large-format prints. Switch to manual mode (M) and start with these values:
| Setting | Starting value | Adjustment |
|---|---|---|
| Aperture | f/2.8 (or the widest) | As wide as possible – every bit of light counts |
| ISO | 1600–3200 | For bright auroras drop to 800, for faint ones up to 6400 |
| Exposure time | 3–5 seconds | Fast-dancing bands: 1–3 s · faint glow: 10–15 s |
| Focus | Manual, at infinity | Focus in Live View on a bright star |
| White balance | 3500–4500 K | Adjustable afterwards when shooting RAW |
| Format | RAW | Maximum headroom for post-processing |
| Image stabiliser | Off | On a tripod it can paradoxically create blur |
Pro tip – the 500 rule: So that stars appear as points and not as trails, divide 500 by your focal length (full-frame equivalent). Example: at a focal length of 20 mm, a maximum of 500 ÷ 20 = 25 seconds is possible. For auroras you generally stay well below that anyway, otherwise the structures of the light bands blur.
Location and timing: half the battle
The best photo setup is useless in the wrong place. Three factors decide between success and frustration:
- A clear view to the north: in Central Europe, auroras almost always appear on the northern horizon. Look for an elevated spot with no trees, houses or towns to the north – coastlines, country tracks or hills are ideal.
- Dark sky: the less light pollution, the more you see. Even 20–30 km of distance from the nearest city makes a huge difference. A light-pollution map helps with the search.
- Good timing: watch the aurora forecast (Kp index) with apps like My Aurora Forecast or the alerts from specialist aurora archives. The best hours are usually between 10 p.m. and 2 a.m. Moonless nights or a half moon are ideal – a full moon outshines faint auroras.
Step by step: how an aurora night unfolds
- Beforehand: scout the location in daylight, charge the batteries, pack warm clothing (you’ll be standing still for hours!).
- Setup: set up the tripod firmly, point the camera north, choose the wide-angle.
- Focusing: in Live View, magnify a bright star as much as possible and focus manually – then don’t touch the focus again.
- Test shot: take an image with the starting values from the table and check it on the display (watch the histogram, not just the brightness).
- Adjust: too dark? Raise the ISO or exposure time. Structures blurred? Shorten the exposure time.
- Composition: include a foreground – trees, a lake with a reflection or a silhouette turn a sky photo into an image with a story.
- Don’t forget to enjoy: put the camera aside now and then. A strong aurora over Central Europe isn’t something you experience every week!
Post-processing: the finishing touch
From RAW files you can extract considerably more with just a few steps: fine-tune the white balance, gently raise contrast and clarity, apply noise reduction sparingly. Free apps like Snapseed (phone) or programs like Darktable and Lightroom are perfectly sufficient for this. Important: boost the colours only moderately – the camera already shows more than the eye saw, and oversaturated aurora photos quickly look unnatural.
Want to dive deeper and photograph the Milky Way, the Moon and deep-sky objects too? Then our overview Astrophotography for beginners is the right next step.
Frequently asked questions about photographing the northern lights
Can you photograph the northern lights with a phone?
Yes – any smartphone with a night mode (iPhone from the 11, Samsung from the S10, Google Pixel from the 3) can capture the northern lights. What matters is a stable rest and an exposure time of several seconds. The phone camera often shows more colour than you see with the naked eye.
Which ISO setting for the northern lights?
Start with ISO 1600–3200. For bright, active auroras you can go down to ISO 800 (less noise); for a faint glow up to ISO 6400 is needed. Basic rule: as much as necessary, as little as possible.
Why does the camera see more than the eye?
At night the human eye sees mainly with the colour-insensitive rods – faint auroras therefore appear grey. A camera sensor, by contrast, collects light over several seconds and registers the green and red hues that escape the eye.
Which app forecasts the northern lights?
My Aurora Forecast and Aurora Alerts have proven their worth, as have the alerts from specialist aurora archives. The decisive factor is the Kp index: from Kp 7, the chances are good in central and southern Central Europe too.
Do you absolutely need a tripod?
For sharp photos: yes. With exposure times of several seconds, any handheld shot comes out blurred. But you can improvise: lean the phone against a wall, place the camera on a car roof with a jacket underneath – the main thing is absolute stillness.
When can you photograph the northern lights in Central Europe?
In principle on any clear, dark night with high solar activity – most often around the equinoxes in spring and autumn. Everything about visibility, the Kp index and forecasts can be read in our guide Northern lights.