By Alexander Merz · Updated on · Details checked on 14 September 2026
You won’t take your first astrophoto with a 2,000-euro rig – but with the device in your pocket. Smartphone astrophotography delivers astonishing results in 2026: Milky Way panoramas in night mode, close-ups of the Moon through a telescope, star trails over your own patio. In this guide you’ll learn step by step how to photograph the stars with your smartphone – from the right settings to location and timing, all the way to post-processing. And because not every subject is equally hard, you’ll get an honest roadmap in three levels: from 0 euros in extra cost to a telescope upgrade.
- What is really possible with a smartphone
- Gear: what you really need
- Level 1: just the smartphone – settings & night mode
- Location and timing
- Level 2: smartphone + telescope (digiscoping)
- Stacking and post-processing
- Level 3: when you want more
- Fixing typical mistakes
- Frequently asked questions
What is really possible with a smartphone
Before you set out, an honest reality check helps: a phone camera has a tiny sensor and a fixed wide-angle lens. That’s ideal for large-area subjects such as constellations or the Milky Way – and limited for anything small and far away. The good news: with the right approach (and, if needed, a telescope as a “telephoto lens”), you cover an astonishing amount. A special case with its own rules is the aurora, by the way – for that we have a dedicated guide: Photographing the aurora with phone & camera.
| Subject | Difficulty | What you need |
|---|---|---|
| Moon (wide angle in a landscape) | Easy | Just the smartphone |
| Constellations & starry sky | Easy | Tripod + night mode |
| Star trails | Medium | Tripod + long exposure / app |
| Milky Way | Medium | Tripod + dark sky + RAW |
| Lunar craters in close-up | Medium | Telescope + smartphone adapter |
| Jupiter, Saturn & co. | Demanding | Telescope + adapter + video stacking |
| Deep sky (nebulae, galaxies) | Borderline | Tracking or smart telescope |
Four of the seven subjects work without a telescope, three do not. If you are missing the instrument for the lower half of the table, our beginner’s guide is the most honest starting point: it says which aperture belongs to which budget. For the last row, the shorter route runs through smart telescopes.
The gear: what you really need
The basic kit to get started costs less than a pizza with a drink – what matters is stability, not electronics:
- Tripod with a smartphone mount – with exposure times of 10–30 seconds, any handheld shot is doomed to fail. A mini tripod is enough; at a pinch, lean the phone against a rock or rest it on a wall.
- Remote or self-timer – even tapping the shutter blurs the image. Use the 3-second timer or a Bluetooth remote.
- Power bank – long exposures and cold nights drain the battery twice as fast.
- Red-light headlamp – white light destroys your dark adaptation for up to 30 minutes. A model with a switchable red mode such as the Omegon LED Headlamp (red/white) costs € 14.90.
- Optional: smartphone adapter for the telescope – the game changer for Moon and planets (more on that in Level 2). Concretely: Omegon Smartphone Adapter 25–48 mm for € 14.90.
Level 1: just the smartphone – photographing stars without accessories
Modern night modes (from the iPhone 11 or comparable Android flagships onwards) automatically stack many short exposures into one low-noise composite image. That’s how the Milky Way, constellations and star trails succeed: phone on the tripod, night mode on, let it expose for 10–30 seconds – done. A dark sky is a prerequisite (keyword: light pollution). Anyone who wants more control switches to pro or manual mode:
The right camera settings
| Setting | Recommendation |
|---|---|
| Focus | Manual to infinity (∞) – autofocus fails in the dark. Alternatively focus on a bright star. |
| Exposure time | 10–30 seconds. From about 15 seconds on, stars turn into streaks due to Earth’s rotation – for point-like stars, stay shorter. |
| ISO | 800–3,200. Higher = brighter, but more noise. Better to stack several images than to max out the ISO. |
| White balance | Daylight (approx. 3,800–5,000 K) instead of auto – this keeps star colours natural. |
| Format | Enable RAW / ProRAW / Expert RAW – the digital negative is far more forgiving in post-processing. |
| Shutter release | 3-second self-timer or Bluetooth remote. |
| Lens | Use the 1x main camera – it has the largest sensor. Avoid digital zoom. |
iPhone, Pixel or Samsung?
Manufacturers tackle the night differently: on the iPhone, night mode only unlocks the full 30-second exposure once the device detects tripod stability – so the tripod is mandatory, not optional. You enable ProRAW under Settings → Camera → Formats. Google Pixel offers a dedicated astrophotography mode that automatically stacks several minutes of exposure on a tripod. On Samsung, the route is via pro mode or the Expert RAW app with manual exposure control. As a rule: any flagship from the last four to five years is enough to get started.
Location and timing: half the battle
The biggest enemy of smartphone astrophotography isn’t the small sensor, but stray light. Urban light mercilessly outshines faint stars – so head out into the countryside. Certified dark-sky parks such as Westhavelland in Brandenburg, the Rhön or the Eifel National Park offer the darkest skies in Germany; a light-pollution map (e.g. lightpollutionmap.info) shows you dark spots near you. Observatories, too, are often located at usefully dark sites.
Timing is just as important: shoot in the nights around new moon – a bright moon acts like a floodlight in the sky. The centre of the Milky Way is visible from Central Europe roughly from April to October, with peak season from June to August, when the bright core band stands above the southern horizon. Stellarium (free) or PhotoPills help with planning; which objects are worthwhile right now is revealed by our monthly sky preview.
Level 2: smartphone + telescope (digiscoping)
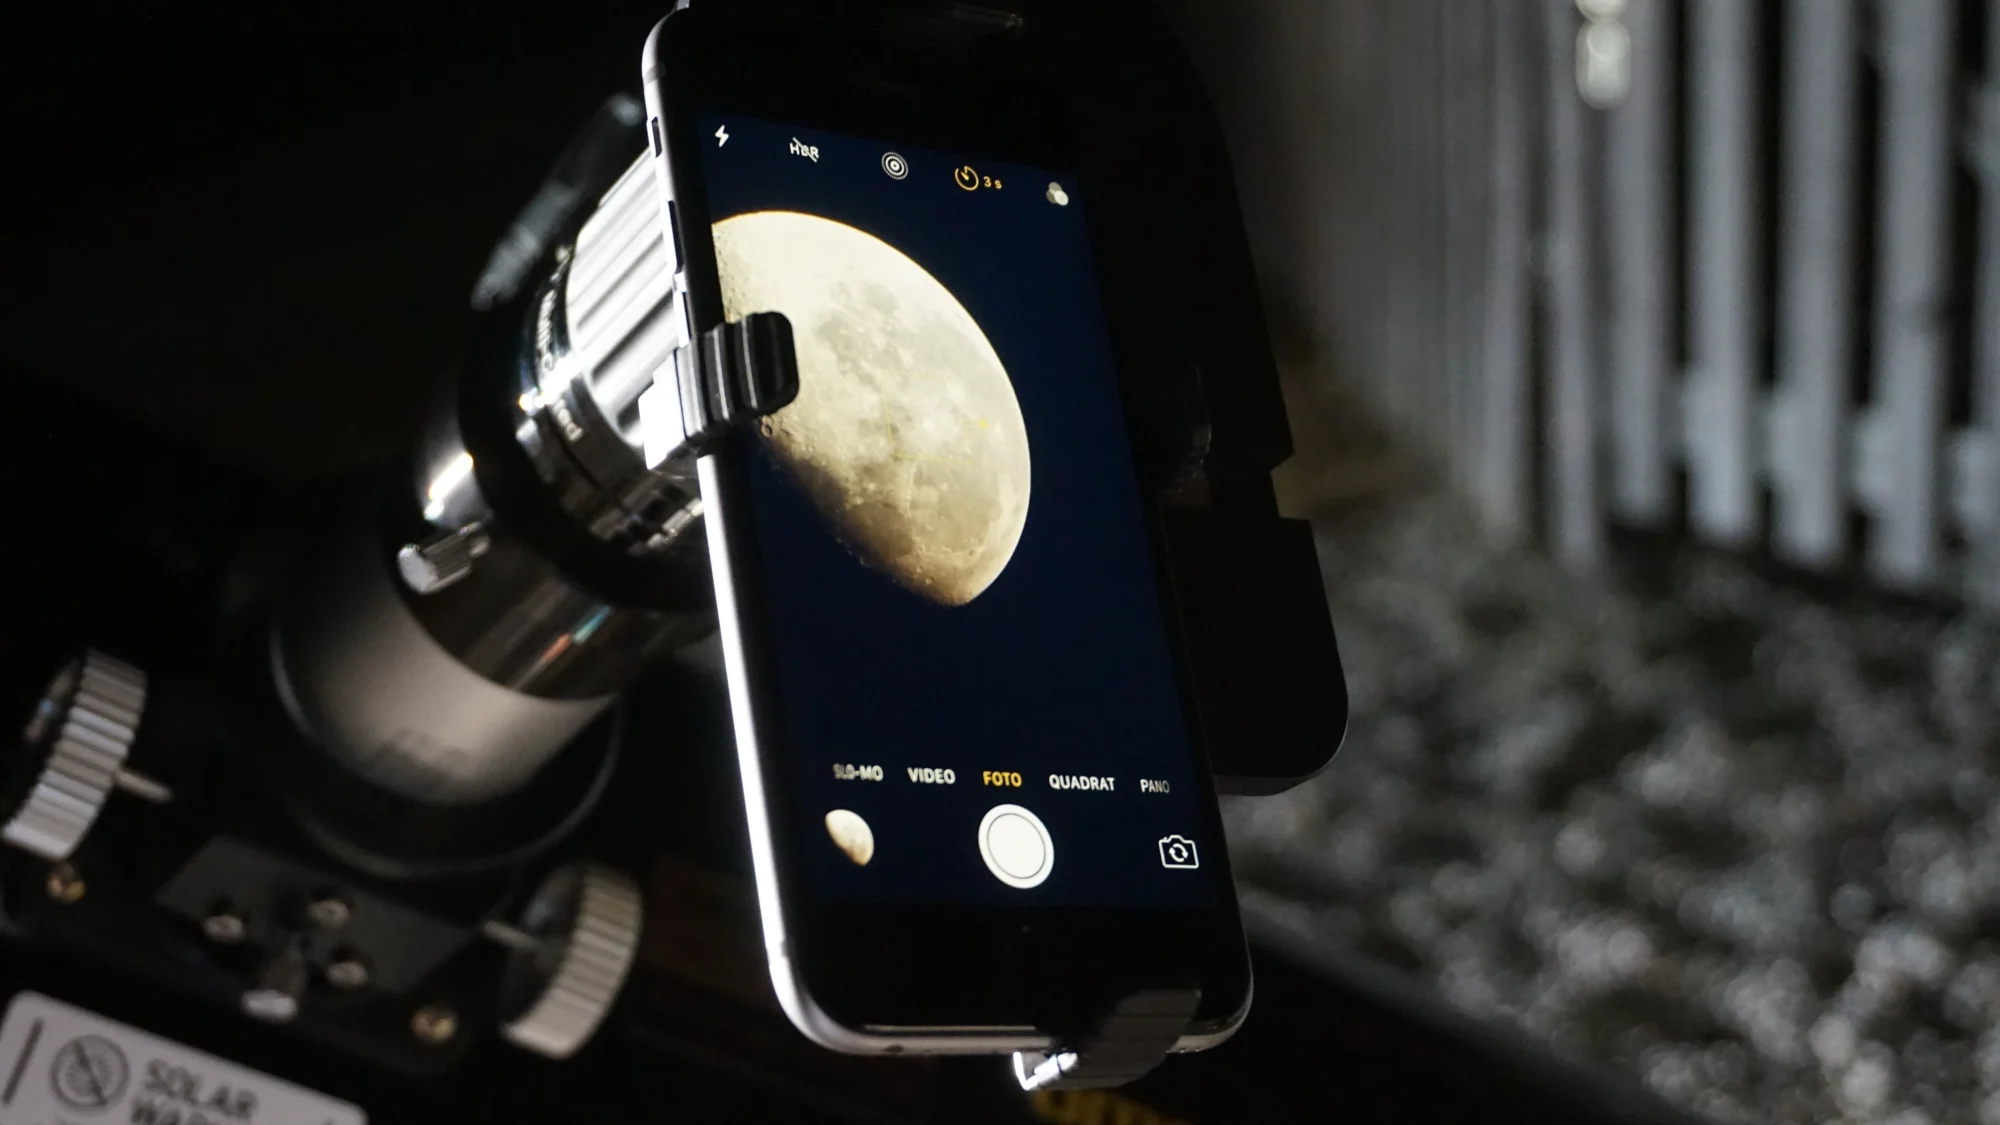
Simply holding the phone camera up to the eyepiece works – but shakily and rarely reproducibly. A smartphone adapter (€ 14.90) clamps the phone exactly centred in front of the eyepiece: this makes lunar craters, sunspots (only with a solar filter!) and the bright planets sharp and repeatable. As a telescope, any beginner instrument from our beginner’s guide is enough.
📱 The smartphone astro gear
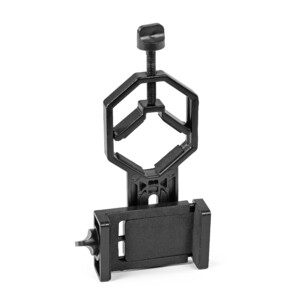 Omegon smartphone adapter 25–48 mm (€ 14.90 ● Currently unavailable (Product can be shipped as of 15.11.2026)) – clamps any phone (25–48 mm wide) exactly in front of the eyepiece – the 15-euro game changer
Check availability* →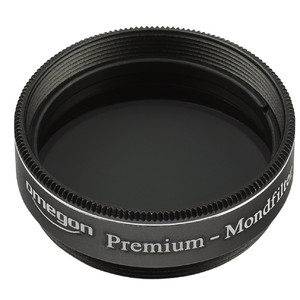 Omegon Premium moon filter 1.25″ ($14.95€ 19.90) – a must for moon shooting: without a filter the Moon outshines every phone camera
Check availability* →
For planet videos and more: planetary photography guide.
Step by step: the Moon through the telescope
- 1. Align the telescope: centre and focus the Moon with an overview eyepiece (e.g. 25 mm) – first with your eye.
- 2. Screw in the moon filter: without a filter, the bright Moon overwhelms the auto-exposure of every phone camera.
- 3. Mount the adapter: align the smartphone camera lens centrally over the eyepiece lens until the image is round and evenly bright.
- 4. Expose manually: low ISO (50–200), short exposure (1/100 s and faster), refine focus with the focuser – not on the phone.
- 5. Burst shots or video: take several shots and pick the sharpest – atmospheric turbulence varies from second to second.
With the same technique, Jupiter with its moons and Saturn with its ring succeed. For real detailed shots (cloud bands, the Cassini division), a planetary camera is worthwhile later – more on that in the planetary photography guide.
Stacking and post-processing: from good to impressive
Single night shots are noisy – that’s the physics of small sensors. The pros’ trick is called stacking: take 5–10 identical shots back to back and layer them via software. The noise averages out, the stars remain. Modern night modes do exactly that automatically; manually it works with apps or on a computer.
The RAW image looks flat on the display at first – no panic, it’s a digital negative. In Lightroom Mobile, Snapseed or the Photos app you bring it out: raise exposure and contrast, lower the shadows (keeps the sky black), increase clarity (makes stars crisp). The “dehaze” slider often works wonders on Milky Way photos – use it sparingly, otherwise it amplifies colour noise. Finally, apply targeted noise reduction without swallowing the fine stars.
Level 3: when the smartphone hits its limits
At some point the phone optics become the limit: deep-sky objects such as the Orion Nebula or the Andromeda Galaxy need tracking and long total exposure. Then two paths lead onward: the classic one – camera, mount and the astrophotography basics – or the convenient one: a smart telescope (for example the DWARF 3 for around $549.00€ 529), which photographs nebulae and galaxies fully automatically and sends the finished images straight to your phone. Strictly speaking, that’s the most consistent form of smartphone astrophotography – which model is worth it is shown by our comparison of the best smart telescopes. Not sure which path suits you? The telescope finder helps in two minutes.
A class above sits the DWARFLAB Draco (€ 1,499), with 90 mm of aperture, a cooled sensor and a built-in guide scope. You do not need it to get from a phone shot to your first deep-sky image, and at 5.5 kg it is not a backpack instrument either; on top of that it only ships from November and nobody has tested it yet.
Typical mistakes – and how to fix them
| Problem | Cause | Solution |
|---|---|---|
| Everything is blurred | Shutter tapped / windy tripod | Use self-timer or remote, weigh down the tripod |
| Stars are streaks instead of points | Exposure longer than ~15 s | Shorten the exposure time or deliberately compose star trails |
| Sky orange instead of black | Light pollution + auto white balance | Find a darker location, set white balance manually to daylight |
| Heavy image noise | ISO too high, only a single shot | Lower ISO to 800–1,600, stack 5–10 images |
| Stars blurry/mushy | Autofocus in the dark | Focus manually to infinity, check on a bright star |
| Moon just a white blob | Auto-exposure overwhelmed | Reduce exposure strongly by hand, moon filter on the telescope |
Frequently asked questions about smartphone astrophotography
Can you really photograph stars with a smartphone?
Yes – any smartphone with a night mode or a manual camera mode can capture constellations and, under a dark sky, even the Milky Way. What matters is a tripod, a dark location and 10–30 seconds of exposure time, not the price of the device.
Which settings do I need to photograph stars with a phone?
The short formula: manual focus to infinity, exposure time 10–30 seconds, ISO 800–3,200, white balance daylight, RAW format on, use the self-timer. You’ll find all the details in the settings table above.
Can I photograph the Milky Way with a smartphone?
Yes, between April and October (best June–August) and at new moon. You need a really dark location away from the cities, a tripod and night mode or 20–30 seconds of manual exposure. Post-processing the RAW image makes the difference.
Can I photograph planets with a smartphone?
Through a telescope with an adapter: yes – Jupiter with its moons and Saturn with its ring succeed. For detailed shots (cloud bands), planetary cameras are better, see planetary photography.
Which apps do I need?
A star-chart app for planning (Stellarium, free, or PhotoPills), the camera app in pro/RAW mode, Snapseed or Lightroom Mobile for editing – and for timing our monthly sky preview.
Do I need an expensive flagship smartphone?
No. A mid-range device with a manual mode already delivers presentable star fields via stacking. Current flagships have larger sensors and better night modes – they make it more convenient, not possible in the first place. Before you invest in a new phone, a 15-euro adapter plus a telescope is a better bet.
Conclusion: start small, come out big
Smartphone astrophotography is the cheapest way into a fascinating hobby: Level 1 costs you only a tripod, Level 2 a 15-euro adapter on the telescope, and if the fever grabs you, smart telescopes and classic astrophotography await. The best time for your first star photo is the next clear, moonless night.