By Alexander Merz · Published on · Details checked on 22 September 2026
A pinhole projector for a solar eclipse (camera obscura) is a dark box or tube with a tiny hole through which the Sun casts its own image onto a white screen. You look at the image, never at the Sun – and the Sun’s image is about 1/108 of the distance between hole and screen.
For the partial solar eclipse on 2 August 2027, a pinhole projector is enough to see the crescent safely – but only if it is long enough. In a shoebox, the Sun is just 3 mm across; a one-metre tube, a colander or a mirror aimed at a wall show far more. “Homemade eclipse glasses”, on the other hand, do not exist: if you want to look directly, you need glasses certified to ISO 12312-2.
Making your own eclipse glasses: why it is dangerous
“How to make eclipse glasses” is one of the most common searches before every eclipse. The honest answer: no household material dims the Sun enough and evenly enough. Certified glasses let through only about one hundred-thousandth of the light and block infrared and UV as well.
- Emergency (space) blanket: the film is unevenly coated, has creases and micro-cracks and lets infrared through.
- Sunglasses, even several stacked: roughly ten thousand times too bright.
- CD or DVD: the coating is wafer-thin and not made for sunlight.
- X-ray film, exposed film, negatives: unknown density, infrared gets through.
- Smoked or blackened glass: the soot is never even, and it rubs off.
- Welding glass: only shade 14 would be sufficient; typical hobby welding masks are below that.
There are exactly two safe ways: glasses certified to EN ISO 12312-2 for looking directly or a projection, where you turn your back to the Sun and look at an image. The pinhole projector is the simplest projection there is – and it costs nothing.
How a pinhole projector works: light path and formula
Every point on the Sun’s disc sends a thin beam of light through the hole. On the screen behind it, these beams add up to an image of the Sun – upside down and mirror-reversed.
The Sun appears to us at an angle of about 0.53 degrees. That gives a simple rule of thumb: image size = distance hole–screen ÷ 108.
The hole itself must not be too large, or the crescent blurs. The ideal hole diameter is roughly 0.037 × √distance (both in millimetres) – so just over 1 mm for one metre.
| Design | Distance | Sun image | Ideal hole |
|---|---|---|---|
| Crisps tube | 23 cm | 2.1 mm | 0.6 mm |
| Shoebox | 33 cm | 3.1 mm | 0.7 mm |
| Moving box | 60 cm | 5.6 mm | 0.9 mm |
| Cardboard tube | 1 m | 9.3 mm | 1.2 mm |
| Long tube | 2 m | 18.5 mm | 1.6 mm |
| Mirror onto a house wall | 5 m | 4.6 cm | mirror 1–2 cm |
| Mirror in a classroom | 10 m | 9.3 cm | mirror 1–2 cm |
Shoebox pinhole projector: instructions in 7 steps
The shoebox is the classic because everyone has one at home. Take the longest box you can find – a boot box beats a children’s shoebox.
| Material | Purpose | Substitute |
|---|---|---|
| Shoebox with lid | dark chamber | moving box, shipping box |
| Aluminium foil (approx. 5×5 cm) | pinhole plate | thin card, drinks can |
| Pin or drawing pin | the hole | fine sewing needle |
| White paper | projection screen | printer paper, baking paper |
| Tape, scissors/craft knife | assembly | parcel tape |
| Black paper or marker | absorb stray light (optional) | dark paint |
- Stick in the screen: glue white paper to the inside of one of the short ends.
- Cut a window: in the opposite short end, cut a square of about 3×3 cm, ideally near the edge.
- Attach the foil: stretch aluminium foil smoothly over the window and tape it down all round.
- Make the hole: press one single, round hole into the middle of the foil with the pin – don’t twist, don’t widen. Target: 0.5 to 1 mm.
- Cut a viewing hole: next to the foil (on the same side or at the side), cut an opening of about 2×3 cm for one eye.
- Seal it: put the lid on and close all gaps with tape. The darker the inside, the more contrast the crescent has.
- Aim it: stand with your back to the Sun, point the foil towards the Sun and tilt the box until its shadow is as small as possible. Then look through the viewing hole at the screen.
On 2 August 2027, the Sun will stand between 37 and 40 degrees high at mid-eclipse (our calculation for Edinburgh to London). You’ll have to hold the box steeply upwards – a tripod, a chair or a wall to lean it against saves you the effort.
Cardboard tube or crisps tube: a pinhole projector with a bigger image
More distance means a bigger image. The best DIY version is therefore a long tube: a poster mailing tube, several kitchen-roll tubes taped together or a tube rolled from card.
- Tube (1–2 m): foil with a hole at the front (1–1.5 mm), a cap with white paper at the back. Cut a viewing window in the side just before the end. Result: a 9 to 18 mm Sun, big enough for a clear crescent.
- Crisps tube: pierce the base with a needle, clamp baking paper under the plastic lid as a screen and wrap the tube in foil. You look from behind at the translucent baking paper. Result: about 2 mm – fun to make, marginal as an observing tool.
- Toilet roll: works on the same principle but shows only one millimetre of Sun at 10 cm length. Good as an intro for children, not for the eclipse itself.
With a tube, daylight falling on the screen next to your head gets in the way. A dark cloth over your head and the viewing window works like it did for old large-format photographers and practically doubles the contrast.
Colander, perforated sheet and leaf shadows: pinholes without crafting
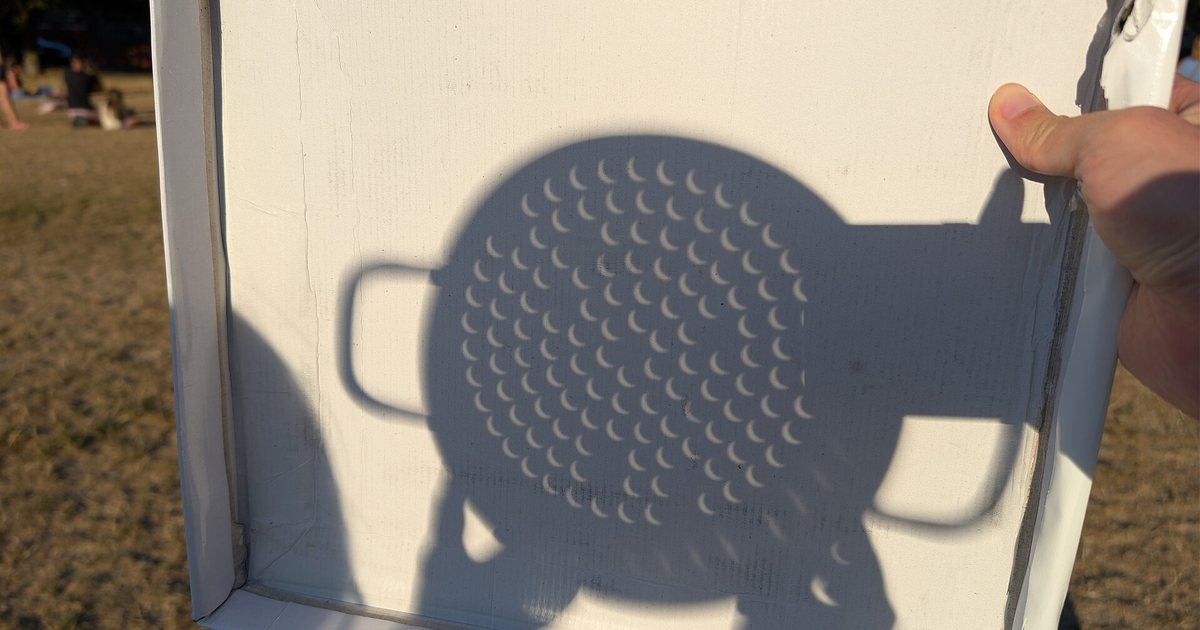
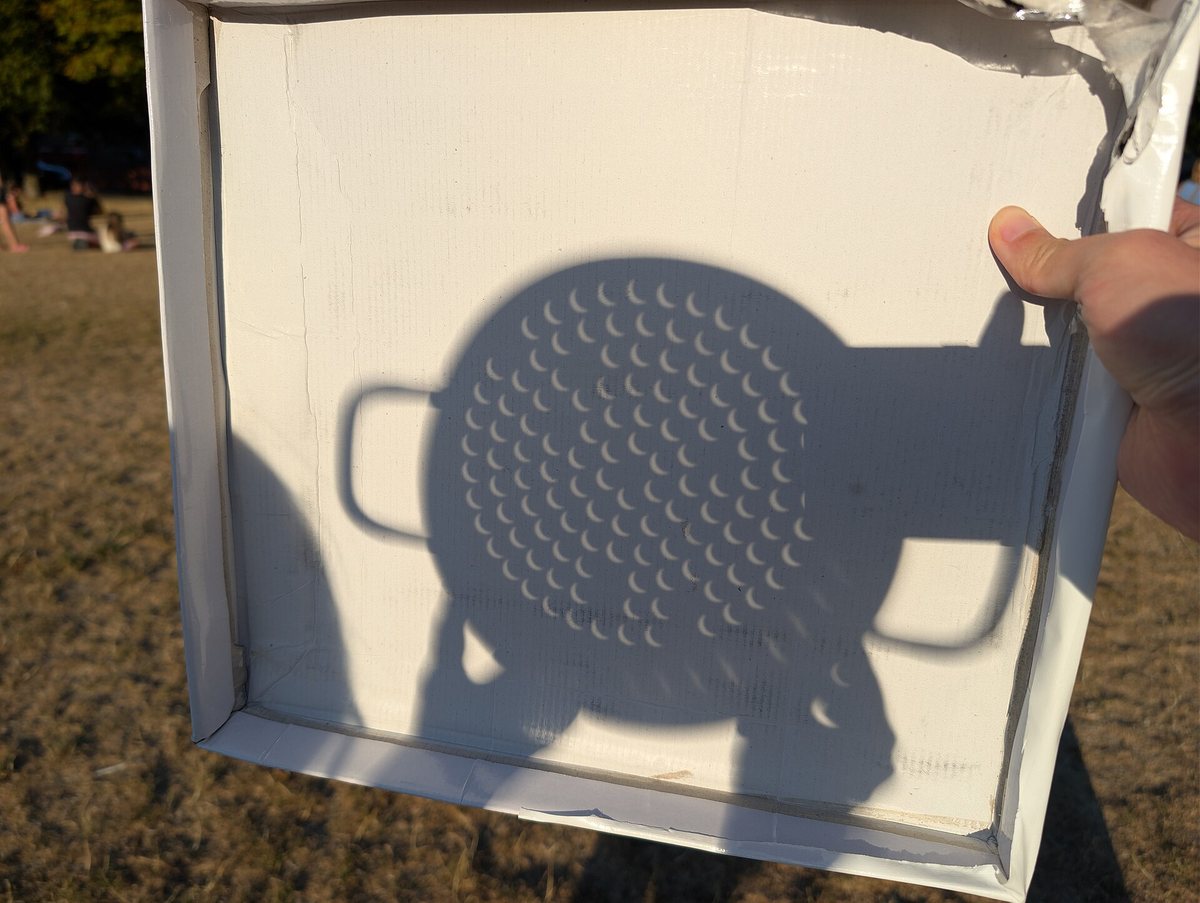
Every small hole is a pinhole projector. A colander, a skimmer or a perforated metal sheet projects dozens of crescents at once – no box needed.
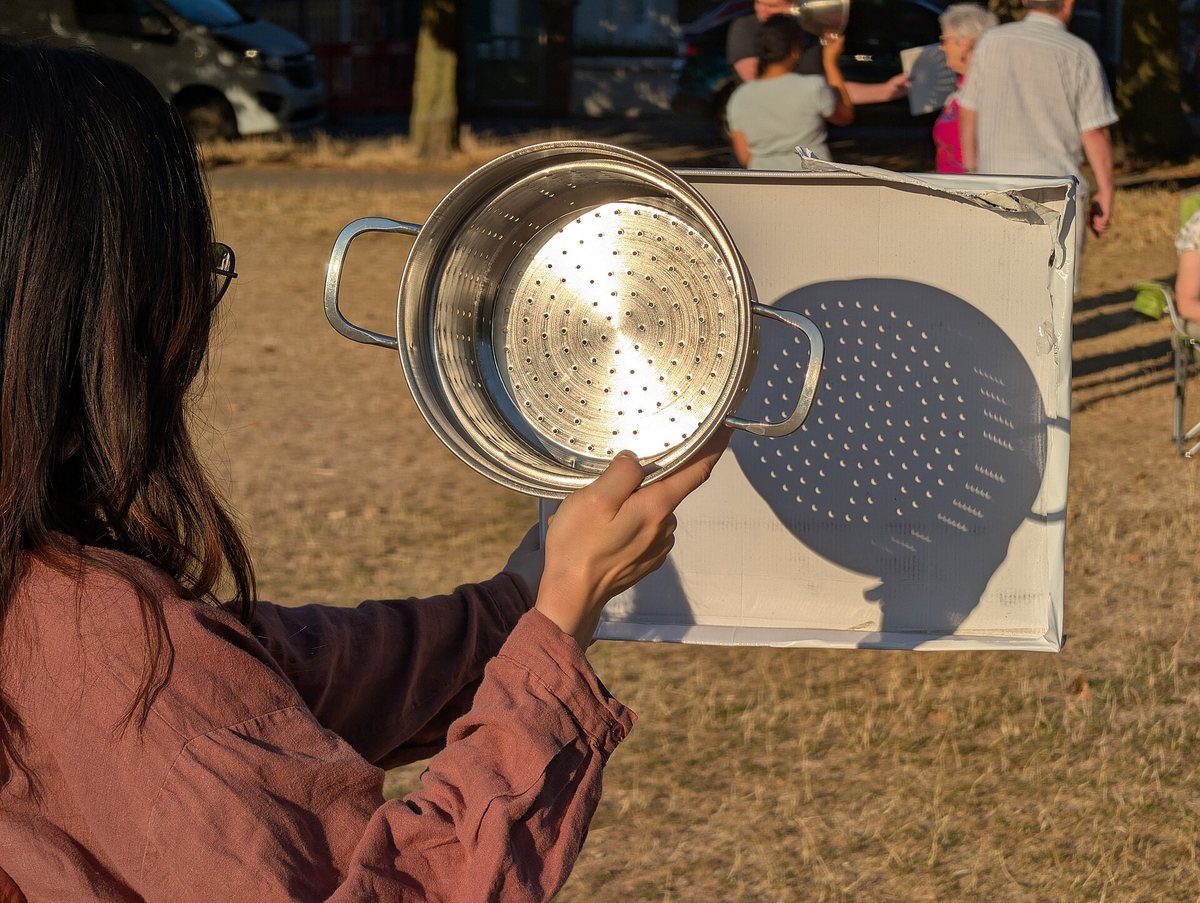
- Colander: hold card or paper about a metre below the colander. The further away, the larger and fainter the crescents.
- Homemade punched message: prick a pattern or a name into card with a needle – during the eclipse, every letter is made of little crescents. A lovely photo for school.
- Leaf shadows: the gaps between leaves act as pinholes. Under a leafy tree, hundreds of crescents appear on the ground, best on light-coloured paving.
- Finger grid: cross the fingers of both hands – the gaps project small crescents onto the ground.
Mirror projection: the largest Sun image for groups
Mirror projection turns the principle around. A small mirror throws a Sun image onto a shaded wall, and the mirror acts as the hole: the further away the wall, the larger the image.
- Mask the mirror: cover a pocket or make-up mirror with paper so that only a circle of 1 to 2 cm stays free.
- Set it up: place the mirror in the sunlight, for example on a windowsill or stuck in modelling clay, and direct the spot of light onto a shaded, light-coloured wall.
- Choose the distance: at 5 m the Sun is a good 4.5 cm across, at 10 m over 9 cm – enough for a whole class to watch at the same time.
Pinhole projector with children and at school: a project for 2 August 2027
The pinhole projector is the ideal project for children because nobody has to look at the Sun. 2 August 2027 is a Monday during the school summer holidays – but the projector can be built in class well before the break.
- Check the formula: children build projectors 30, 60 and 100 cm long, measure the Sun image and check whether distance ÷ 108 holds.
- Draw the crescent: trace the crescent on the screen every ten minutes – that creates a record of the whole eclipse.
- Explain the upside-down image: why is the crescent the wrong way round on the screen? The diagram above gives the answer.
If the children want to keep going, our guide to the best telescope for kids explains which instrument is worth it. Supervision remains a must: small children like to take “just a quick look” upwards through the hole.
For the class and family: Omegon Solar Eclipse Glasses Solar Safe, pack of 5
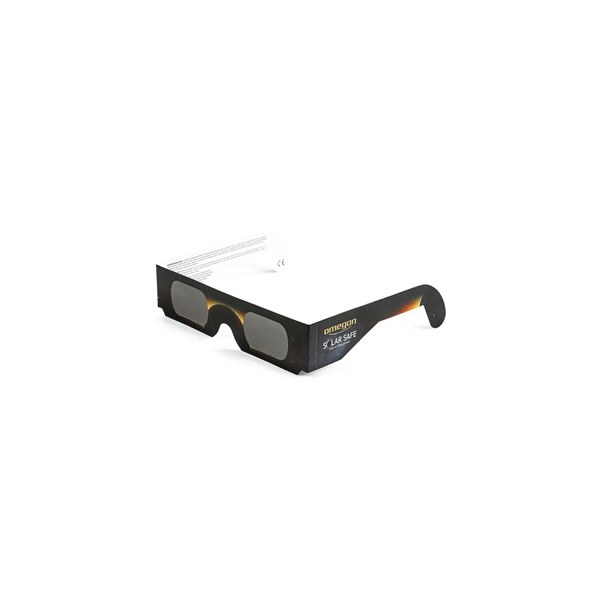
Five certified ISO 12312-2 glasses: the pinhole projector shows the image, the glasses allow a direct view. In a group every child needs their own pair – shared glasses tempt people to look without protection.
Price: € 20
When you’ll need the pinhole projector in 2027: times and coverage
In the UK, the eclipse runs on the morning of 2 August 2027, from roughly 9:00 to 11:00 BST. The further south you are, the thinner the crescent becomes.
| Place | Start | Maximum | End | Coverage | Sun altitude |
|---|---|---|---|---|---|
| London | 09:03 | 10:00 | 10:59 | 41.9 % | 40° |
| Cardiff | 09:01 | 09:57 | 10:56 | 42.2 % | 38° |
| Manchester | 09:06 | 09:59 | 10:55 | 35.2 % | 38° |
| Edinburgh | 09:11 | 10:00 | 10:51 | 27.3 % | 37° |
Even in Edinburgh, with just over a quarter of the Sun covered, the crescent is recognisable in a long pinhole projector, in southern England the Moon covers about two fifths of the Sun. The totality zone over southern Spain and North Africa is covered on our page about the solar eclipse of 2 August 2027.
Pinhole projector or eclipse glasses: what you really need
The pinhole projector shows the eclipse, the glasses show the sky. Best of all is both together: the projector for the shared image and the measurement, the glasses for a look at the real Sun.
| Method | What you see | Cost | For whom |
|---|---|---|---|
| Pinhole projector, colander | small Sun image, crescent visible | 0 € | children, school, spontaneous |
| Mirror projection | large image on the wall | 0 € | groups, classroom |
| Eclipse glasses ISO 12312-2 | ⭐ Our recommendationthe real Sun with the naked eye | € 5 | anyone who wants to look |
| Solar filter film OD 5.0Solar filter film OD 5.0 | crescent and sunspots magnified | $36.00€ 40 | binocular and telescope owners |
For looking directly: Omegon Solar Eclipse Glasses Solar Safe
Certified to ISO 12312-2 – the only safe way to look at an eclipsed Sun with the naked eye. A few euros only, so there is no reason to improvise: buy several for the whole family.
Price: € 5
How to point binoculars or a telescope with filter film at the Sun safely is explained in our guide observing the Sun safely. Important: the filter always goes on the front opening, and a pinhole projector can never be combined with binoculars.
Frequently asked questions about pinhole projectors during an eclipse
How big should the hole in a pinhole projector be?
For a shoebox, 0.5 to 0.7 mm is enough, i.e. one clean pinprick. For a one-metre tube, just over 1 mm is ideal, for two metres about 1.6 mm. A hole that is too large makes the image bright but blurry.
Can I look straight at the Sun through the hole?
No, never. The hole does not dim sunlight, it only focuses it into an image. You look exclusively at the screen inside the box, with your back to the Sun.
Why do I only see a tiny dot in my pinhole projector?
Because the Sun image measures only one 108th of the distance. In a 30 cm box that’s 3 mm. The fix is a longer tube, a colander held a metre away or mirror projection.
Does a camera obscura work when it’s cloudy?
Only if the Sun casts a shadow. With thin veil clouds the image gets fainter; under complete cloud cover you see nothing. Then only a livestream will help.
Can I photograph the crescent in the pinhole projector?
Yes: photograph the screen through the viewing hole, or the colander pattern on the card. Don’t point your phone at the Sun itself, as that harms the sensor.
Is welding glass suitable as eclipse glasses?
Only shade 14, and few people have that at home. Typical DIY welding masks are below it and too bright. Certified eclipse glasses cost a few euros and are the safer choice.
Read more
- Solar eclipse on 2 August 2027: times and coverage
- Observing the Sun safely: filter, film or smart telescope
- Looking back: the solar eclipse of 12 August 2026
- Telescope filters: what is useful
Links marked with * are affiliate links. If you buy through them, we earn a small commission – the price stays the same for you.