By Alexander Merz · Updated on
A light microscope is an optical instrument that magnifies tiny things up to about 1000x using two lens systems – the objective and the eyepiece. It’s made up of 13 parts that fall into three groups: optics, mechanics and illumination.
The most important formula fits on a single line: total magnification = objective × eyepiece, for example 40 × 10 = 400x.
Parts of a microscope labeled: all 13 parts at a glance
The diagram shows a classic compound light microscope from the side, the kind you’ll find in almost every biology classroom. Compound light microscopes use transmitted light: the light comes from below and shines through the specimen.
The table explains for each number what the part does – in one sentence each. That way you can study without reading an entire chapter.
| No. | Part | Function |
|---|---|---|
| 1 | Eyepiece (ocular) | The lens you look into, which magnifies the intermediate image once more like a magnifying glass (usually 10x). |
| 2 | Body tube | The tube between eyepiece and objective that keeps the right distance and blocks stray light. |
| 3 | Revolving nosepiece | The rotating disc you turn to switch between objectives until it audibly clicks into place. |
| 4 | Objectives | The lens systems right above the specimen that create the first, magnified image (e.g. 4x, 10x, 40x). |
| 5 | Stage | The flat platform with a hole in the middle where the glass slide sits. |
| 6 | Mechanical stage with clips | Holds the slide in place and moves it forward, back, left and right with millimeter precision using two knobs. |
| 7 | Condenser | A lens under the stage that focuses the lamp’s light onto the specimen. |
| 8 | Diaphragm (iris diaphragm) | Controls how wide the cone of light opens, and with it brightness, contrast and depth of field. |
| 9 | Illuminator | The lamp in the base (usually LED today) that shines light up through the specimen. |
| 10 | Coarse focus knob | The large knob that quickly moves the stage or tube up and down to bring the image roughly into focus. |
| 11 | Fine focus knob | The small knob for precision work, used to focus exactly at high magnification. |
| 12 | Arm | The curved frame that supports the optics and stage – and where you hold the microscope. |
| 13 | Base | The heavy bottom that keeps the microscope stable and often houses the lamp. |
Label the microscope: printable worksheet
Here’s the same diagram, just without names – for practice and labeling. Write the matching part on each line, then check your answers against the table above.
Studying works best if you first practice the parts along the path of the light: illuminator, diaphragm, condenser, stage, objective, body tube, eyepiece. Then come the parts you touch: focus knobs, arm and base.
Microscope parts in three groups
The 13 parts are easier to remember if you sort them by what they do. The optics magnify, the mechanics hold and move, and the illumination provides light.
| Group | Parts | Job |
|---|---|---|
| Optical parts | Eyepiece, body tube, revolving nosepiece, objectives | Create and magnify the image |
| Mechanical parts | Stage, mechanical stage, coarse focus, fine focus, arm, base | Hold and move the specimen, focus |
| Illumination | Illuminator, condenser, diaphragm | Light the specimen evenly from below |
Optical parts: eyepiece, body tube, objectives
The objective does the real work: it sits just a few millimeters above the specimen and creates the first magnified image. The stronger it magnifies, the longer it usually is and the closer it gets to the slide.
Every objective carries a series of numbers like “40/0.65 160/0.17” – which means 40x, numerical aperture 0.65, tube length 160 mm, cover glass thickness 0.17 mm. We explain the aperture (how much light it gathers) further down; it’s what determines the detail.
The eyepiece is nothing more than a magnifying glass that you use to look at the objective’s image. The body tube keeps both at the right distance so the image forms exactly where the eyepiece is looking.
Mechanical parts: stand, stage, focus knobs
The mechanics make sure the image stays steady and can be finely adjusted. At 400x every vibration becomes visible, which is why good microscopes are heavy and made of metal.
A mechanical stage is especially worth it from about 200x: by then the field of view is so small that pushing the slide with your fingers keeps overshooting the target. By the way, a real microscope is at least about 30 cm (12 in) tall; toy models are noticeably smaller.
Illumination: lamp, condenser, diaphragm
A good image depends on the light: the condenser focuses it exactly on the spot the objective is looking at. Simple models have just a disc with holes instead of a condenser, while mid-range models have an Abbe condenser (named after Ernst Abbe) with an iris diaphragm.
The diaphragm is the most underrated part: close it a little and the image gets more contrast; close it all the way and it turns dark and blurry. You often only see unstained cells such as cheek cells once you close the diaphragm a bit.
How does a microscope work? The light path
A light microscope magnifies in two stages, one after the other: first the objective, then the eyepiece. The path light takes through the instrument is called the light path.
The lamp shines from below, the condenser focuses the light, and it passes through the paper-thin specimen. That’s why specimens have to be thin enough for light to get through – a whole onion won’t work, but a thin layer of its skin will.
The objective creates a real intermediate image in the body tube that is magnified and inverted. The eyepiece magnifies this image once more like a magnifying glass, and your eye sees it as if it were about 25 cm (10 in) away.
How to calculate microscope magnification
Here’s how you calculate total magnification: objective magnification times eyepiece magnification. Both numbers are engraved on the lenses.
| Objective | Eyepiece | Total | Useful up to approx. | What you’ll see |
|---|---|---|---|---|
| 4x (NA 0.10) | 10x | 40x | 100x | Overview: rows of onion skin cells, water fleas, pollen as tiny grains |
| 10x (NA 0.25) | 10x | 100x | 250x | Cell walls, paramecia with their shape, algal filaments |
| 40x (NA 0.65) | 10x | 400x | 650x | ⭐ Everyday school useCell nuclei (stained), chloroplasts in waterweed |
| 100x oil (NA 1.25) | 10x | 1000x | 1250x | Bacteria as dots and rods – only with immersion oil and staining |
400x is the range where school microscopes show the most. The 100x objective needs a drop of immersion oil between lens and cover glass and is really more for advanced users in everyday practice.
With binoculars, by the way, the magnification is the first number in the specs – there it’s just a single number, as you can read in our article on binocular magnification.
Resolution: why more magnification doesn’t show more
What matters for detail isn’t magnification but resolving power – the smallest distance at which two points still appear separate. It depends on the numerical aperture (NA), meaning how wide the cone of light is that the objective takes in.
Light has a wavelength, and that sets a limit: no light microscope resolves anything finer than about 0.2 µm (micrometers, thousandths of a millimeter). Only the best oil objectives with an NA of around 1.4 manage that.
That’s why “1600x” or “2000x” on beginner microscopes is a marketing trick: a stronger eyepiece blows up the same image without adding new details. Viruses (15 to 400 nanometers) always stay invisible in a light microscope.
How to use a microscope: step by step
Many schools require a “microscope license” before the first use – and these ten steps belong in it. Once you’ve got them down, you’ll find any specimen in under a minute.
- Carry it: One hand on the arm, the other under the base.
- Set it up: Place it firmly on the table, route the cord so nobody trips over it, turn on the lamp.
- Lowest objective: Rotate the 4x objective into place until it clicks.
- Insert the slide: Place the slide with the cover glass facing up, secure it with the clips, move the object over the hole.
- Approach from the side: Use the coarse focus knob to reduce the distance between objective and slide – while watching from the side, not through the eyepiece.
- Focus: Now look through the eyepiece and slowly increase the distance with the coarse focus knob until the image appears. Only use the coarse focus knob with the 4x objective.
- Adjust the light: Set the brightness and close the diaphragm until the image has good contrast without getting dark.
- Fine-tune: Bring out the details with the fine focus knob.
- Increase magnification: Move the interesting spot exactly to the center of the view, rotate in the next objective, focus with the fine focus knob only, readjust the diaphragm.
- Clean up: Rotate the lowest objective back into place, remove the slide, turn off the light, put on the dust cover.
Which specimens are good for getting started and how to make them is shown in our guide what to look at under the microscope – from onion skin to hay infusion.
Light microscope vs. electron microscope
Where light reaches its limit, the electron microscope takes over: it works with electron beams instead of light and magnetic fields instead of glass lenses. Ernst Ruska and Max Knoll built the first ones in Berlin in 1931.
| Feature | Light microscope | Electron microscope |
|---|---|---|
| Radiation | Visible light | Electrons |
| Lenses | Glass lenses | Magnetic coils |
| Resolution | approx. 0.2 µm | under 1 nanometer |
| Useful magnification | up to approx. 1000x | over 1,000,000x |
| Specimen | Living or dead, thin, in water | Dead only, dried, in a vacuum |
| Image | In color, live | Black and white (colors added afterward) |
| Visible | Cells, cell nuclei, protozoa, bacteria | Viruses, organelles in detail, molecules |
| Cost | starting in the budget price class | Hundreds of thousands and more |
For school and hobby use, the light microscope is unbeatably practical: you see living creatures moving and in color. The electron microscope, on the other hand, shows structures that are simply too small for light.
Who invented the microscope?
There’s no single inventor: the microscope was created around 1590 in the Netherlands, probably in the workshop of spectacle makers Hans and Zacharias Janssen in Middelburg. This attribution isn’t fully proven, though.
| Year | Who | What |
|---|---|---|
| around 1590 | Hans and Zacharias Janssen | First microscopes with two lenses in a tube (attribution uncertain) |
| 1665 | Robert Hooke | Book “Micrographia”: sees little chambers in cork and calls them “cells” |
| 1670s | Antoni van Leeuwenhoek | Tiny single-lens microscopes up to about 270x; first to describe protozoa and bacteria |
| 1870s | Ernst Abbe and Carl Zeiss | In Jena, Abbe explains the resolution limit and designs objectives scientifically for the first time |
| 1931 | Ernst Ruska and Max Knoll | First electron microscope |
Van Leeuwenhoek is amazing: with a single tiny glass bead, he saw more than his contemporaries did with two lenses. The lenses of the two-lens microscopes of his day were simply not good enough yet.
Microscope and telescope: the same principle
As an astronomy site, we can’t resist: microscopes and telescopes are close optical relatives. Both consist of an objective that creates an intermediate image and an eyepiece that magnifies that image like a magnifying glass.
| Microscope | Telescope | |
|---|---|---|
| Object | Tiny and close | Huge and far away |
| Objective | Very short focal length, a few millimeters | Long focal length, often 700 to 1200 mm |
| Magnification | Objective × eyepiece | Objective focal length ÷ eyepiece focal length |
| Limit | Wavelength of light (approx. 0.2 µm) | Aperture of the objective and atmospheric turbulence |
We explain how this looks in a telescope in detail in our article on how a telescope is built and how it works. Once you understand the parts of a microscope, you’ll understand a telescope in five minutes.
Which microscope for school and home?
For home use, a compound microscope with the parts from our diagram is all you need: a nosepiece with three objectives, mechanical stage, fine focus and LED. Models like these start in the mid-range price class; for younger kids, a stereo microscope is often the better choice.
We present the two models below based on spec sheets and experience from microscopy forums – we haven’t tested them ourselves. More choices and comparisons are in our microscope buying guide, especially for young explorers in our article on the microscope for kids and in our guide to the stereo microscope.
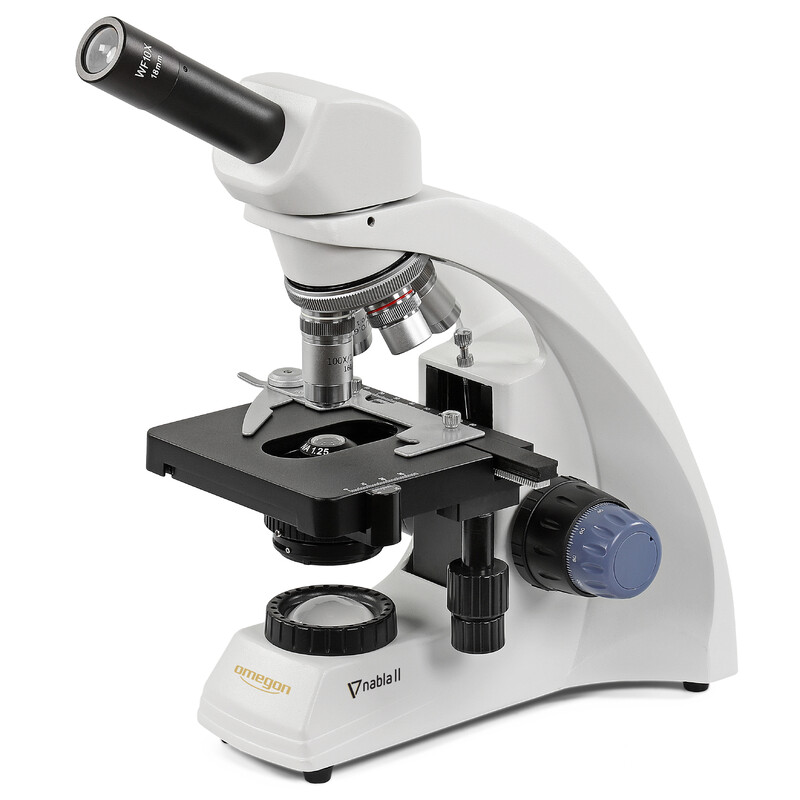
Every part in the diagram: Omegon Nabla II Mono microscope (up to 1000x)
Has everything shown in our diagram: revolving nosepiece with objectives up to 100x oil, mechanical stage with vernier scale (a reading aid for positions), Abbe condenser, coarse and fine focus and LED. Viewing with one eye is more tiring during long sessions than a binocular head.
Price: € 249
With both eyes: Omegon Binofield microscope, 40x–800x (LED)
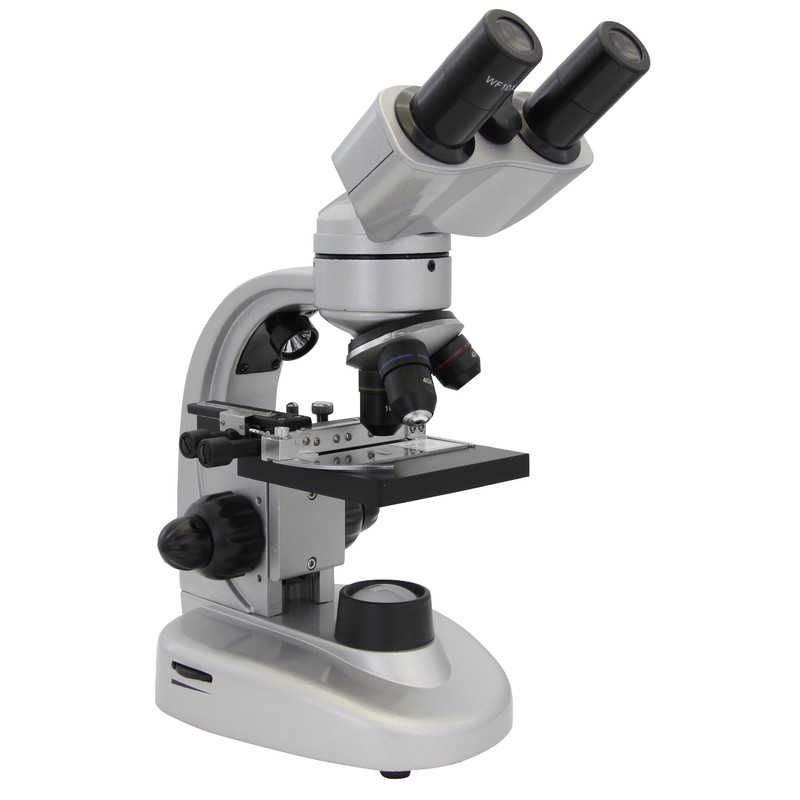
Affordable entry with a binocular head, nosepiece, mechanical stage, coarse and fine focus and a filter wheel with five colors for more contrast. It shows real detail up to about 400x to 650x; the 800x on the box is empty magnification.
Price: € 149
The Omegon Nabla III has illumination designed after August Köhler: an additional field diaphragm at the lamp and a height-adjustable, centerable condenser make sure the field of view is evenly lit and no stray light eats up the contrast. On top of that come DIN achromats from 4x to 100x oil and a condenser with NA 1.25 that makes full use of the oil objective. The extra cost pays off for upper high school, college biology and anyone who really wants to see bacteria and stained cells cleanly – for fifth grade, it’s too much.
For advanced users: Omegon Nabla III Bino microscope (Köhler)
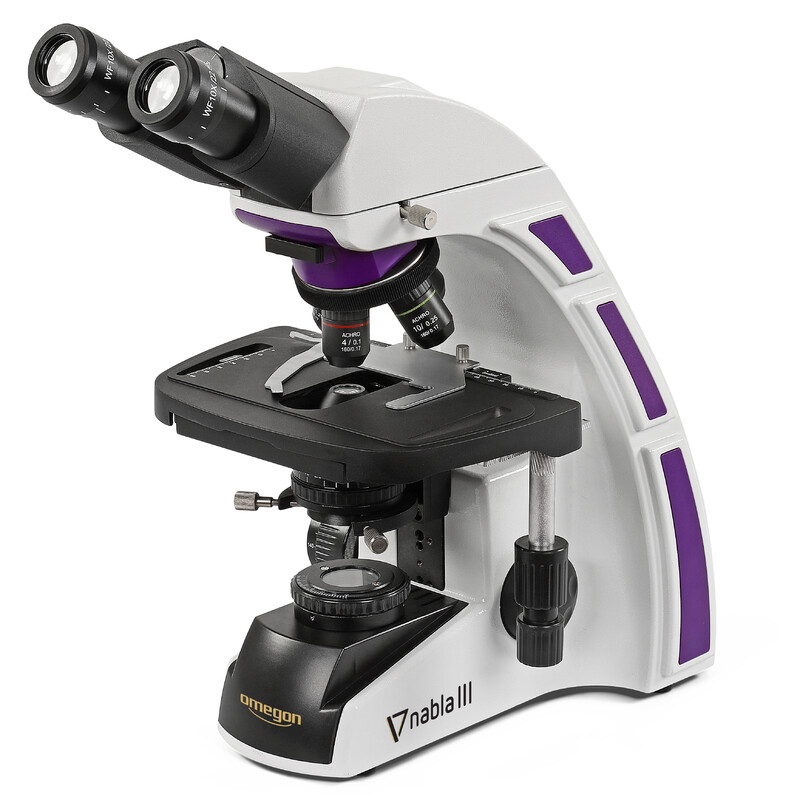
Köhler illumination, DIN achromats from 4x to 100x oil and an NA 1.25 condenser: laboratory standard that handles bacteria and fine cell structures cleanly too.
Price: € 489
Frequently asked questions about the parts of a microscope
What are the parts of a microscope?
A light microscope consists of optical parts (eyepiece, body tube, revolving nosepiece, objectives), mechanical parts (stage, mechanical stage, coarse and fine focus knobs, arm, base) and the illumination (illuminator, condenser, diaphragm). Together that makes 13 parts, which you’ll find in our labeled microscope diagram above.
What does the body tube do on a microscope?
The body tube connects the eyepiece and objective and keeps them at the right distance. The intermediate image that the eyepiece magnifies forms inside it. It also blocks distracting light from the sides.
What is the condenser for?
The condenser sits under the stage and focuses the lamp’s light onto the specimen. Together with the diaphragm, it determines brightness and contrast. Without a condenser, magnifications above 400x are hardly worth it.
What is the difference between eyepiece and objective?
The objective sits close to the specimen and creates the first, magnified image. The eyepiece is the lens at your eye and magnifies that image once more like a magnifying glass. Total magnification is the product of the two.
How do you calculate microscope magnification?
You multiply the objective’s magnification by the eyepiece’s. A 10x objective with a 10x eyepiece gives you 100x, a 40x objective gives you 400x.
Who invented the microscope and when?
The first microscope was created around 1590 in the Netherlands, probably by Hans and Zacharias Janssen. It was made famous by Robert Hooke (1665) and Antoni van Leeuwenhoek (1670s).
Can you see viruses with a light microscope?
No, at 15 to 400 nanometers viruses are too small. The limit of a light microscope is about 0.2 micrometers, or 200 nanometers – for viruses you need an electron microscope. Bacteria, on the other hand, can be seen at 1000x with oil and staining.
How do I make a microscope drawing for class?
Draw in pencil from the side and start with the base and arm, followed by the stage, body tube and optics. Use a ruler to draw the label lines straight out horizontally, without letting them cross. You can use our worksheet above as a template.
Keep reading: Buying a microscope: the guide · What to look at under the microscope · Microscope for kids · Telescope: how it’s built and how it works
Links marked with an asterisk (*) are affiliate links. If you buy through them, we earn a small commission – the price stays the same for you.