By Alexander Merz · Updated on
Microscopy means looking at tiny objects through a microscope, usually magnified 40x to 400x: cells, protozoa, pollen or crystals that stay invisible to the naked eye.
To get started, all you need is a decent student microscope, some glass slides and an onion. Bacteria need 1000x with oil, and viruses always stay invisible.
Under the microscope: what you need and which magnification for cells
For almost every object on this page you need a compound microscope – one where the lamp shines up from below through a thin specimen. Add glass slides (small glass plates for the specimen), cover glasses and a pipette.
For insects, rocks and coins, on the other hand, a stereo microscope is better: it delivers a three-dimensional image at 10x to 40x with light from above. Our overview on buying a microscope helps you figure out which instrument suits you.
The most important question in microscopy is: which magnification do I need for what? Total magnification is objective times eyepiece, so for example a 40x objective times a 10x eyepiece equals 400x.
| Magnification | Objective | What you’ll see |
|---|---|---|
| 40× | 4x | Overview: rows of onion cells, paramecia as darting dots, tardigrades |
| 100× | 10x | Individual cells with cell walls, paramecia with their shape, pollen grains |
| 400× | 40x | ⭐ The working level for cellsCell nucleus (stained), chloroplasts, cytoplasmic streaming, yeast cells, red blood cells |
| 1000× | 100x with oil | Bacteria as dots and rods – only with immersion oil and staining |
So for cells the answer is: 100x to find them, 400x to recognize them. Claims like 1200x or 2000x on the box are empty magnification – the image gets bigger, but not sharper. Why that is, is explained in our guide to the parts of a microscope and how it works.
The best first things to look at under a microscope
The table is sorted by chance of success: work your way through from top to bottom.
| Object | Magnification needed | Method | Difficulty | What you’ll see |
|---|---|---|---|---|
| Prepared slides | 40–400× | Prepared | easy | Ready-stained plant, animal and human tissue |
| Onion skin | 100–400× | Wet mount | easy | ⭐ Our starter tipLong cells like a brick wall, cell nucleus visible with Lugol’s |
| Potato starch | 100–400× | Wet mount | easy | Starch grains with fine layers, blue-black with Lugol’s |
| Waterweed | 400× | Wet mount | easy | Green chloroplasts moving along the cell wall |
| Hair | 40–400× | Wet mount (dry) | easy | Scaly outer layer, color pigments |
| Pollen | 100–400× | Wet mount (dry) | easy | Grains with spikes, pores or air sacs – depending on the plant |
| Yeast | 400× | Wet mount | easy | Oval cells, some with a daughter cell (budding) |
| Cheek cells | 100–400× | Wet mount + stain | medium | Flat, irregular cells with a blue nucleus |
| Hay infusion | 40–400× | Wet mount | medium | Paramecia, rotifers, amoebas |
| Tardigrades | 40–100× | Wet mount or stereo | medium | Eight-legged critters slowly crawling through moss sediment |
| Leaf cross-section | 100–400× | Wet mount (section) | hard | Epidermis, palisade and spongy tissue, stomata |
| Insects, rocks | 10–40× | Stereo | easy | Compound eyes, wing veins, crystal faces in 3D |
| Bacteria (yogurt) | 1000× with oil | Wet mount + stain | hard | Tiny rods and dots, just barely visible |
How to make a wet mount: step by step
A wet mount is a living or fresh object in a drop of water under a cover glass. It only lasts minutes to hours, but it’s ready in two minutes – here’s how it works with onion skin:
- Clean the slide and use the pipette to place a small drop of water in the middle.
- Cut the onion into quarters and break off one of the fleshy layers.
- Peel off the paper-thin skin on the inside with tweezers. A piece of about five millimeters is enough.
- Lay the skin flat in the drop; smooth out any folds with the dissecting needle.
- Set the cover glass at an angle: one edge on the slide so that it touches the drop.
- Slowly lower the cover glass with the needle. That way the water pushes the air ahead of it and no air bubbles are left behind.
- Soak up excess water at the edge with a piece of paper towel.
- Start at 40x, find a good spot, then switch to 100x and 400x.
You can recognize air bubbles as perfectly round rings with a thick black edge – they have nothing to do with cells.
The right tools: Omegon microscopy dissecting kit, 7 pieces
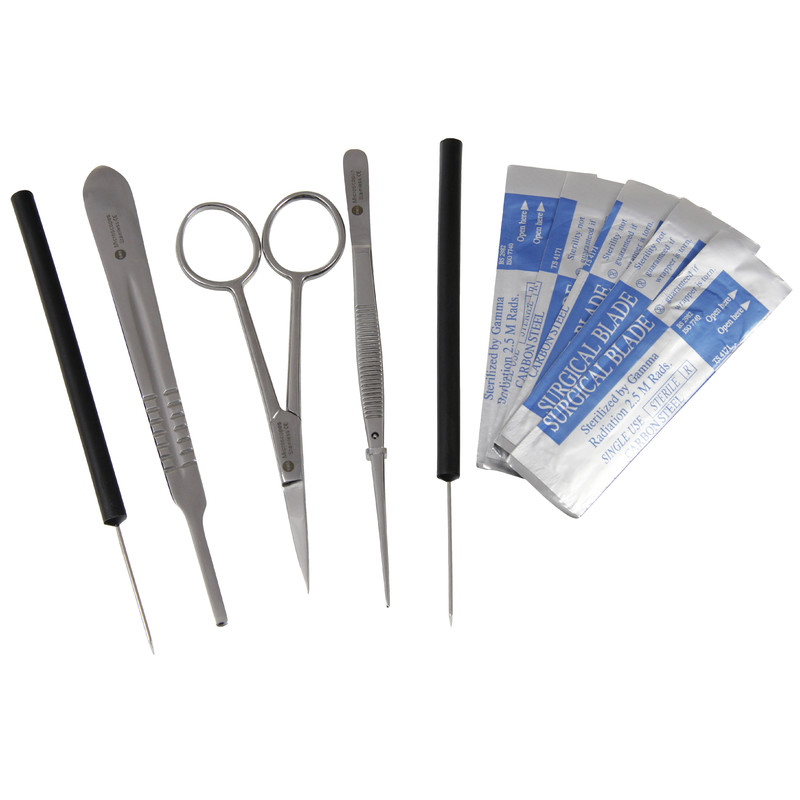
Tweezers, dissecting needles, scissors and scalpel in one case. With fine tweezers you can peel off onion skin cleanly, and with the needle you lower the cover glass without air bubbles – with kids, the scalpel stays in adult hands.
Price: € 29.90
Cells under the microscope: onion, cheek cells, waterweed
These three specimens are the classics from biology class, and for good reason. They show the difference between plant and animal cells at a glance: plant cells have a rigid cell wall, while animal and human cells only have a thin membrane.
Onion cells under the microscope
Onion skin cells are about 0.1 to 0.3 mm long and lie like bricks in a wall. Even at 100x you can see the cell walls as fine lines, and at 400x the nucleus as a small grain.
Unstained, the image looks pale. A drop of Lugol’s iodine stains the nuclei yellowish brown and makes them visible right away – how that works is explained further down in the staining section.
Looking at cheek cells under the microscope
For cheek cells, gently scrape the inside of your cheek with the blunt end of a clean toothpick. Smear what you collect into the drop of water on the slide and put a cover glass on top.
The cells are about 50 to 70 µm in size, flat and irregularly shaped, often lying on top of each other like scattered playing cards. Unstained they’re almost transparent – with methylene blue, the nucleus shows up as a dark blue spot in the middle.
Waterweed under the microscope: chloroplasts and cytoplasmic streaming
A young leaf from the shoot tip of waterweed (Elodea) is only two cell layers thick – you simply lay the whole leaf in a drop of water without cutting anything. At 400x you’ll see dozens of green grains in every cell: the chloroplasts, where photosynthesis takes place.
With a little patience, they start to move. This cytoplasmic streaming carries the chloroplasts in circles along the cell wall, best seen in the elongated cells along the leaf’s midrib. Leave the slide under the lamp for a few minutes and the streaming often becomes more obvious.
Plant cells, pollen and leaf cross-sections
You can simply tap pollen dry onto the slide, for example from a lily or hazel. Every plant species has its own grains – smooth, spiky or with air sacs like those of pines.
A leaf cross-section, on the other hand, is your first real sectioning exercise. Clamp a leaf between two slices of carrot, cut slices as thin as possible with a fresh razor blade and use the thinnest one.
At 100x you’ll then recognize the layers: upper epidermis, densely packed palisade tissue, loose spongy tissue and the lower epidermis. Stomata are easier to find with an imprint: paint the underside of a leaf with clear nail polish, let it dry, peel it off with clear tape and stick it on the slide.
Life in a drop of water: hay infusion, yeast and tardigrades
Cells are fascinating, but what really gets you hooked is what moves – protozoa and tiny animals from hay infusions and moss.
Making a hay infusion: growing paramecia
For a hay infusion, put a handful of hay into about 500 ml (2 cups) of pond or aquarium water. Cover the jar loosely and place it somewhere bright but out of direct sun.
After a few days, a film forms on the surface. After one to two weeks, the larger protozoa show up: paramecia, rotifers and amoebas.
A paramecium is about 180 to 300 µm long and visible at 40x as a darting dot. At 100x to 400x you can make out its slipper shape and the fringe of cilia; a cotton fiber under the cover glass slows down the fast swimmers.
Yeast under the microscope
Stir a pinch of dry or fresh yeast into lukewarm sugar water and wait half an hour. Put a small drop of it under the cover glass.
Yeast cells are about 5 to 10 µm in size, oval and easy to see at 400x. Some have a smaller daughter cell attached: that’s how yeast reproduces, by budding.
Finding tardigrades: soaking moss
Tardigrades, or water bears, are eight-legged animals 0.1 to 1.5 mm long that can survive drying out for years. The best source is dry moss from walls, roofs or tree bark.
Soak a handful of moss overnight in rainwater, then squeeze it out over a shallow dish and search the water at 20x to 40x. Not every sample contains them, but you’ll recognize their clumsy walk right away.
Bacteria under the microscope: what’s realistic
Bacteria are about 0.5 to 5 µm in size – which puts many of them close to the limit of what a light microscope can resolve at all. At 400x you’ll at best see a swarm of tiny dots, and you can’t be sure they’re bacteria.
It only becomes realistic with 1000x, a 100x oil immersion objective and staining. With an oil immersion objective, a drop of special oil sits between the cover glass and the lens so that more light and detail reach the objective.
The easiest sample is plain yogurt: dilute a tiny bit with a drop of water, smear it thinly on the slide, let it dry and stain it with methylene blue. Then you’ll see the rod-shaped lactic acid bacteria; a sample of dental plaque shows a colorful mix of spheres and rods.
Blood under the microscope
What does blood look like under a microscope? Mostly you’ll see red blood cells, round discs about 7 to 8 µm across that look lighter in the middle because they’re thinner there. They have no nucleus; the rarer white blood cells can only be recognized by their lobed nucleus after special staining.
For that you need 400x and a paper-thin blood smear. The safest solution is a ready-made prepared slide that’s already stained and shows all blood cells clearly – before buying a set, check the contents list to see whether a blood smear is included.
Instant success: Omegon prepared slide set, 40 pieces (wooden box)
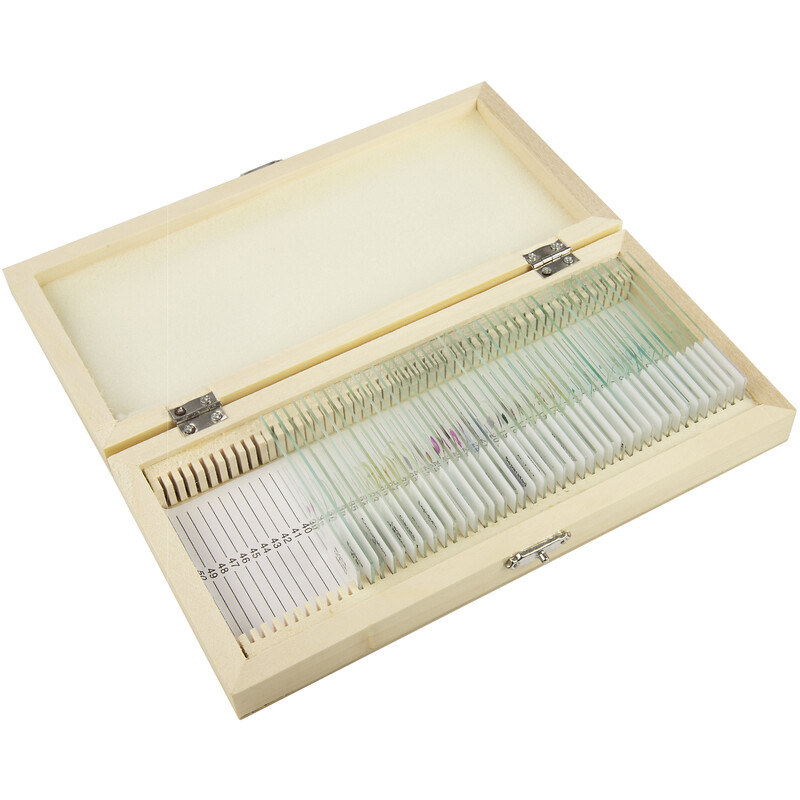
40 ready-made plant, animal and human slides in a wooden box. Ideal for the first evening, when your own slides don't work out yet, and for everything you can't or shouldn't make yourself. The exact list of slides is on the shop page.
Price: € 69
Can you see viruses under a microscope?
No, viruses are fundamentally invisible in a light microscope. They measure only 20 to 400 nm, or 0.02 to 0.4 µm, while a light microscope can only separate structures down to about 0.2 µm, even with the best oil objective.
This limit comes from the wavelength of light, not from the quality of your instrument. Viruses can only be seen with an electron microscope; the colorful virus images in the news are such images, colored in afterward.
Nature under the stereo microscope: insects, hair, sand and rocks
Not everything has to be lit from below. Insects, feathers, flowers, rocks and sand are shown in 3D by a top-lit stereo microscope at 10x to 40x, with no prep at all.
Dead flies from the windowsill, a butterfly wing or a spoonful of beach sand under a microscope are the most rewarding objects for kids, because there’s something to see right away. You’ll find more in our guide to the microscope for kids.
You can look at hair with both types of microscope. In a compound microscope at 100x to 400x, you’ll see the scaly outer layer, which stays hidden under a stereo microscope.
Staining specimens: methylene blue, Lugol’s iodine, eosin
Many cells are almost transparent. A stain binds preferentially to certain parts of the cell and makes them visible – such as the nucleus or starch.
| Stain | Stains | Good for |
|---|---|---|
| Methylene blue | Nuclei blue | Cheek cells, bacteria, yeast (dead cells turn blue, living ones stay light) |
| Lugol’s iodine (iodine-potassium iodide) | Starch blue-black, nuclei yellowish brown | Onion skin, potato starch, leaf cross-sections |
| Eosin | Cytoplasm pink to red | Animal cells, as a counterstain to methylene blue |
The easiest way is the wicking method: place a drop of stain at one edge of the cover glass and hold a piece of paper towel against the opposite edge. The paper draws the stain underneath the cover glass.

Affordable start: Omegon microscopy experiment kit
Glass slides, cover glasses, stains and tools in one box – everything for your first homemade wet mounts. The amounts of stain are on the small side.
Price: € 19.90
The 7 most common beginner mistakes with a microscope
Almost every frustration at the microscope has one of seven causes. Most of them cost nothing but a flick of the wrist once you know them.
- Too much light, diaphragm wide open: Transparent cells vanish in the bright glare. Closing the iris diaphragm on the condenser (the lens under the stage) a little brings back contrast.
- Starting with the 40x objective: At 400x you won’t find anything. Always search with the lowest objective and only then switch up.
- Coarse focus with the 40x objective: The objective runs into the specimen and the cover glass breaks. At high magnification, only turn the fine focus knob.
- Specimens too thick: Only a paper-thin membrane or a thin section lets light through; thick pieces just show color.
- Air bubbles: Black circles aren’t cells. Set the cover glass at an angle and lower it slowly.
- Oil on a dry objective: After oil immersion, never swing the 40x through the drop of oil; remove oil immediately with lens paper.
- Dirty eyepieces: Spots that rotate when you turn the eyepiece are on it – not in the specimen. Clean with a blower and lens paper, never with your sweater.
That’s why the right focusing order is always the same: lowest objective, raise the stage while watching from the side, then slowly lower it while looking through the eyepiece. Which part does what is shown in our guide to the parts of a microscope.
Microscope pictures: taking photos through the eyepiece
You already have the simplest camera for microscope pictures: your smartphone. Hold the phone camera centered and close to the eyepiece until the round image fills the screen, then zoom in digitally a little.
Handheld, the shot quickly gets shaky. A smartphone adapter for eyepieces holds the camera steady and centered – the same technique we describe for the Moon and planets in smartphone astrophotography.
Equipment for microscopy
For every object on this page except bacteria, a compound microscope up to 400x with fine focus and a mechanical stage is all you need. The mechanical stage moves the slide with two control knobs, which is much more comfortable than pushing it by hand from 100x up.
A very affordable way in is the Omegon VisioStar 40–400x for € 99 with top and bottom light. If you want to stick with it, viewing with both eyes is much more relaxed – that’s our pick.
Our pick: Omegon Binofield microscope, 40x–800x (LED)
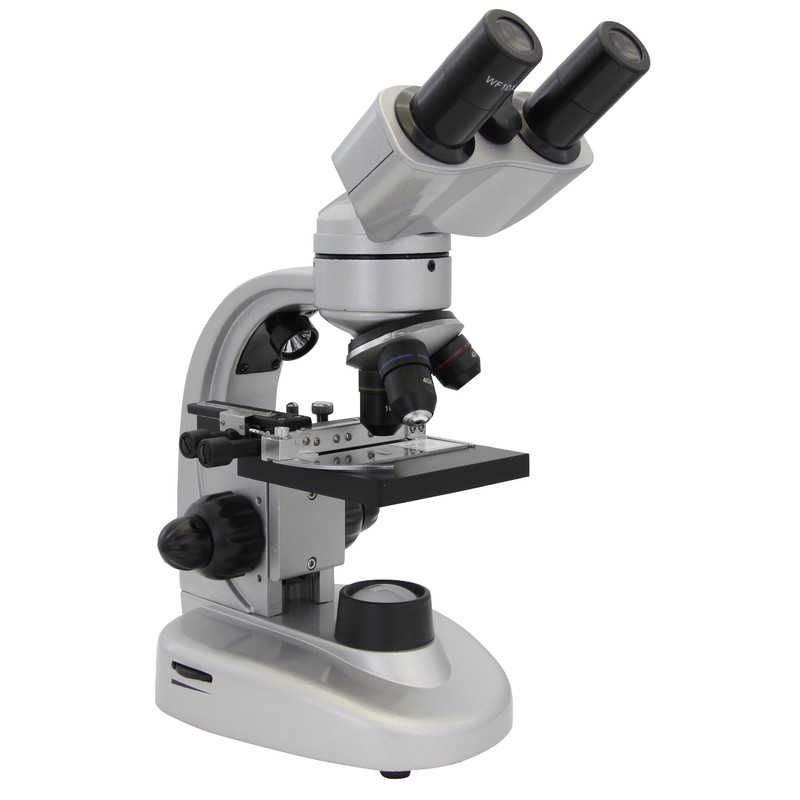
Binocular head for both eyes, coarse and fine focus, mechanical stage and dimmable LED. Usable up to 400x; the 800x at the top end is empty magnification. Just right for onion, waterweed, hay infusion and yeast.
Price: € 149
Consumables run out faster than you’d think. Slides and cover glasses break, get scratched and disappear, so a stock like the Omegon glass slides 26×76 mm (pack of 50) for € 12.90 is worth it.
For reference: Kosmos “Mikroskopieren” (book, German)

The Kosmos book explains preparing, staining and observing, with lots of photos for comparison. Helpful when you want to know whether what you see really is a paramecium – as a supplement to this page, not a substitute for practice.
Price: € 12
If bacteria and finer cell details appeal to you, you need a microscope with an Abbe condenser and a 100x oil objective. The Omegon Nabla II Mono has both, plus a mechanical stage with vernier scale and a finely geared fine focus – the condenser concentrates the light so that enough resolution actually arrives at 1000x. The Omegon Nabla III Bino goes one step further with Köhler illumination and DIN objectives up to 100x oil. The extra cost pays off if you use a microscope regularly and want to go beyond cells; for onion, waterweed and hay infusion it offers hardly any advantage.
For advanced users: Omegon Nabla II Mono microscope (up to 1000x)
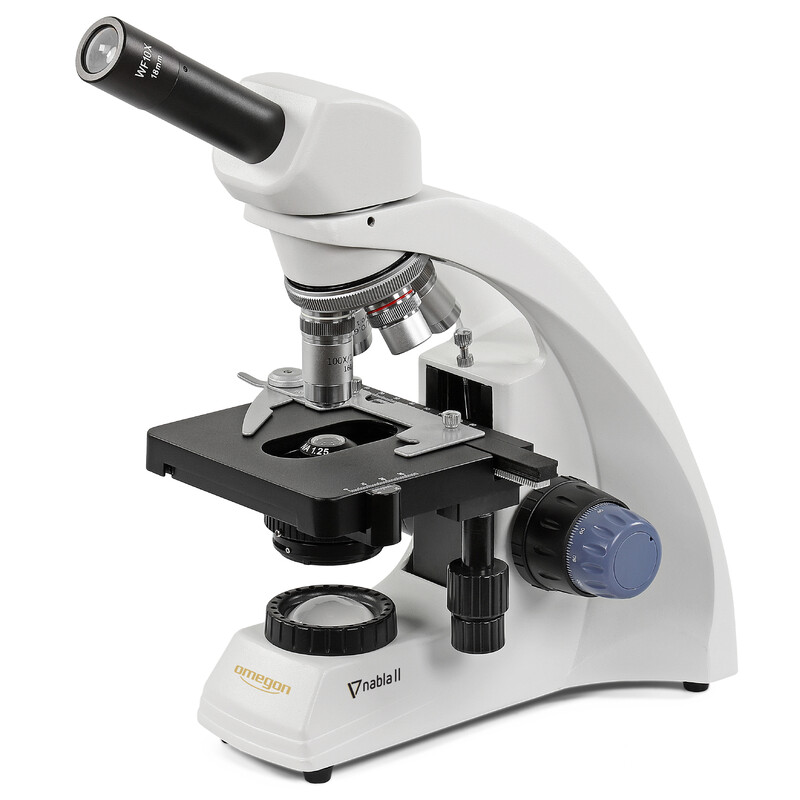
Up to 1000x with Abbe condenser, mechanical stage with vernier scale and geared fine focus – the step from hobby microscope to working microscope.
Price: € 249
Frequently asked questions about what to look at under the microscope
What are good things to look at under a microscope at home?
The most successful are onion skin, waterweed, cheek cells, yeast, pollen and hair. A hay infusion and tardigrades from moss take a bit more patience. For insects, rocks and flowers, use a stereo microscope.
What magnification do I need to see cells?
You’ll find cells at 100x, and you’ll see details like the nucleus or chloroplasts at 400x. You don’t need more for plant and animal cells. Only bacteria require 1000x with an oil immersion objective.
Can you see bacteria and germs with a normal microscope?
With a beginner microscope up to 400x, you’ll see tiny dots at most, and you can’t identify them for sure. Bacteria only become recognizable at 1000x with immersion oil and staining, for example with methylene blue. For that, the microscope needs a real 100x oil objective and a condenser.
Can you see viruses with a light microscope?
No. Viruses are 20 to 400 nm small, but a light microscope only separates structures down to about 0.2 µm. Only an electron microscope shows viruses.
Why do I only see black circles in the microscope?
Those are almost always air bubbles under the cover glass. Set the cover glass at an angle and lower it slowly, and the air escapes. Real cells have thin walls and no thick black edge.
At what age can kids use a microscope?
Stereo microscopes are suitable even for preschoolers, because no prep is needed. Wet mounts usually work from elementary school age with some help. Scalpels, lancets and stains always belong in the hands – or under the supervision – of an adult.
Keep reading: Buying a microscope · Parts of a microscope · Stereo microscope · Microscope for kids
Links marked with an asterisk (*) are affiliate links. If you buy through them, we earn a small commission – the price stays the same for you.