By Alexander Merz · Updated on · Details checked on 14 October 2026
Astrophotography is a sub-genre of photography. Well-known traditional photography genres include nature, landscape, street, portrait, macro and many others. Astrophotography is all about capturing the night sky and its countless objects.
⚡ The quick answer: Astrophotography is photographing the night sky – from the Moon and planets to nebulae and galaxies. Today there are three ways to get started: with a smartphone (Moon, Milky Way), with a camera + tracking mount (the classic approach) – or, radically simpler, with a smart telescope that captures deep-sky photos fully automatically.
📱 The easiest new way: smart telescopes
Since 2024, automatic compact telescopes have been revolutionising astrophotography: set it up, open the app, pick an object – alignment, focusing and image stacking all happen by themselves. Your first galaxy photos on the very first night, with no prior knowledge at all.
➡️ Smart telescopes at a glance · DWARF 3 reviewed · Best smart telescope 2026
The main goal of astrophotography is to capture an image of the night sky and the spectacular objects that the human eye can barely see or cannot see at all. These include planets, nebulae, galaxies, double stars and much more. But even images of the readily visible Moon reveal detail on an unexpected scale.
Compared with visual astronomy, astrophotography requires extensive and costly equipment, depending on how professional you want to get. Of course, there is also a budget-friendly way to get started with astrophotography.

Quite simply with a digital single-lens reflex camera, or in a more sophisticated way through a telescope.
Simply “shooting” the image is not the end of it, however. What usually follows is multi-stage electronic image processing (EIP) using various software programs.
At the end of the process there is an impressive image that has taken many hours of work, but which brings great joy to astrophotographers and viewers alike.
Looking to buy a telescope? Here is the quick check.
What can you expect from our article: astrophotography for beginners?
By the end of this introduction to astrophotography you will have an idea of what it takes to capture your first images of the night sky. This guide obviously cannot cover every situation and set of conditions, but it should make clear that there are many aspects involved in astrophotography.
The combination of sometimes complex technology and demanding image processing calls above all for patience and a genuine enjoyment of astrophotography.
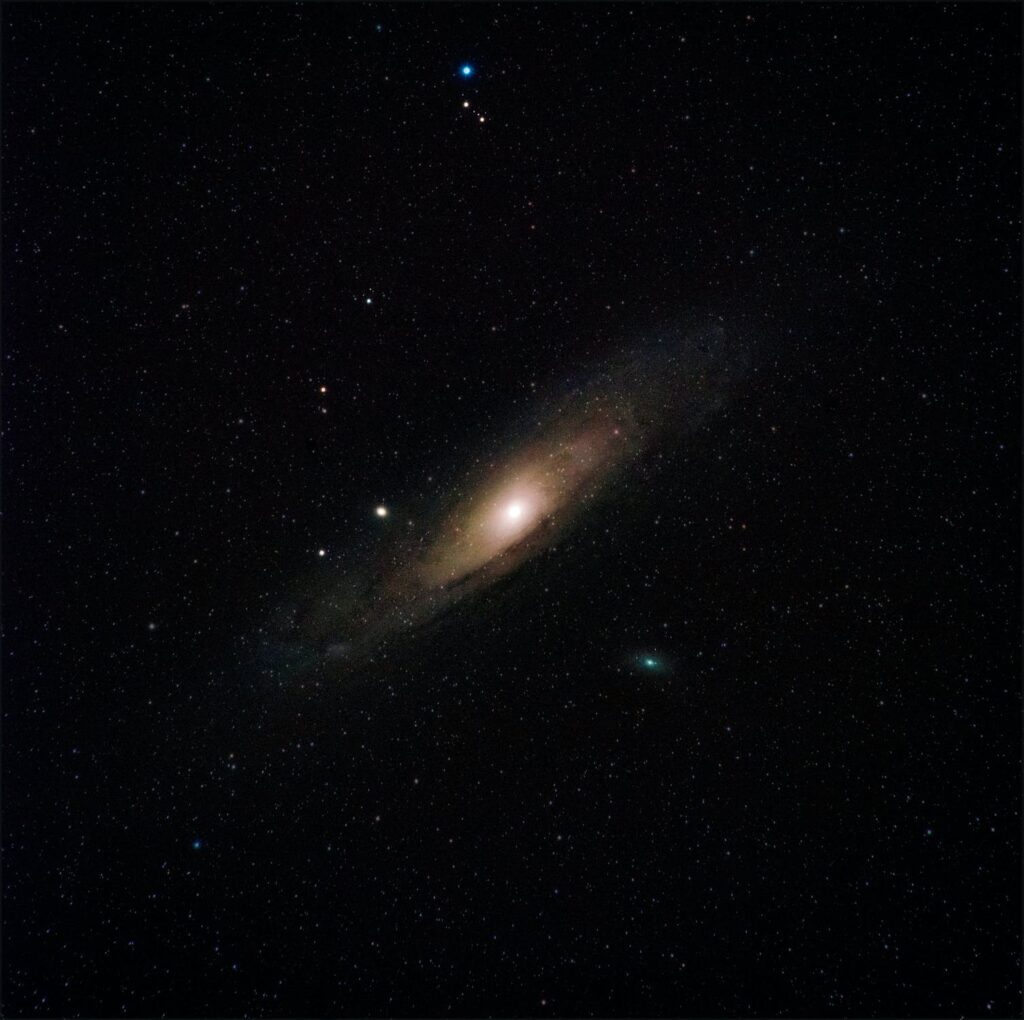
Equipment: NIKON D810, 400.0mm ƒ/11.0 ISO 1600
In this article I would like to provide a simple blueprint for capturing your first astrophoto with affordable means. About the simplest conceivable astrophotography setup consists of a digital single-lens reflex camera and a tripod. This article aims to give a quick-start guide for that setup.
Many of the aspects discussed, however, also apply to more advanced astrophotography.
For everyone else, the article can serve as an (incomplete) overview of the fundamentals of astrophotography.
 Our partner shop: a trusted US astronomy retailer – telescopes, binoculars & accessories.Visit High Point Scientific* →
 Our partner shop: Europe’s large astronomy retailer – telescopes, binoculars & accessories, shipping across Europe.Visit Astroshop* →
Types of astrophotos
Astrophotography can be divided into various subcategories, each of which requires its own equipment and presents its own particular challenges.
Wide-angle astrophotography
Wide-angle photography is the easiest type of astrophotography to begin with. It requires the least technical equipment and is the least prone to error.
With only minimal gear:
- a DSLR camera (digital single-lens reflex)
- a lens and
- a tripod
you can capture your first fantastic images with minimal effort.
Typical wide-angle subjects are constellations, the Milky Way and auroras. The latter in particular are a rewarding beginner subject around the current solar maximum – our guide Photographing auroras shows the specific settings for phone and camera.
To capture this type of image, you need a wide-angle or ultra-wide-angle lens for your DSLR camera. The kinds of images this makes possible include Milky Way photos, landscape astrophotography and time-lapse photos.
Milky Way photography: photographing the Milky Way
At very dark locations, the diffuse band of light of our own galaxy can just barely be made out with the naked eye. A simple DSLR camera can readily capture an image of this band of light with a few changes to the settings. More on this in Photographing the Milky Way: instructions, gear & tips [2023]
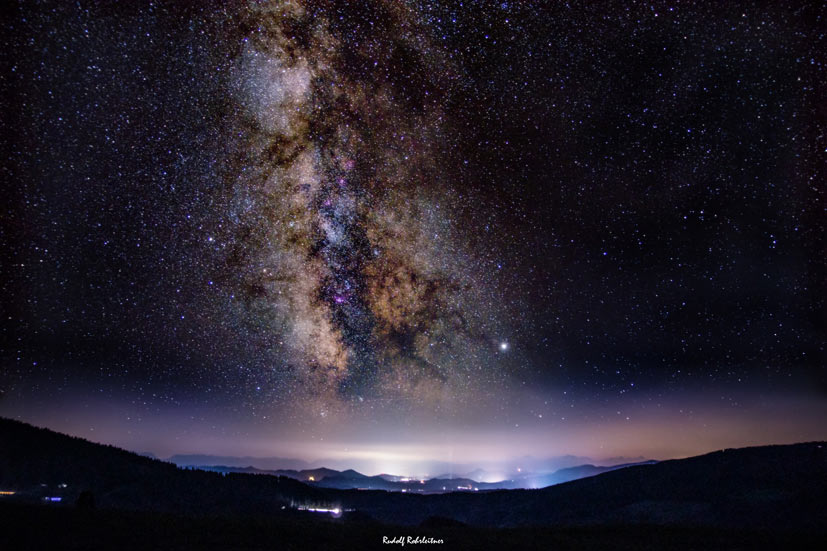
After a few adjustments to the camera, you can capture a pretty impressive image of the Milky Way.
Landscape astrophotography
A nightscape is a blend of the surroundings – e.g. mountains, trees or city skylines – and the stars or the Milky Way in the background.
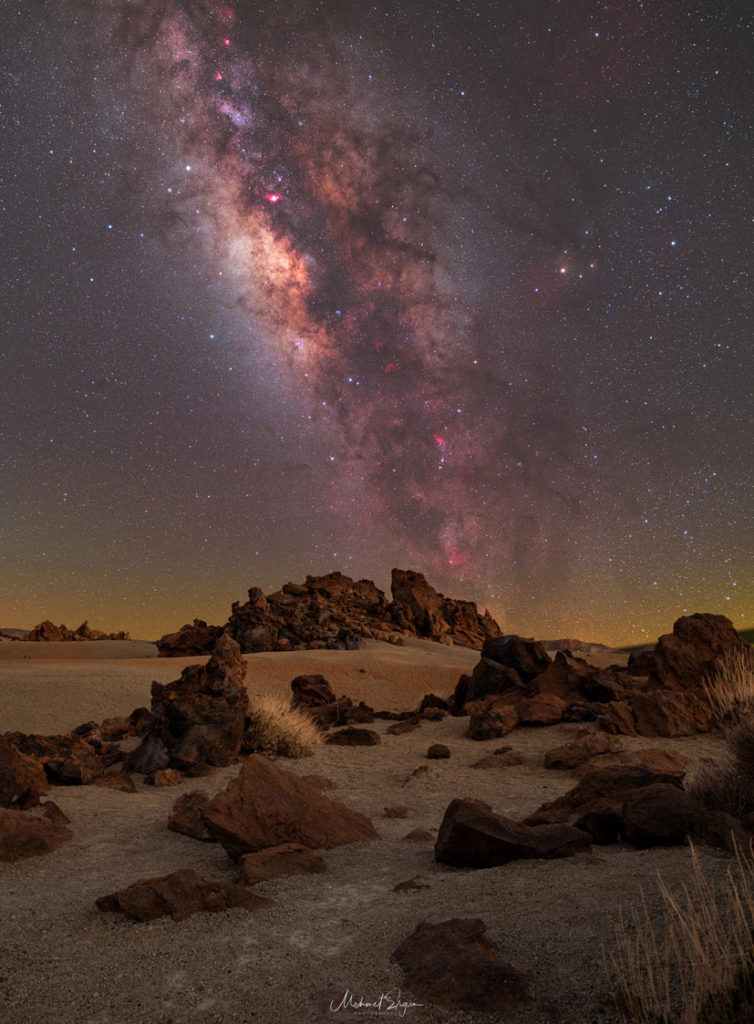
Camera: Nikon D850 astro camera (cooled), lens: Samyang 24mm f1.4*, mount: Fornax Lightrack II
Another subcategory of wide-angle astrophotography is the time-lapse. With a camera suitable for time-lapses, it is possible to capture many images (250–300 photos per sequence) and then combine them into a time-lapse video.
Star trails
To capture star trails, all you need is a very long exposure time. As the Earth rotates, the stars move across the firmament, and the light-sensitive chip traces their paths.
Photographing the Solar System
The next level of astrophotography, in terms of the technical equipment and the demands on image processing, is Solar System astrophotography. These images involve capturing objects such as our Moon (photographing the Moon), the Sun and all the orbiting planets (planetary photography) in our Solar System. Asteroids and comets can also be counted here.
Depending on what you want to photograph, we now reach the point where we have to attach the camera to a telescope in order to obtain those breathtaking planetary shots.
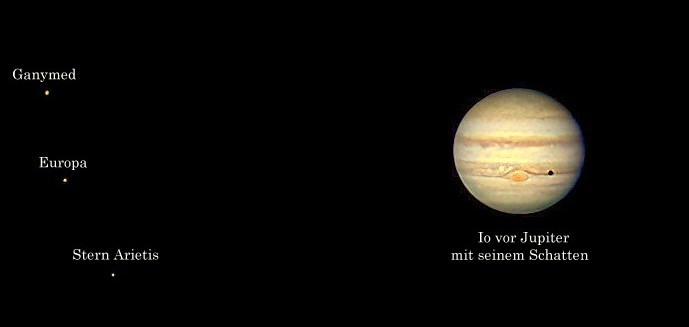
Equipment: Celestron NexStar 6SE* with ZWO ASI120MC-S*
Images of planets like the one shown below (Mars) are created using a technique called “lucky imaging“. Many thousands of exposures of the planet are taken, the best of them are stacked on top of one another and then further optimised in image processing.
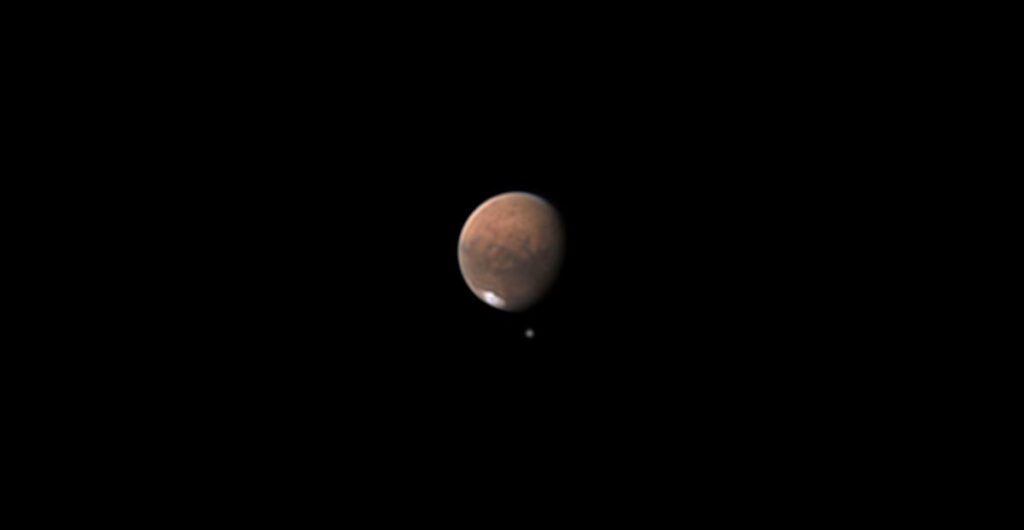
(photographer: James Bates. Equipment: Celestron NexStar 8SE*Celestron NexStar 8 SE GoTo Telescope* ($1,699.00€ 2,149), ZWO ADC, ZWO ASI678MC*ZWO ASI224MC*)
On top of this, an interested astronomer coming from field observation will face the question of whether a dedicated planetary camera might not be the right choice for the project – particularly if no DSLR is available.
Photographing deep-sky objects
Imaging deep-sky objects (DSOs) is arguably the supreme discipline of astrophotography.
Here you capture images of DSOs such as differently coloured nebulae, star clusters and other galaxies with their stars. These images are surely among the most spectacular shots a non-professional astrophotographer can achieve.

Telescope: Sky-Watcher Quattro 6″ f/4*Sky-Watcher Quattro 6″ f/4* ($665.00€ 489), camera: an astro-modified DSLR*an astro-modified DSLR* (personal astro-modification)
The only drawback of deep-sky photography is the high demands it places on technique, equipment and time. To capture deep-sky objects such as galaxies and nebulae, you need a complex setup that allows the long-exposure imaging of these faint objects:
- a good DSLR (astro-modified if possible) or dedicated astro cameras (CCD or CMOS)
- a fast telescope (telescope for advanced users)
- a precise motorised equatorial mount
- a laptop to control the telescope (guiding)
- plenty of time and a willingness to learn
So here you need a fairly technical and expensive setup. You should also allow for a good deal of time and frustration on the learning curve. The reward, though, will be great images from the depths of the universe.
The basic workflow in astrophotography
- Choose an object and set the camera focus
- Check the tracking (guiding)
- Capture several (long-exposure) images
- Transfer these images to your computer
- Overlay and combine these images to eliminate image noise
- Process the image with editing software and correct the image’s brightness levels
Environmental factors in astrophotography
Before your first attempt, you should watch out for a few things in advance that will invariably lead to a disappointing image. These include fog, clouds or rain. But the light of a nearby city or of the full Moon is also among them.
On the internet you can find a number of tools and apps for astrophotographers that answer these questions for you.
Light pollution
Light pollution refers to the brightening of the night sky by artificial light sources. Their light is scattered in the atmosphere and thus creates a diffuse background glow.
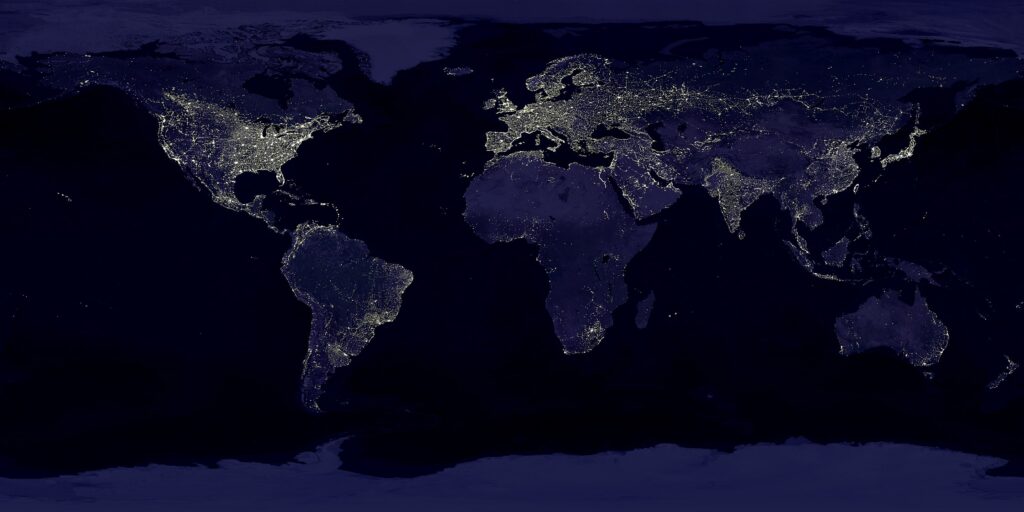
A good spot for astrophotography is one with only minimal to no light pollution. Your driveway may appear to be dark, but that does not mean the atmosphere isn’t heavily light-polluted. We have to avoid this, because too much light pollution can significantly reduce image quality.
There are numerous tools you can use to check your surroundings for dark locations and light pollution. One of them is the Light pollution map.
Moon phase: it too affects our astrophoto
Anyone who does not specifically want to photograph the Moon should plan their photo session with the Moon phase in mind, because the Moon, as a very bright object, can also disrupt the quality of long-exposure deep-sky objects.
Even in wide-field shots, a full Moon, for example, causes all but the brightest stars to disappear from the image.
There are a few handy apps you can use to determine the darkest times of the month. One of them is Spaceweatherlive.
Weather: crucial for astrophotos
Checking the weather in advance is another simple but often overlooked task. Especially if you are planning to drive to a more distant location where you hope for better conditions for astrophotography.
Check your local weather forecast and look out for a clear, cloudless night. That way you’ll spare yourself some avoidable frustration.
The best observing dates, explained in plain language, plus honest buying advice without the marketing noise. Free, unsubscribe any time.
You will get a confirmation email in a moment. Your address stays with us – no sharing, no third-party ads.
Astrophotography gear: what do you need?
The standard gear for doing astrophotography includes a …
- camera for astrophotography
- lens for the camera
- for advanced users: a telescope for astrophotography
- T-ring adapter (connecting camera to telescope)
- astrophotography accessories
- knowledge of camera settings
- knowledge of electronic image processing
Our astrophotography gear reviews:
- Sky-Watcher EvoStar 80ED – the classic ED refractor to start with
- William Optics RedCat 51 – very compact, ideal for wide field
- Askar SQA55 – fast optics, full-frame coverage
- Askar N160 – 6-inch f/3.4 Newtonian for APS-C
- William Optics ZenithStar 73 – a little more focal length than the 50s, but currently unavailable new (the review still helps if you buy used)
- Celestron RASA 8 – f/2 astrograph for short exposures
- Apertura 75Q – the US house-brand quadruplet
- ZWO ASIAIR – the mini computer that runs the whole setup
Astrophotography camera
A camera is perhaps the most important piece of the puzzle, since it determines which types of images you can capture and what additional equipment you need.
That’s why it’s important to invest some time in deciding what to use, as this sets the benchmark for the type and quality of the images you can capture.
In astrophotography there are several different types of images, as we learned above. The various camera types are each better suited to a particular task than others.
Digital single-lens reflex camera
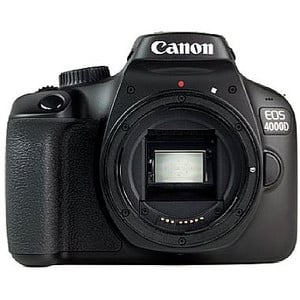
A digital single-lens reflex camera (DSLR, Digital Single Lens Reflex) is always the first camera that can be recommended.
It is versatile and makes a great entry-level camera for astrophotography for beginners.
(image source: manufacturer)
The great advantage of the DSLR is its self-sufficiency. It has its own power supply, a processor, sufficient storage, and a display for checking and simple editing. Everything in one device. Especially at the start, that is an enormous relief.
With a Canon 1000D you certainly can’t go far wrong to begin with. It can also be picked up very cheaply on the second-hand market.
Anyone who wants to start out a little more ambitiously can look for a Canon EOS 4000Da. The little “a” stands for astro-modified.
In the premium segment, the Canon 6Da does an outstanding job.
Mirrorless systems
As an alternative to the DSLR above, a mirrorless camera has the advantage of being vibration-free thanks to the camera’s “mirrorless” design. It does an excellent job of landscape astrophotography over great distances.
Dedicated astro cameras: CMOS camera or CCD camera?
Now we move on to the more specialised cameras for astrophotography (dedicated astro cameras). Some of these camera systems were developed exclusively for astrophotography.
You can tell just from their external appearance that these are not conventional cameras. They have no display or viewfinder and also no power supply of their own.
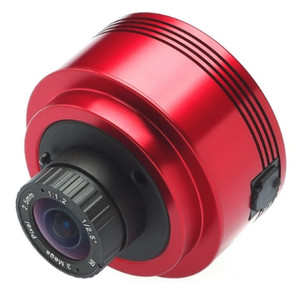
ZWO ASI678MC colour camera*ZWO ASI224MC Color camera*
(image source: ZWO)
The essential difference between the dedicated astro cameras stems from the chip technology used.
What both chip types have in common is that they come in a colour (color) or mono version. Colour versions are less sensitive because a chequerboard-like colour filter (Bayer layer) consisting of green (50%) plus red and blue (25% each) is laid over the pixel array.
As a result, the pixels beneath register only light of the corresponding wavelength (colour). In return, the camera delivers a colour image directly.
A mono camera does not have this built-in filter. Anyone who still wants to capture colour images with a mono camera has to shoot the image several times through different colour filters placed in front of it (a filter wheel) and combine them in the EIP. That’s how the best astrophotos are created.
Both chip types are also offered as a cooled version, which reduces noise during long exposures (for example of deep-sky objects).
At this point we’ll give only a simple overview of the two systems.
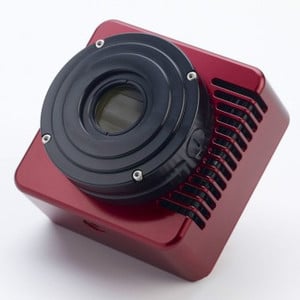
QHY183M Mono cooled camera*QHY183M Mono cooled camera* ($1,067.00€ 1,200)
(image source: manufacturer)
CMOS camera
CMOS stands for complementary metal-oxide-semiconductor. In the CMOS system, the light(photo)-induced charge is converted directly within the pixel into a charge. This creates a time advantage when reading out.
A CMOS camera is particularly suited to Solar System astrophotography, where high frame rates are required depending on the object. CMOS astro cameras are also distinguished by a lower price.
CCD camera
CCD stands for charge-coupled device. CCD cameras were the first dedicated astro cameras. With this technology, the conversion of the photo-induced charge takes place outside the chip.
As a result, CCD chips have a very high fill factor, which describes the ratio of light-sensitive area to pixel area. This is how these highly sensitive CCD chips produce very low-noise and precise images, even when captured at long exposure times. The very expensive CCD cameras are the gold standard in deep-sky astrophotography.
Pixel size and sampling
When choosing a camera, among many other aspects you should also pay attention to the pixel size [µm]. The trend towards ever smaller pixels is problematic for astrophotography. Pixel size and the section of sky it samples (sampling) are interrelated.
This is explained in more detail in the article Pixel size and sampling.
Which camera for astrophotography?
Below you’ll find a decision tree that takes into account the aspects discussed above and is intended to serve as a decision aid.
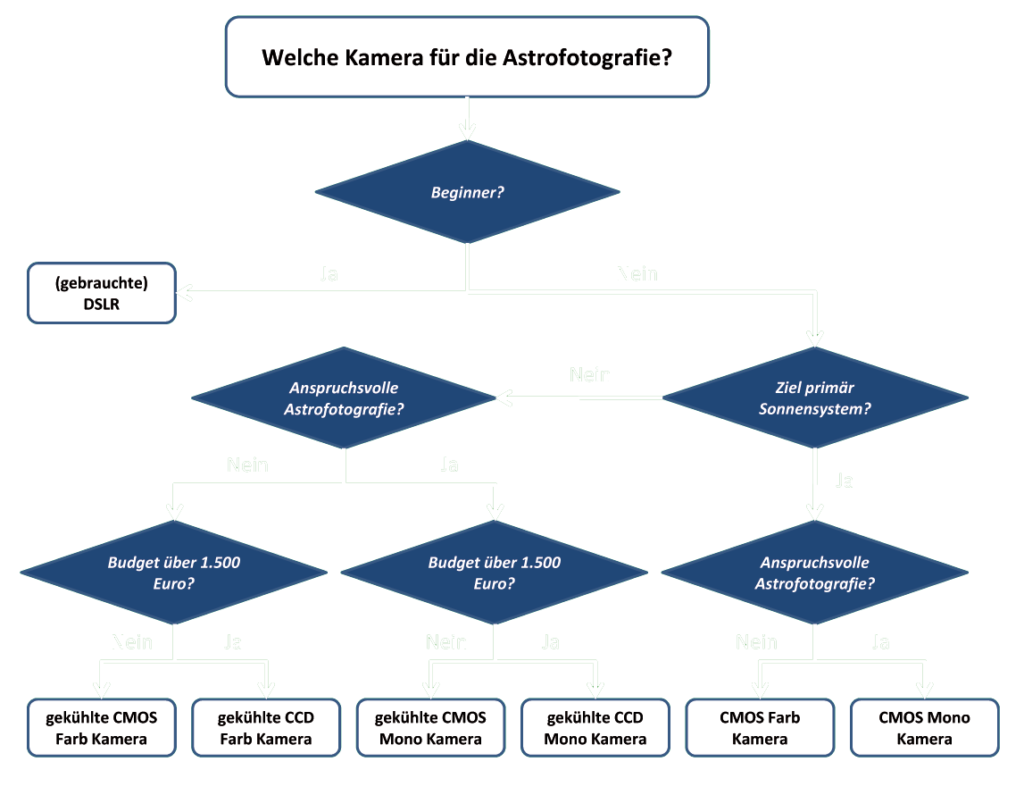
You’ll find more information here: Astrophotography camera: what you need to know before buying [guide]
Sensor size for astrophotography
What is the difference between a crop and a full-frame camera?
If you place a full-frame and a crop-sensor camera side by side and both capture an image of the same object, the crop sensor (for example the APS-C size) captures a smaller photographic area than the full-frame camera.
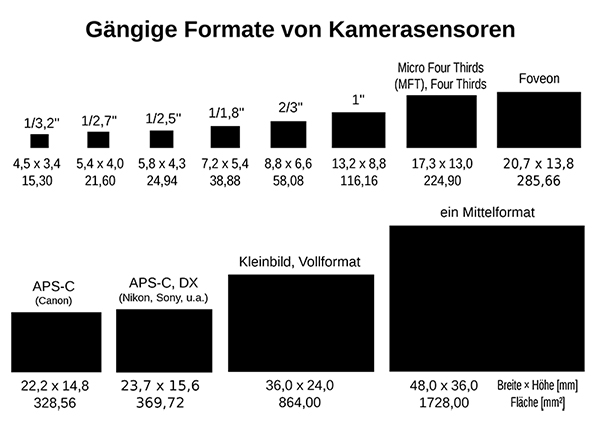
That does not mean, however, that only a full-frame chip comes into question, because depending on the target object and the lens or telescope, we don’t need this format at all.
For planetary photography, considerably smaller chip formats are also suitable, of the kind often found in dedicated astro cameras. Another reason is the price that has to be paid for a high-quality full-frame chip.
In principle, the APS-C chip size is absolutely sufficient for achieving outstanding astrophotography shots, especially for the beginner. Dedicated astro cameras sometimes have even smaller chips, but depending on the application these can deliver equally outstanding results.
Camera lens
We’ll look in detail at two characteristics of the camera lens: focal length and aperture (f-stop).
If you already want to know what makes a good lens for getting started in astrophotography (especially wide-angle astrophotography and Milky Way photography): the Samyang 14 mm 1:2.8 is a good choice.
A whole range of third-party manufacturers produce very good lenses that are considerably cheaper than those of the big brands. It’s worth taking a look.
Aperture
Ideal is a lens with a large aperture (f-stop). The larger the aperture, the more light the lens lets in. An aperture of 1:2.8, 1:1.8 or 1:1.4 would be a good choice.
An aperture value such as “1:2.8” is obtained by dividing the focal length by the chosen aperture (opening) of the lens. More information follows further below.
Focal length
Another figure to consider is the focal length of the lens.
The longer the focal length, the more the image is magnified.
For this reason, a wide-angle lens with a medium or short focal length can be recommended for getting started in astrophotography. A recommended focal length is less than 35 mm.
More information follows further below.
Anyone who progresses further in astrophotography will sooner or later choose a telescope as their lens. This makes it possible to take detailed images of deep-sky objects and planets.
Telescope for astrophotography
Anyone who wants to take images of planets or deep-sky objects will sooner or later need a telescope. This applies in particular to astrophotographers who come from photography and have so far had no contact with astronomy.
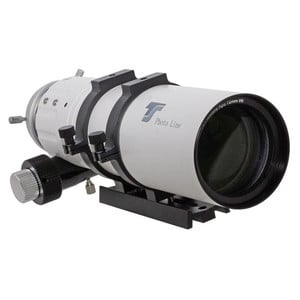
Apertura 72mm FPL-53 Doublet APO Refractor* TS-Optics PhotoLine 72 mm FPL53 APO Refractor* ($649.95€ 549)
(image source: manufacturer)
Fundamentally, astrophotography through a telescope also requires some experience and knowledge of astronomy, so this area is something for the advanced photographer or the experienced astronomer.
At this point we refer you to the telescope guide, which deals with the basic properties of the various telescope types.
For beginners, a wide-field refractor with a fast focal ratio and good colour correction is recommended:
- They are small, compact and therefore easy to move
- Their field of view is very forgiving (greater tolerance for tracking errors)
- No need for regular alignment or collimation
Anyone who already has experience in astronomy can consider buying a Newtonian telescope.
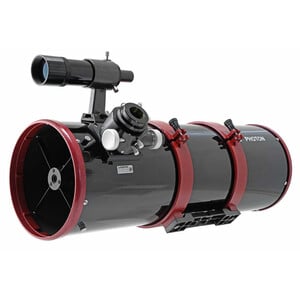
Sky-Watcher Quattro 8″ f/4 Imaging Newtonian*Sky-Watcher Quattro 8″ f/4 Imaging Newtonian* ($925.00€ 525)
(image source: manufacturer)
They offer plenty of aperture and light-gathering power at a good price-performance ratio, and are also available in modifications for astrophotography.
They also have a fast focal ratio and therefore forgive minor tracking errors.
From time to time, Newtonian telescopes have to be collimated. They are larger than entry-level refractors and require a larger and more expensive mount for the astrophotos to succeed.
Back focus and image train
The back focus is the distance between the optics’ (telescope’s) focal point and the fully retracted focuser. We want to have the camera at the focal point. The path to it can be fitted with filters, an off-axis guider or other equipment. This path is called the image train.
Refractors and catadioptric telescopes usually have a considerably larger back focus than Newtonian telescopes. Space problems rarely arise with these telescopes when using a lot of equipment.
Telescope photography: the telescope as a lens
In astrophotography through a telescope, the telescope is used as the camera’s lens. This type of astrophotography is more demanding technically and in terms of price, and is suited to someone who has already gained experience with wide-field shots and electronic image processing.
Telescope photography will shortly be presented in a dedicated guide.
T-ring adapter
If you want to use a telescope for astrophotography, you’ll need a T-ring adapter. Essentially, this connects your camera to your telescope. Using a T-ring is the simplest solution for making camera and telescope become one.
Astrophotography accessories
The following pieces of equipment are not strictly necessary for capturing your first astrophotos. The most important things remain the camera, lens and, if applicable, a telescope.
Camera filters for astrophotography
Camera filters improve your images during a nighttime photo shoot. There are several different types of filters, all of which perform different tasks.
A frequently used filter is a light-pollution filter. Especially anyone living in an urban region can make life considerably easier with one.
Other types of filter are:
- Optolong CLS filter*Optolong CLS filter*: reduces artificial light pollution
- LP filter (Optolong L-Pro)*LP filter (Optolong L-Pro)* ($219.00€ 189): very significantly increase contrast and allow longer exposure times with DSLR or astro cameras.
- Narrowband filter
- Solar filter
Mount with tracking
Anyone who wants to take long-exposure astrophotos and doesn’t want star trails needs a mount with tracking. Depending on the intended use, these can be kept very simple or be very complex and costly.
Particularly popular for getting started is the Star Adventurer by Skywatcher.
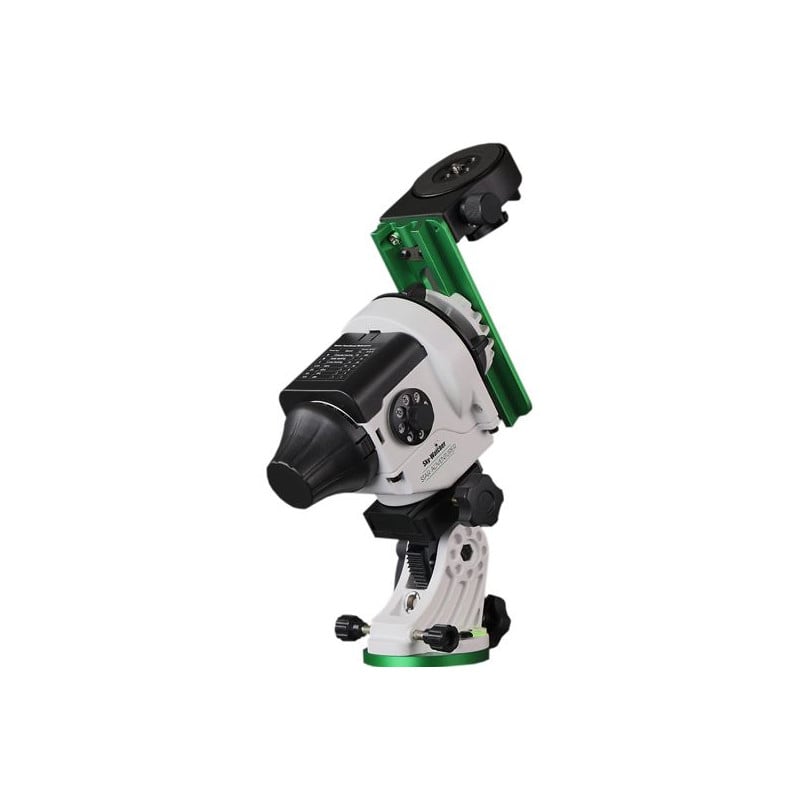
(image source: manufacturer)
Deep-sky images in particular sometimes require very long exposure times for a single image, so that the camera can capture all the detail of the far-distant object.
Because of the Earth’s constant rotation, on a conventional tripod or mount they will turn out blurred and distorted.
The greater the magnification factor of the system used, the more important the precision of the tracking becomes. Wide-angle shots of the Milky Way require less accurate and therefore simpler and cheaper mounts with tracking.
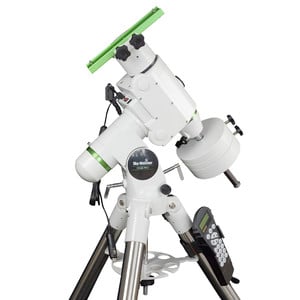
Sky-Watcher HEQ5-R Pro GoTo mount*Sky-Watcher HEQ5-R Pro GoTo mount* ($1,695.00€ 1,679)
(image source: manufacturer)
Anyone who wants to take astrophotos with a telescope needs, beyond a certain point, a robust and precise mount with tracking that offers enough capacity for additional astro equipment.
As a rule of thumb, the mount should only be loaded to 70% of its payload with astrophotography gear.
Skywatcher’s mounts are hugely popular in the community.
Every mount with tracking has to be aligned. Usually to the celestial pole, so that the tracking compensates for the Earth’s rotation. Depending on the mount, this can be done by optical alignment or at the push of a button (GPS, plate-solving).
The mount’s tracking has its limits…
On its own, the tracking accuracy of even the best mount is normally not enough for high-end, very long-exposure photos. For this, an additional camera has to be connected via a guide scope or off-axis guider, keeping a guide star in its sights, intervening in the mount’s control and correcting its movement.
If you would rather not build the tracking yourself, it now comes built in: the DWARFLAB Draco ($1,399.00€ 1,499) combines mount, 90 mm optics, a cooled sensor and its own guide scope for exposures of up to 300 seconds in a single housing. It is not expandable – if you want to combine your own cameras and optics, you stay with a separate mount and guiding; on top of that the Draco only ships from November and nobody has tested it yet.
Remote shutter release
Even the slightest movement can ruin an image and cause blur. A remote control prevents you from accidentally shaking the camera when taking a photo.
Torch or headlamp
Once the Sun goes down and you’re ready to begin your astrophotography, you’ll need a light so you can see what you’re doing.
For astrophotography, a red-light torch or headlamp is recommended. This way your eyes’ dark adaptation is not lost as quickly as it would be, for example, with blue light.
Spare batteries
Enough batteries or a power pack for the power supply are helpful. Anyone working with dedicated astro cameras and also bringing a laptop into the field will not be able to do astrophotography without a strong power pack.
Laptop for imaging
CCD or CMOS cameras need a computer to control and focus them in use and to receive the captured images. A laptop is also needed for controlling high-end mounts for astrophotography with telescopes.
Heater straps
When the temperature begins to drop, moisture and condensation can form on the surfaces of the lens. Dew leads to blurred images.
The solution is to use a dew heater. It is a heated hook-and-loop strap that keeps the area around the lenses warm enough to prevent dew from forming. A power source in the form of a power pack is needed for this.
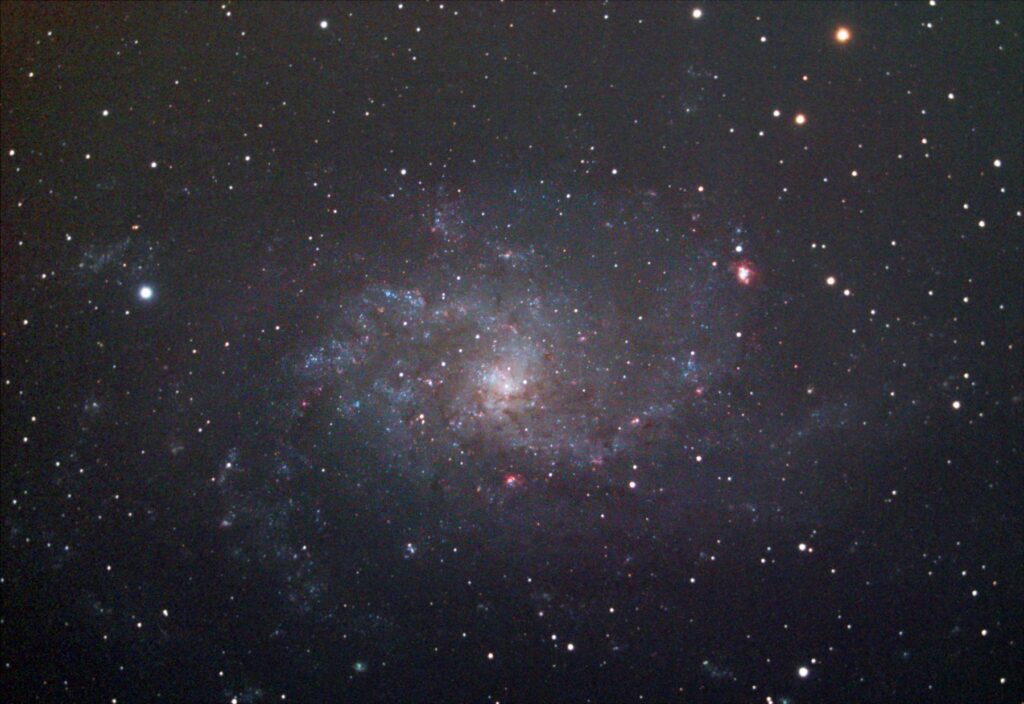
Handy: astrophotography calculator
Here you’ll find our astrophotography calculator
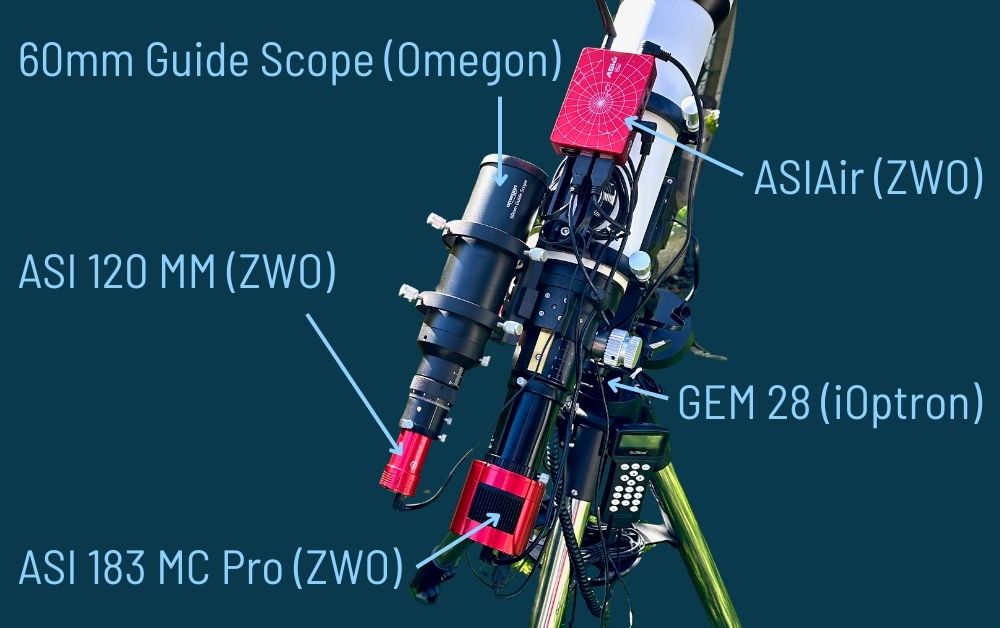
Example setup with components
Camera settings in astrophotography
This is the part where many beginners feel overwhelmed. The sheer number of setting options often puts you off getting started. How are you supposed to set focal length, ISO and aperture, and for which object?
There is no one-hundred-percent answer, because every astrophotographer has their own preferences. You can find inspiration in relevant forums, or you can check the camera settings of your favourite images, for example on Astrobin.
It does, however, take a little persistence to find your preferred settings.
Focusing at night
Focusing at night can be a bit of a challenge at first.
Manual focus
The solution is to always use manual focus for astrophotography. You don’t want the camera automatically trying to refocus during a long exposure.
“Set your camera to manual mode!” – one of the few valid laws in astrophotography.
Infinity
Set the lens focus to infinity. Infinity focus is usually a good starting point for capturing the stars with a wide-angle lens.
Still out of focus?
If the stars still look somewhat out of focus, make a slight adjustment to just short of infinity. You have to play around with the focus a little here to find the “sweet spot” for your camera lens.
You should also always check whether the lens might in fact be fogged up. If so, that problem should be solved first.
Use the display (Live View)
The advantage of the DSLR is that you can check the focus immediately on the display. Whether in Live View or via a test shot.
Focus on the brightest star
Point your camera at the brightest star in the sky and check whether it appears on the display.
Now you have to play around with the focus until the star is as small and sharp as possible. You can then take a test shot and check at your leisure whether you’re happy with the focus.
How do I set aperture, shutter speed and ISO?
The great challenge in astrophotography lies in capturing objects that are typically very faint.
To capture very faint objects, we have to adjust our camera settings so that as much light as possible can be captured.
There are three highly relevant camera settings that affect the capture of faint objects. In what follows, aperture, shutter speed and ISO are described in detail. All three interact with one another. One thing up front: there is no perfect setting!
Aperture
The first setting concerns the aperture (f-stop) mentioned above. The aperture indicates the size of the lens’s opening, i.e. the size of the light field that passes through the lens. It is variable.
The lower the f-number, the larger the aperture becomes, so that more light falls onto the sensor, and vice versa.
The aperture size can be set in various increments. Numbers such as 1:1.4, 1:1.8, 1:2.8, or 1:8 are normally shown on a lens. These represent the ratio of the focal length to the chosen aperture.
For getting started in astrophotography, you should begin with as large an aperture as possible.
Shutter speed
The shutter speed indicates how long the shutter is open to expose the sensor. If we set the shutter to stay open longer, the camera can capture more light in our image.
Shutter speeds range from speeds of 1/1000 second up to 20–30 seconds or more. You can also set the camera so that the shutter speed corresponds to how long the shutter button is pressed.
The longer we choose the shutter speed, the more relevance the Earth’s rotation has for our image. If we don’t have a mount with tracking, we can expose for around 30 seconds without noticeable artefacts.
If you want or need to expose for longer, a mount with tracking is a must.
30 seconds is only an approximate figure for avoiding star trails.
There is a reasonably accurate method for calculating how long you can leave the shutter open: the 500 rule.
What is the 500 rule in astrophotography?
The 500 rule is a mathematical formula for calculating the longest possible exposure (shutter speed) with which you can ensure that your objects in the night sky are still sharp, without image errors resulting from the Earth’s rotation.
Sensor is full-frame:
500 / focal length = shutter speed (in seconds) before you see star trails in your photos.
If you now use a camera with a smaller sensor (e.g. APS-C), the focal length of the lens has to be increased by a factor of 1.5.
Sensor smaller than full-frame:
500 / (focal length x 1.5) = shutter speed (in seconds) before you see star trails in your photos
What is the best ISO for astrophotography?
The ISO setting changes the sensitivity of the chip. While we cannot change the true sensitivity of the chip’s pixels, their signal can nonetheless be amplified. This, however, also leads to greater noise in the image.
ISO ranges vary from camera to camera, but can range from very low sensitivity (100) up to very high sensitivity (12,800) on high-end cameras.
The higher we set the ISO, the brighter the image becomes. However, noise and graininess in the image also increase.
A recommended starting ISO range is usually between 800 and 1600. If the image is still too dark, set the ISO value to 3200.
Shoot in RAW mode
With almost all types of photography it is recommended to shoot in RAW format. The RAW format contains all the information the sensor has delivered. RAW files are very large and contain no interpretations carried out in advance (e.g. white balance).
Astrophotography is no exception, since we try to capture the minimal amount of light in the night sky by pushing our camera settings to their limits.
When we have as much data as possible, a great deal more can also be readjusted later in the electronic image processing, if desired.
Recommended camera settings for the astrophotography quick start
Set the file type to RAW format
Camera into manual mode
Camera lens focus to infinity
Aperture to the lowest possible setting (large aperture)
Shutter speed to 25 seconds (in line with the 500 rule)
ISO to 1600
White balance to auto
Electronic image processing (EIP) for astrophotography
EIP is a science in its own right and cannot be covered in full by this article. It is meant to serve as a small quick-start guide.
In astrophotography, capturing the image is only one part of the path to the finished astro image. The second part is electronic image processing, which requires a lot of practice and patience. Here you have the opportunity to fill your knowledge gaps with tutorials.
The classic in image processing is Photoshop. The remarks that follow refer to this program.
There are, however, also numerous, in some cases free, programs available that likewise do an outstanding job.
Software for astrophotos: free and paid tools
Free software
Paid software
- PixInsight
- Adobe Lightroom
- Adobe Photoshop
Stacking the images
In astrophotography it is common to capture several exposures of the object. In planetary photography, even many thousands of individual frames. This way we can stack them on top of one another in order to reduce noise.
There are many ways to stack images. One free piece of software that does this job very well is Deep Sky Tracker.
Cleaning up and finishing the image
Once you are done with Deep Sky Tracker, the stacked image will be a large TIFF file.
Next you import the TIFF file into Photoshop (PS). Now the editing of the image begins. Here too there is an almost unmanageable number of options.
By using the TIFF format there is no data loss, since it is an uncompressed file format. In contrast, the JPEG format is compressed, which always means data loss.
The freshly imported image is normally very dark. First of all you begin with what is known as stretching in the RGB histogram.
From RAW file to finished astrophoto [step by step]
This workflow should help you process your astrophotos in RAW format using free programs. Depending on the subject and your personal preferences, you can make further adjustments and fine-tuning to achieve the best possible result.
Download the software:
- RAW development: darktable (https://www.darktable.org/)
- Stacking and astrophoto processing: DeepSkyStacker (http://deepskystacker.free.fr/english/index.html) and Siril (https://www.siril.org/)
- Image editing: GIMP (https://www.gimp.org/)
Step-by-step instructions:
- RAW development in darktable
- a. Import the astrophotos (RAW files) into darktable.
- b. Adjust the exposure, the white balance and possibly the contrast.
- c. Disable noise reduction and sharpening in order to preserve the natural noise of the astrophotos.
- d. Export the processed images as 16-bit TIFF files.
- Stacking the TIFF files in DeepSkyStacker or Siril
- a. Import the TIFF files into DeepSkyStacker or Siril.
- b. Add calibration frames (darks, flats, bias), if available, to improve image quality.
- c. Set the stacking parameters, e.g. number of best images, alignment and drizzle. d. Start the stacking and wait until the process is complete.
- e. Export the stacked image as a 16-bit TIFF file.
- Image editing in GIMP
- a. Import the stacked TIFF image into GIMP.
- b. Adjust the brightness and contrast to darken the background sky and bring out the detail of the deep-sky objects.
- c. Use the layer and mask functions to make selective adjustments to the brightness and colour ranges.
- d. Remove distracting artefacts or image noise with the appropriate tools and filters.
- e. Perform a final sharpening to bring out the detail of the deep-sky objects.
- f. Save the edited image in the desired format, e.g. as JPEG or PNG.
Conclusion to the astronomy guide
We hope this guide has given you an overview of astrophotography. If you still have any open questions or comments, feel free to write to us at info@sterngucker.de.
✅Quick start in astrophotography: camera settings
- Set the file type to RAW format
- Camera into manual mode
- Camera lens focus to infinity
- Aperture to the lowest possible setting (large aperture)
- Shutter speed to 25 seconds (in line with the 500 rule)
- ISO to 1600
- White balance to auto
Read more
Sources
- Kapege.de, Starwatching, CC BY-SA 3.0, retrieved 07/09/2020
- Follow Alex Andrews on Pexels
- Data: Marc Imhoff/NASA GSFC, Christopher Elvidge/NOAA NGDC; Image: Craig Mayhew and Robert Simmon/NASA GSFC, Earth’s City Lights by DMSP, 1994-1995 (large), marked as public domain, details on Wikimedia Commons, retrieved 07/09/2020
- Хрюша, Sensorformate, CC BY-SA 3.0, retrieved 07/09/2020
- Skywatcher EQ6-R Pro, Celestron C8, f/6.3 focal reducer, IDAS LPS-P2 filter, ZWO ASI 294MC Pro cooled planetary camera, ZWO off-axis guider, ZWO ASI 224MC as guide cam.
122x120s lights, darks, flats, bias, captured in ccdciel. Guiding in PHD2, stacking & processing in DeepSkyStacker & Gimp.